Custom Automation
Overview
Custom automation allows you to schedule events in ChargeOver automatically. For example, you can send an email to a customer when they update their payment method or send a new customer your link to the customer portal with an event. There are loads of possible options here.
Find custom automations
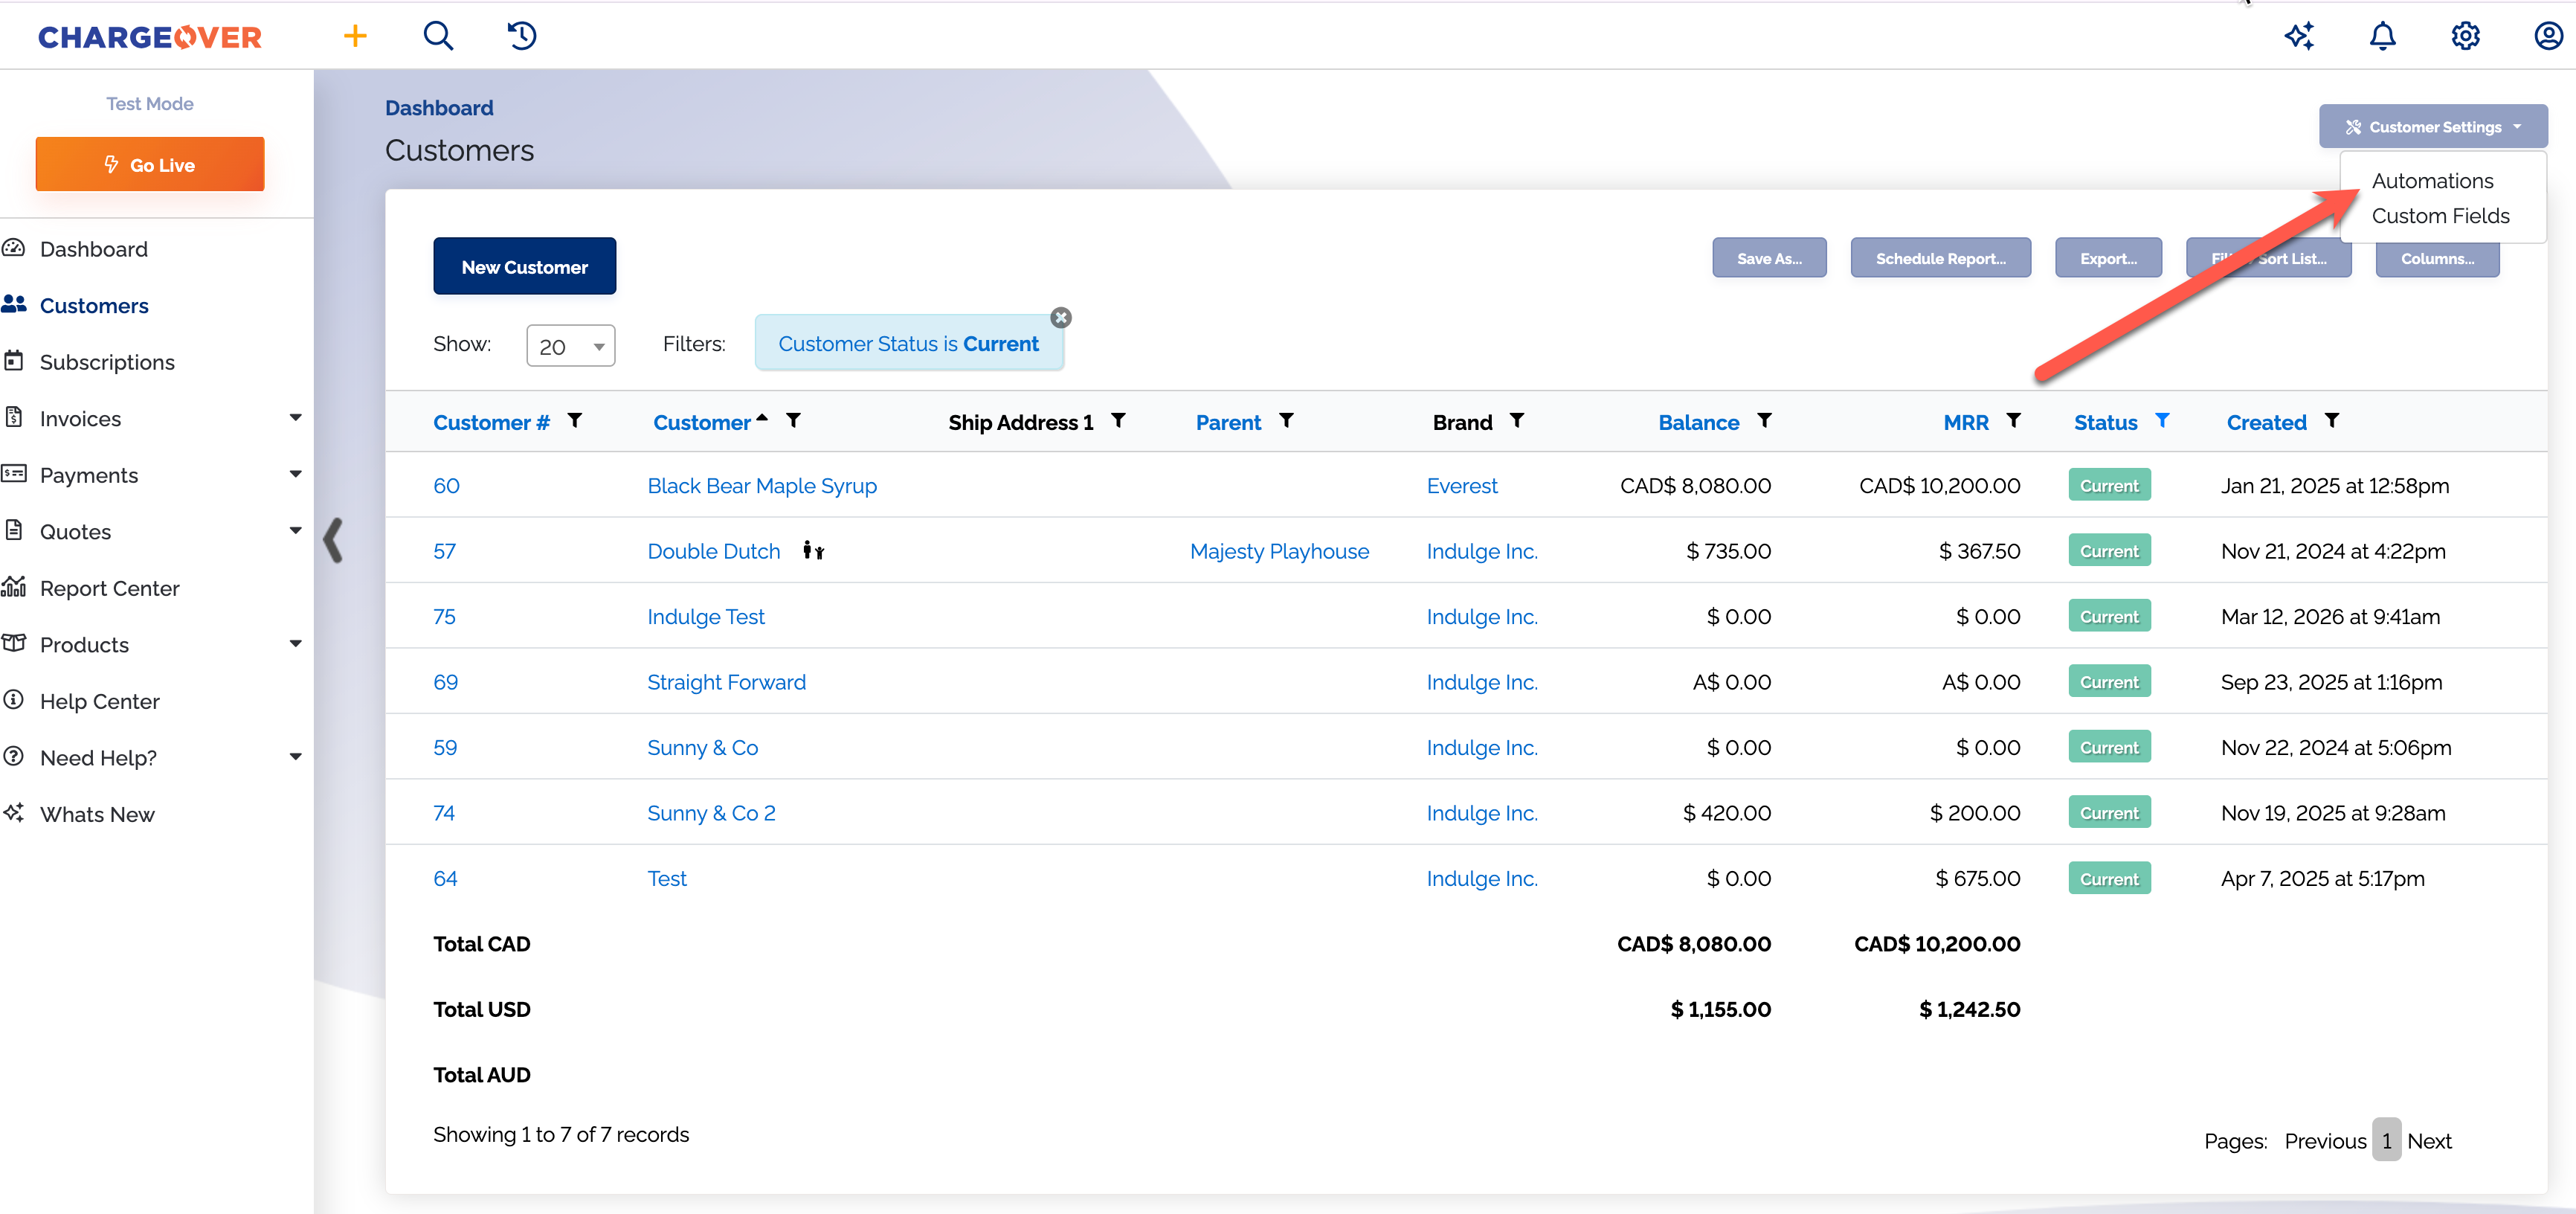
You can access custom automation on your main dashboard tabs, like the customers tab, invoices tab, subscriptions tab, contacts tab or payments tab. It will say something like 'Customer Settings.'
To get to the automations option, click the dropdown and select Automations from the list.
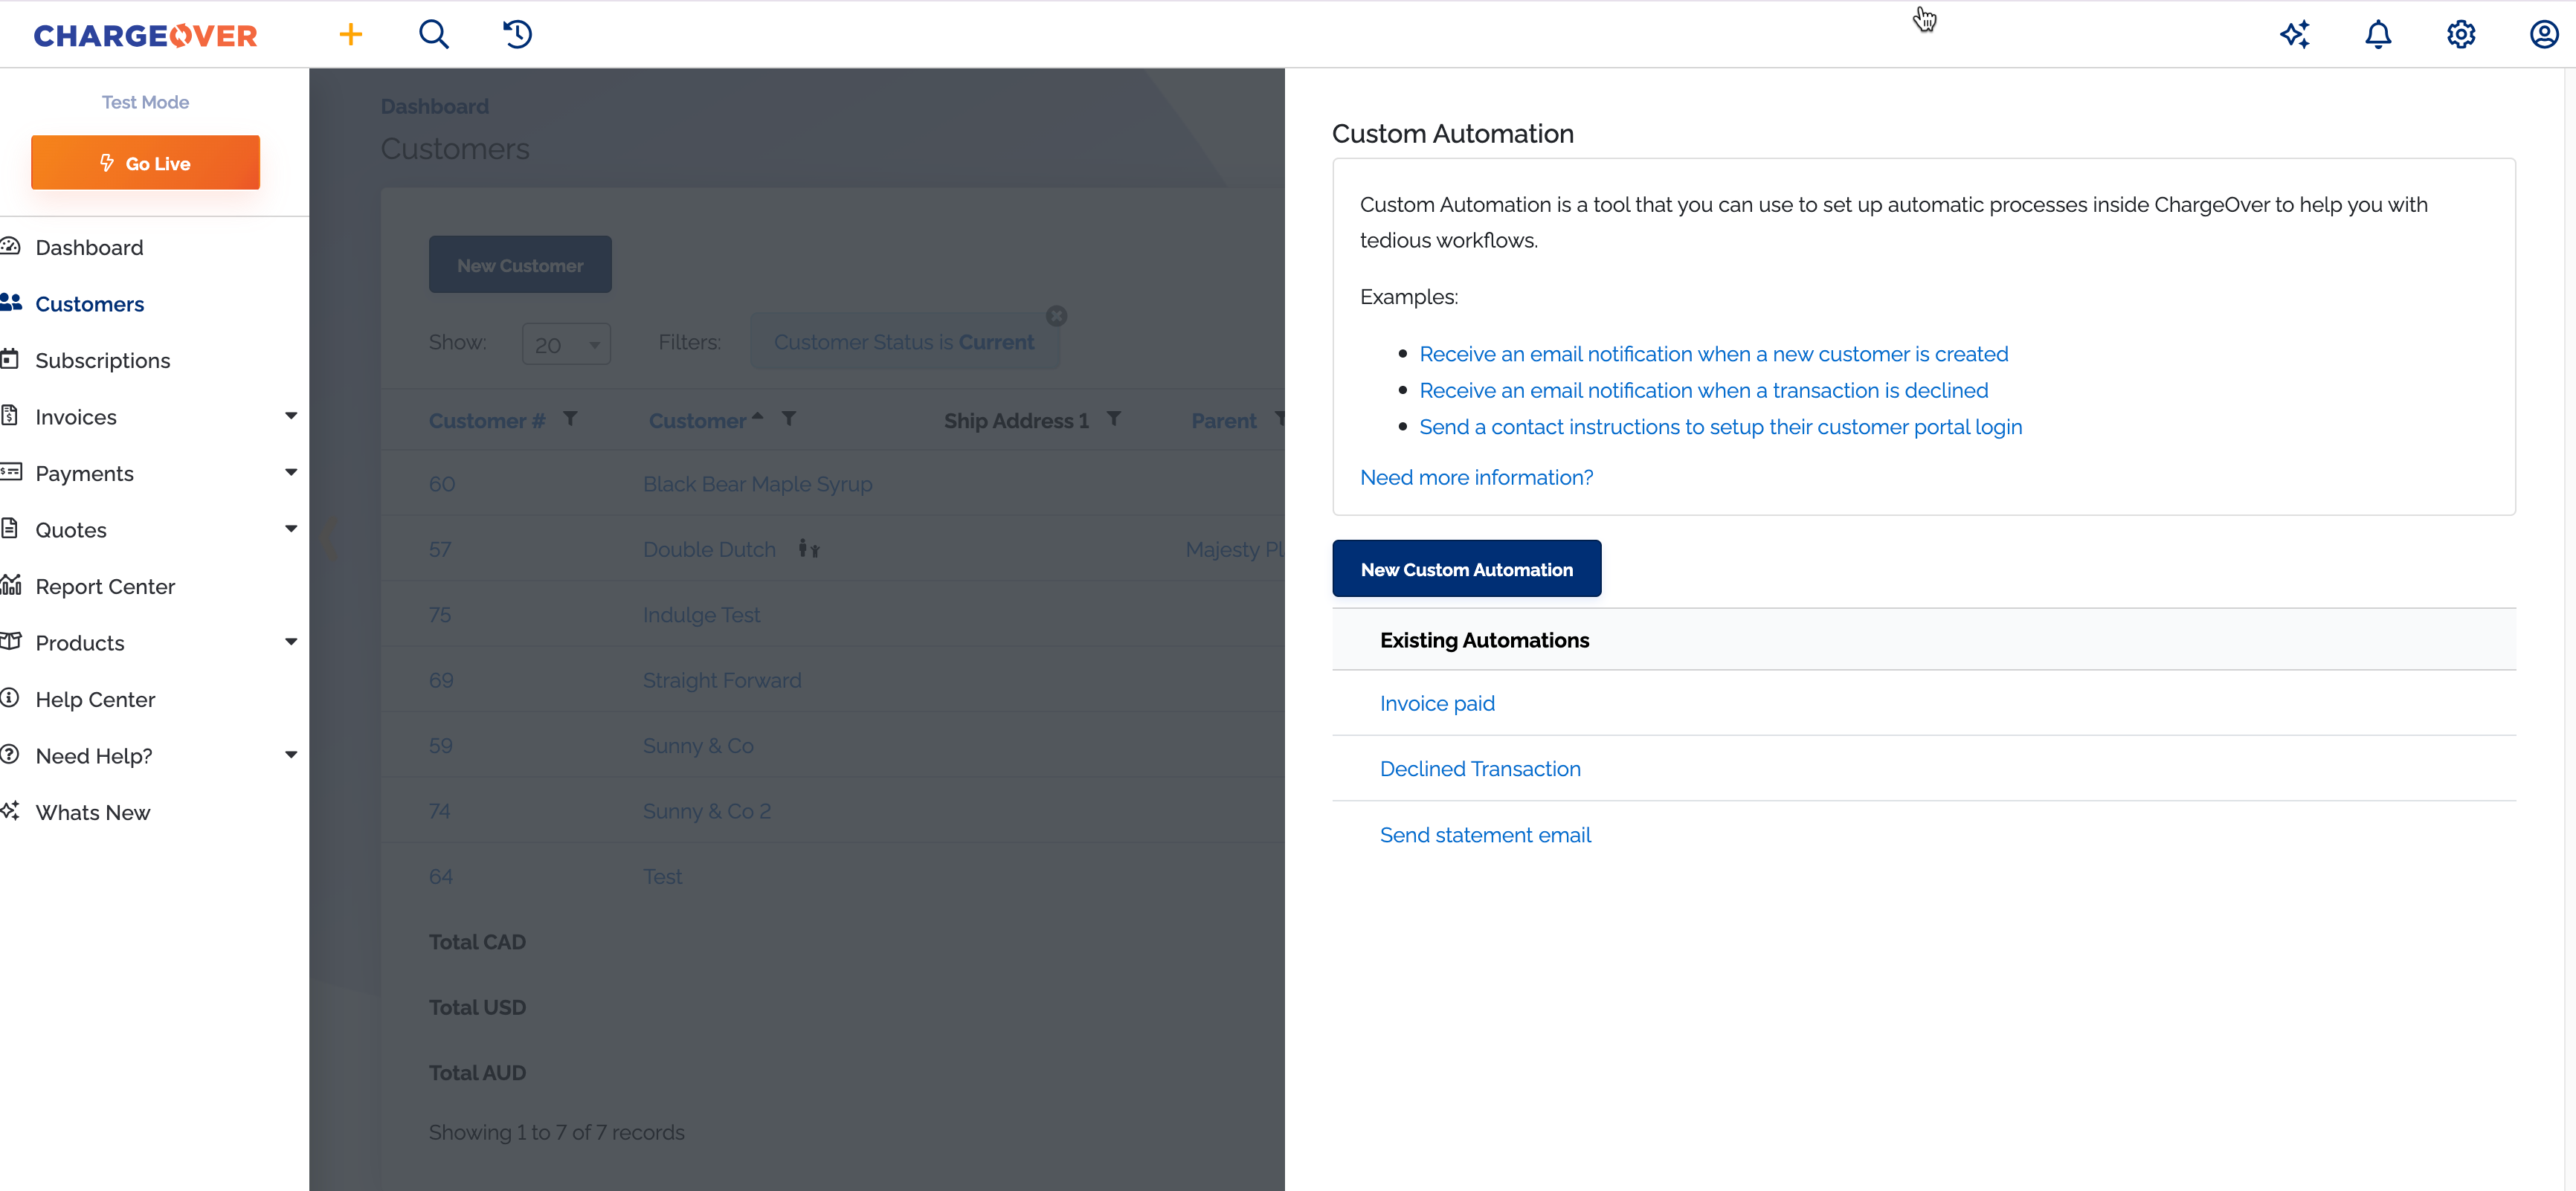
You'll see a page like this where you can find all of your custom automations, if you have created any previously. You can also create new custom automations here too.
Supported objects
We support the following objects and their associated events. Each event represents a specific change that can occur to the object, such as when a customer is created or updated.
Customer
- is created
- This event triggers every time a new customer is created
- is updated
- This event triggers every time an existing customer is updated
Contact
- is created
- This event triggers every time a new contact is added to a customer
- is updated
- This event triggers every time an existing contact is updated
Invoice
- Is created
- This event triggers every time a new invoice (one-time or recurring) is created
- Is updated
- This event triggers every time an existing invoice is updated
- Status changes
- This event triggers every time an invoice's status changes
- We support the following invoice statuses:
- Unpaid
- Overdue
- Void
- Paid
- Collections
- Unapproved
- Ages
- This event triggers every time an invoice's next scheduled nightly event processes
Subscription
- Is created
- This event triggers every time a new subscription is created
- Is updated
- This event triggers every time an existing subscription is updated
- Is canceled
- This event triggers every time a subscription is canceled
- Status changes
- This event triggers every time a subscription's status changes
- We support the following subscription statuses:
- Current
- Overdue
- Suspended
- Cancelled
- Ages
- This event triggers every time a subscription's next scheduled nightly event processes
- A line item is added or updated
- This event triggers every time a subscription line item is added or updated
- Is suspended
- This event triggers every time a subscription is suspended
- Is unsuspended
- This event triggers every time a subscription is unsuspended
Transaction (Payment, Credit, Refund)
- is created
- status changes
- This event triggers every time a transaction's status changes
- We support the following transaction statuses:
- Success
- Failed (decline)
- Authorized
- Failed (unknown)
- Void
- Pending
- Pending Batch
- Pending Settlement
- Pending Refund
Credit Card
- is created
- This event triggers every time a new credit card is added to a customer
- is updated
- This event triggers every time an existing credit card is updated
- is approved for autopay
- This event triggers every time a credit card is approved for autopay
ACH/eCheck Details
- is created
- This event triggers every time a new ACH/eCheck account is added to a customer
- is updated
- This event triggers every time an existing ACH/eCheck account is updated
Examples of possible custom automations
There are a few different use cases that are fairly popular with our customers. They are listed below.
Keep in mind that if you want your emails to send you certain information that relates to your custom automation, you will need to enter in merge tags into the body of your email or the message box.
Receive an email notification when a new customer is created
- On the custom automation slideout canvas, select New Custom Automation
- Give your custom automation a name
- Select Customer is created
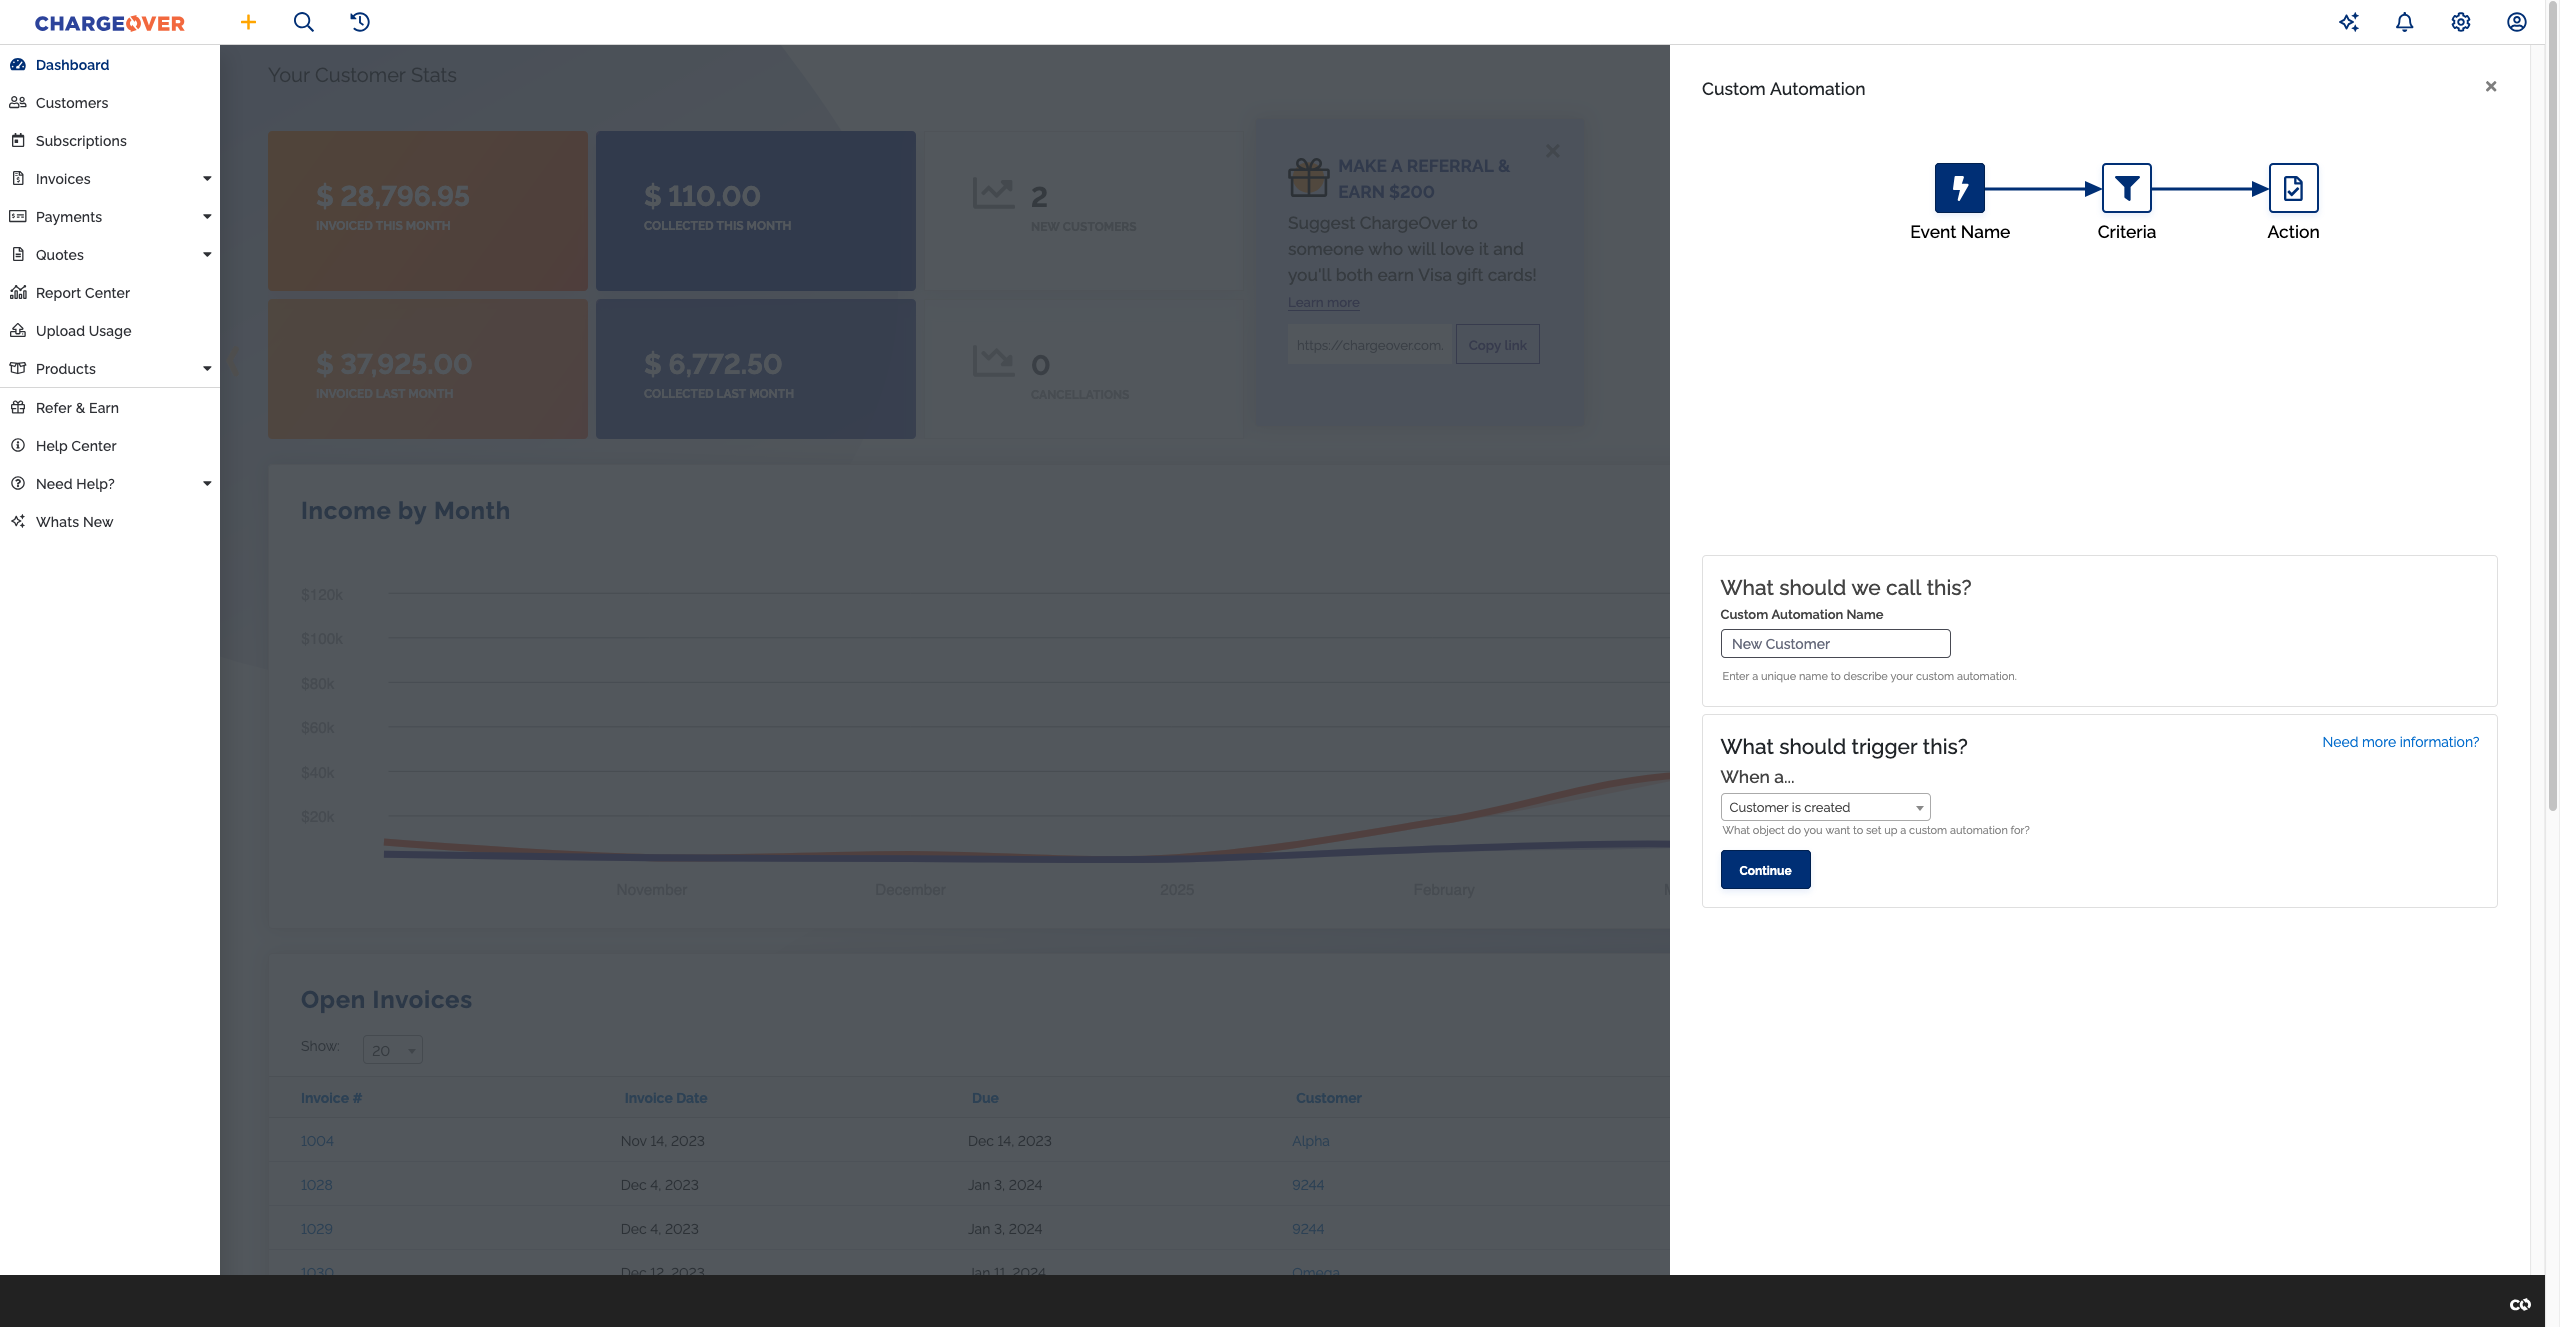
- Click
Continue - Under ... for all customers, click
Continue... 
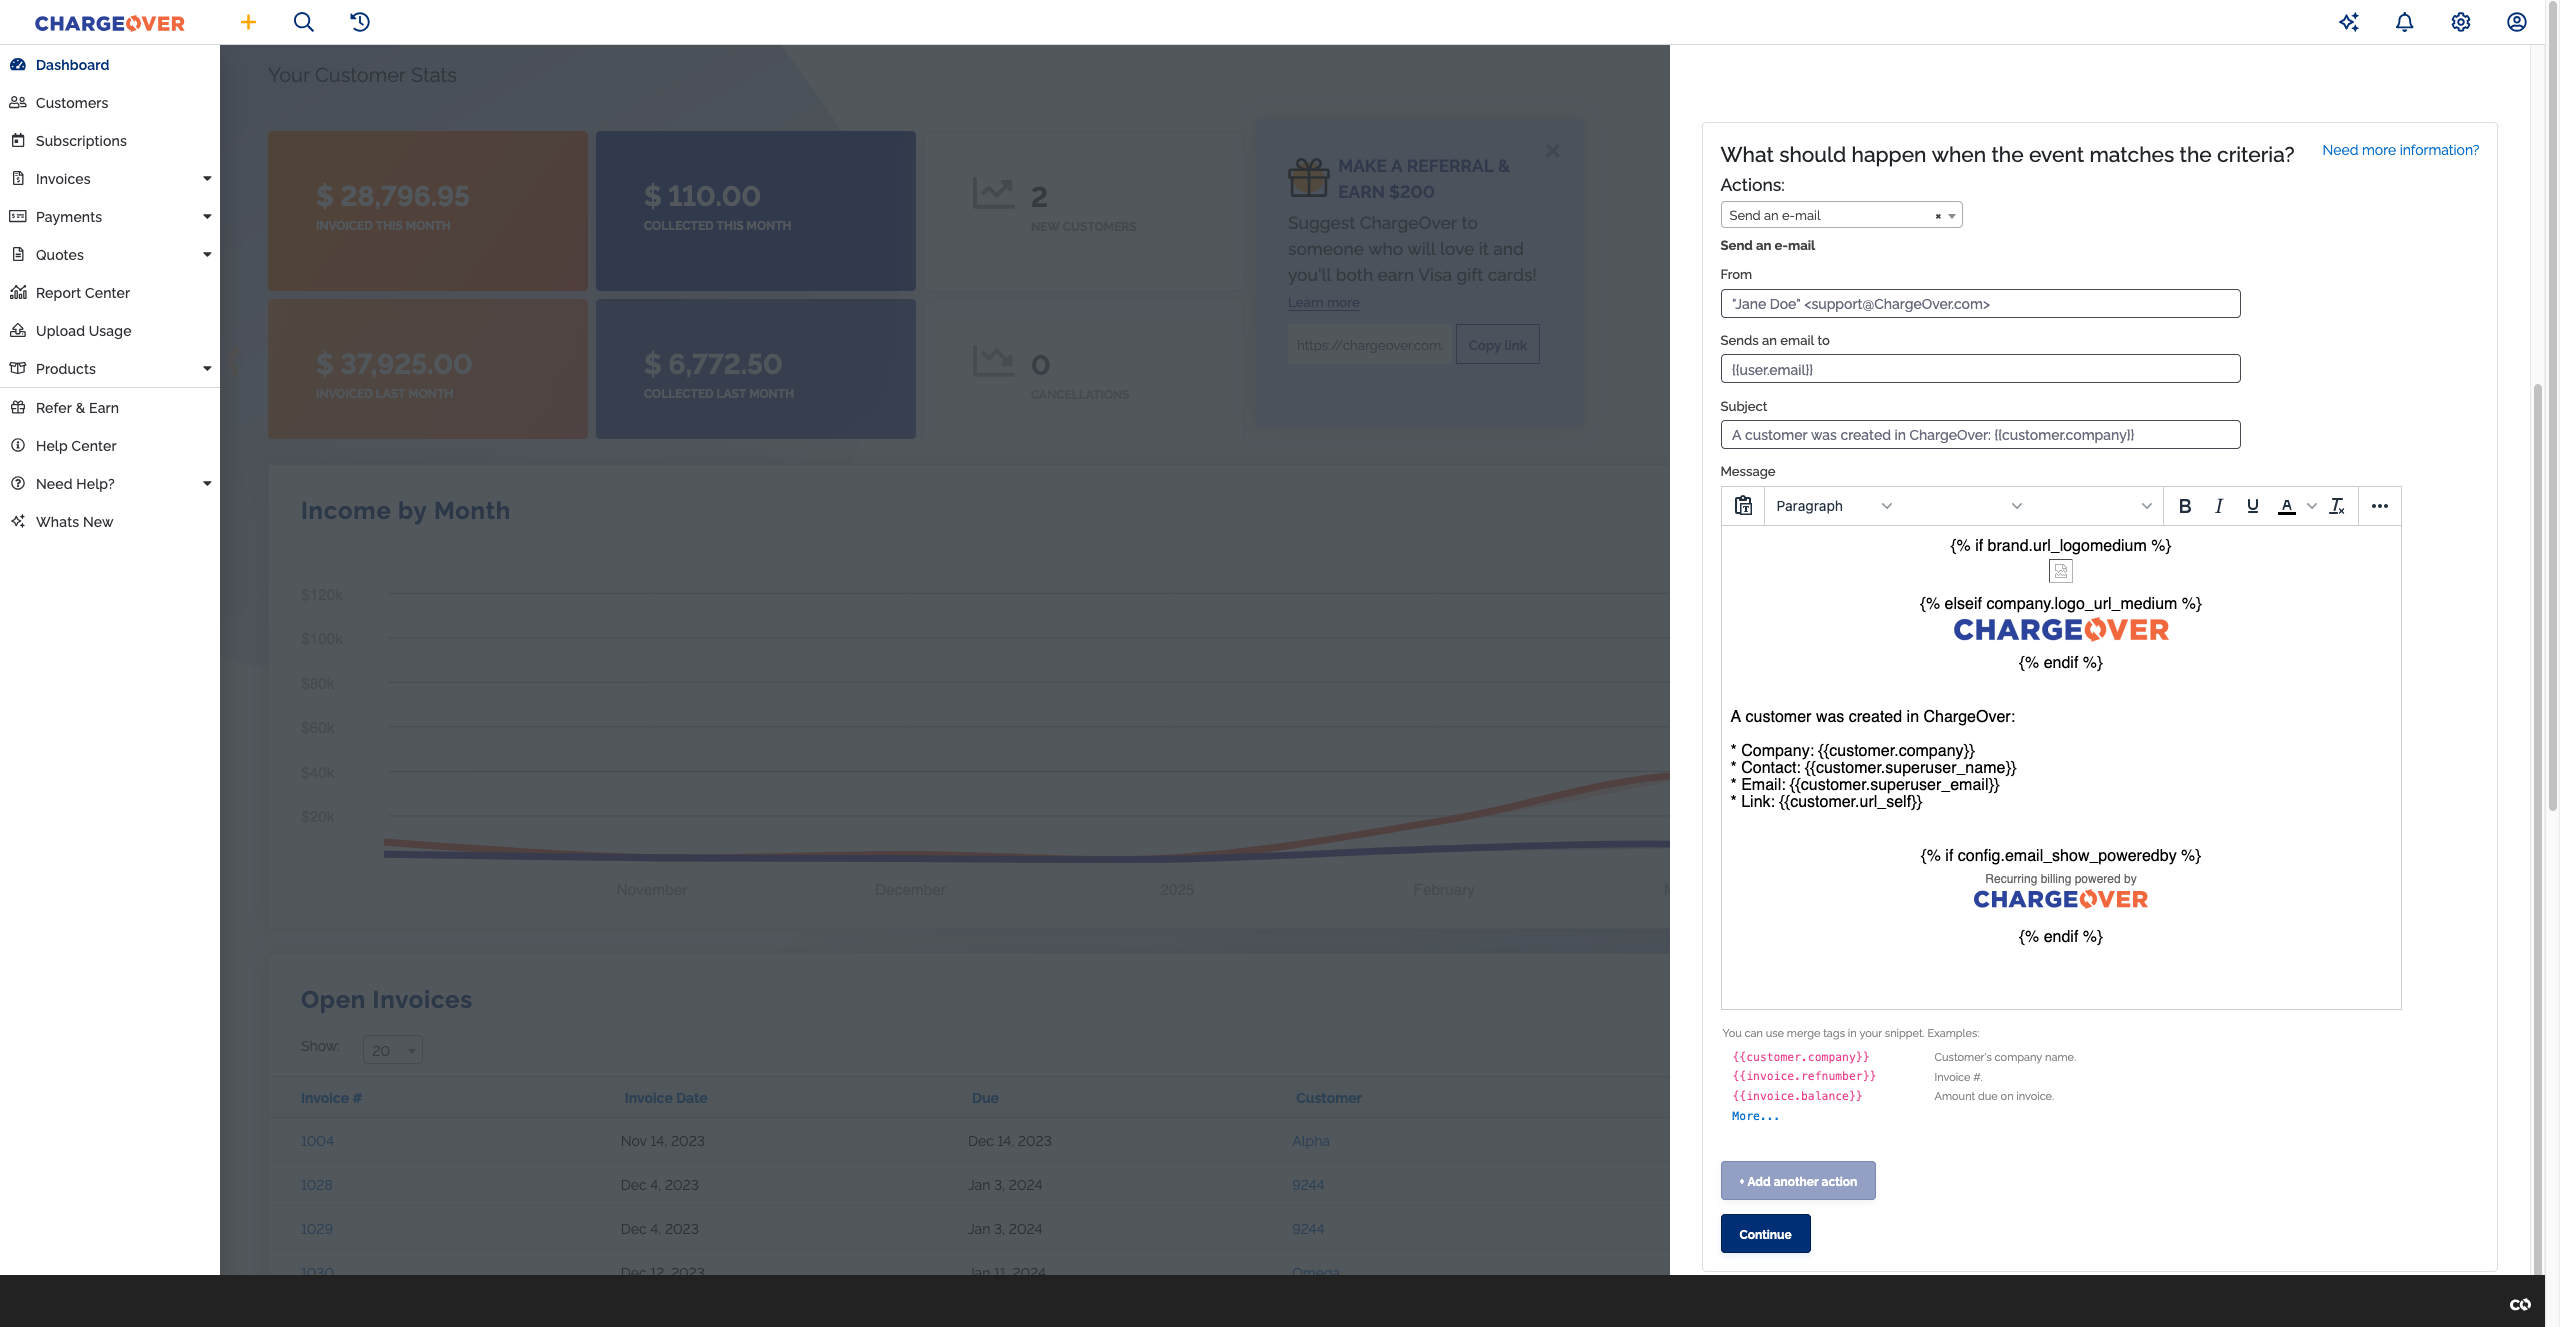
- Select Send an email from the action dropdown
- Customize the email message with your own text or merge tags
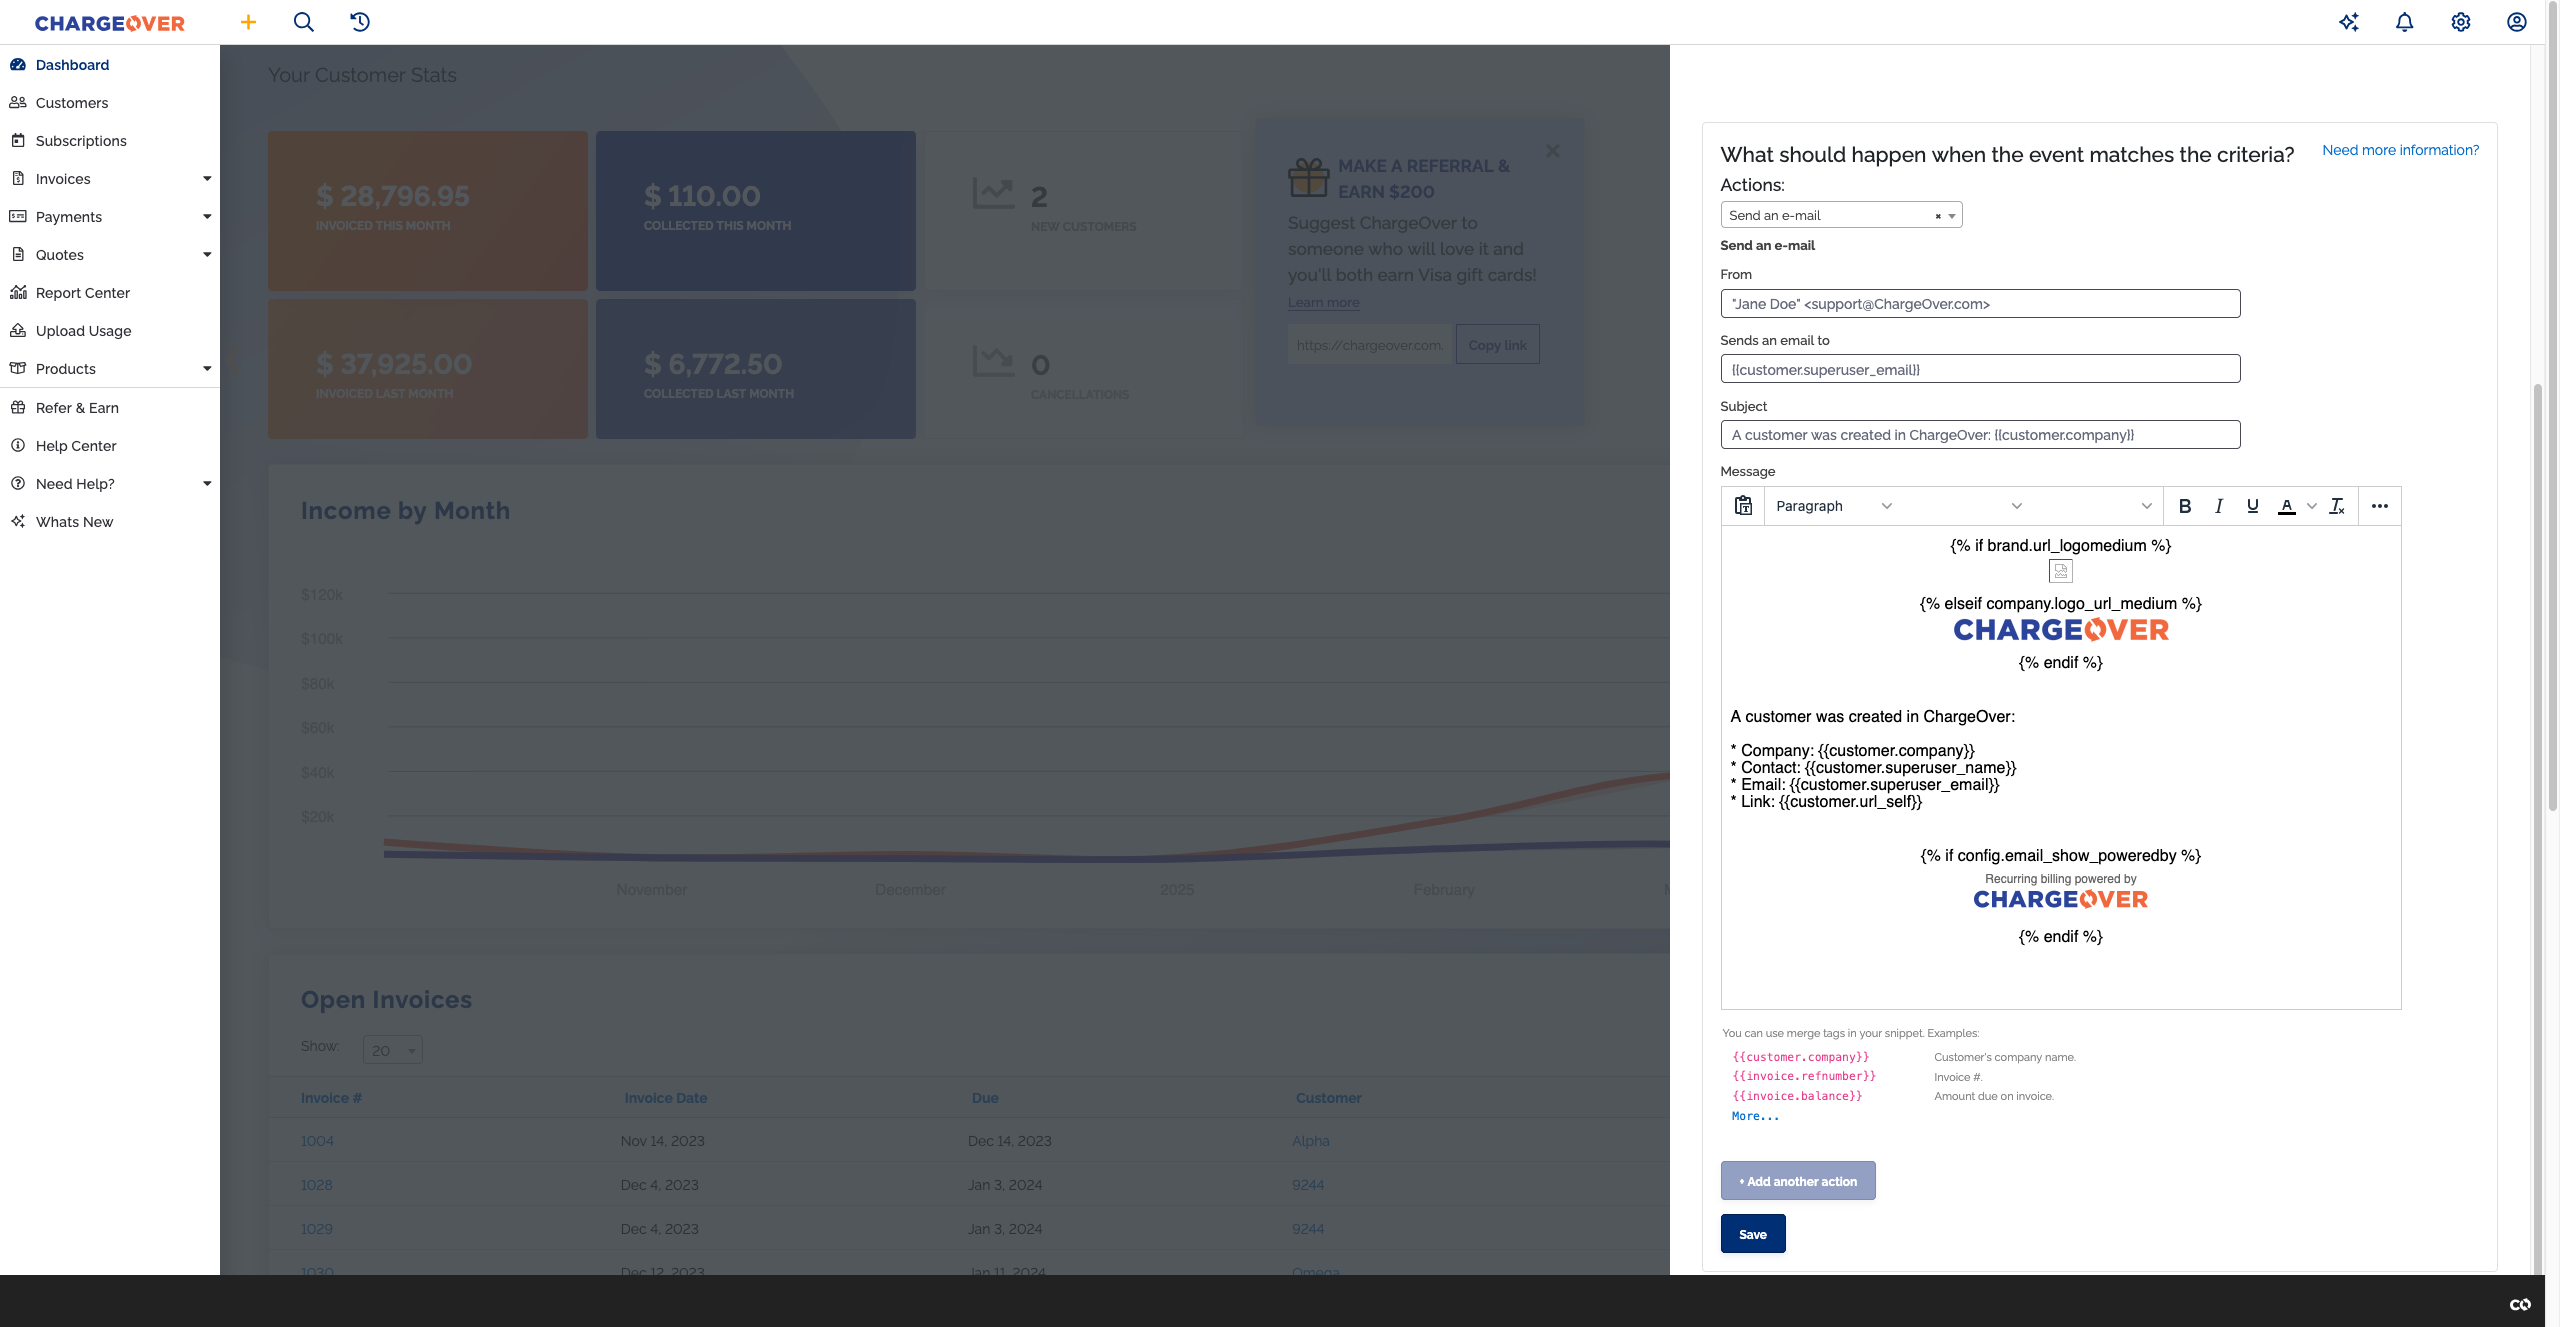
- Click
Save
Receive an email notification when a transaction is declined
- On the custom automation slideout canvas, select New Custom Automation
- Give your custom automation a name
- Select Transaction (Payment, Credit, Refund) is created

- Click
Continue - Under ... only for some transactions, click
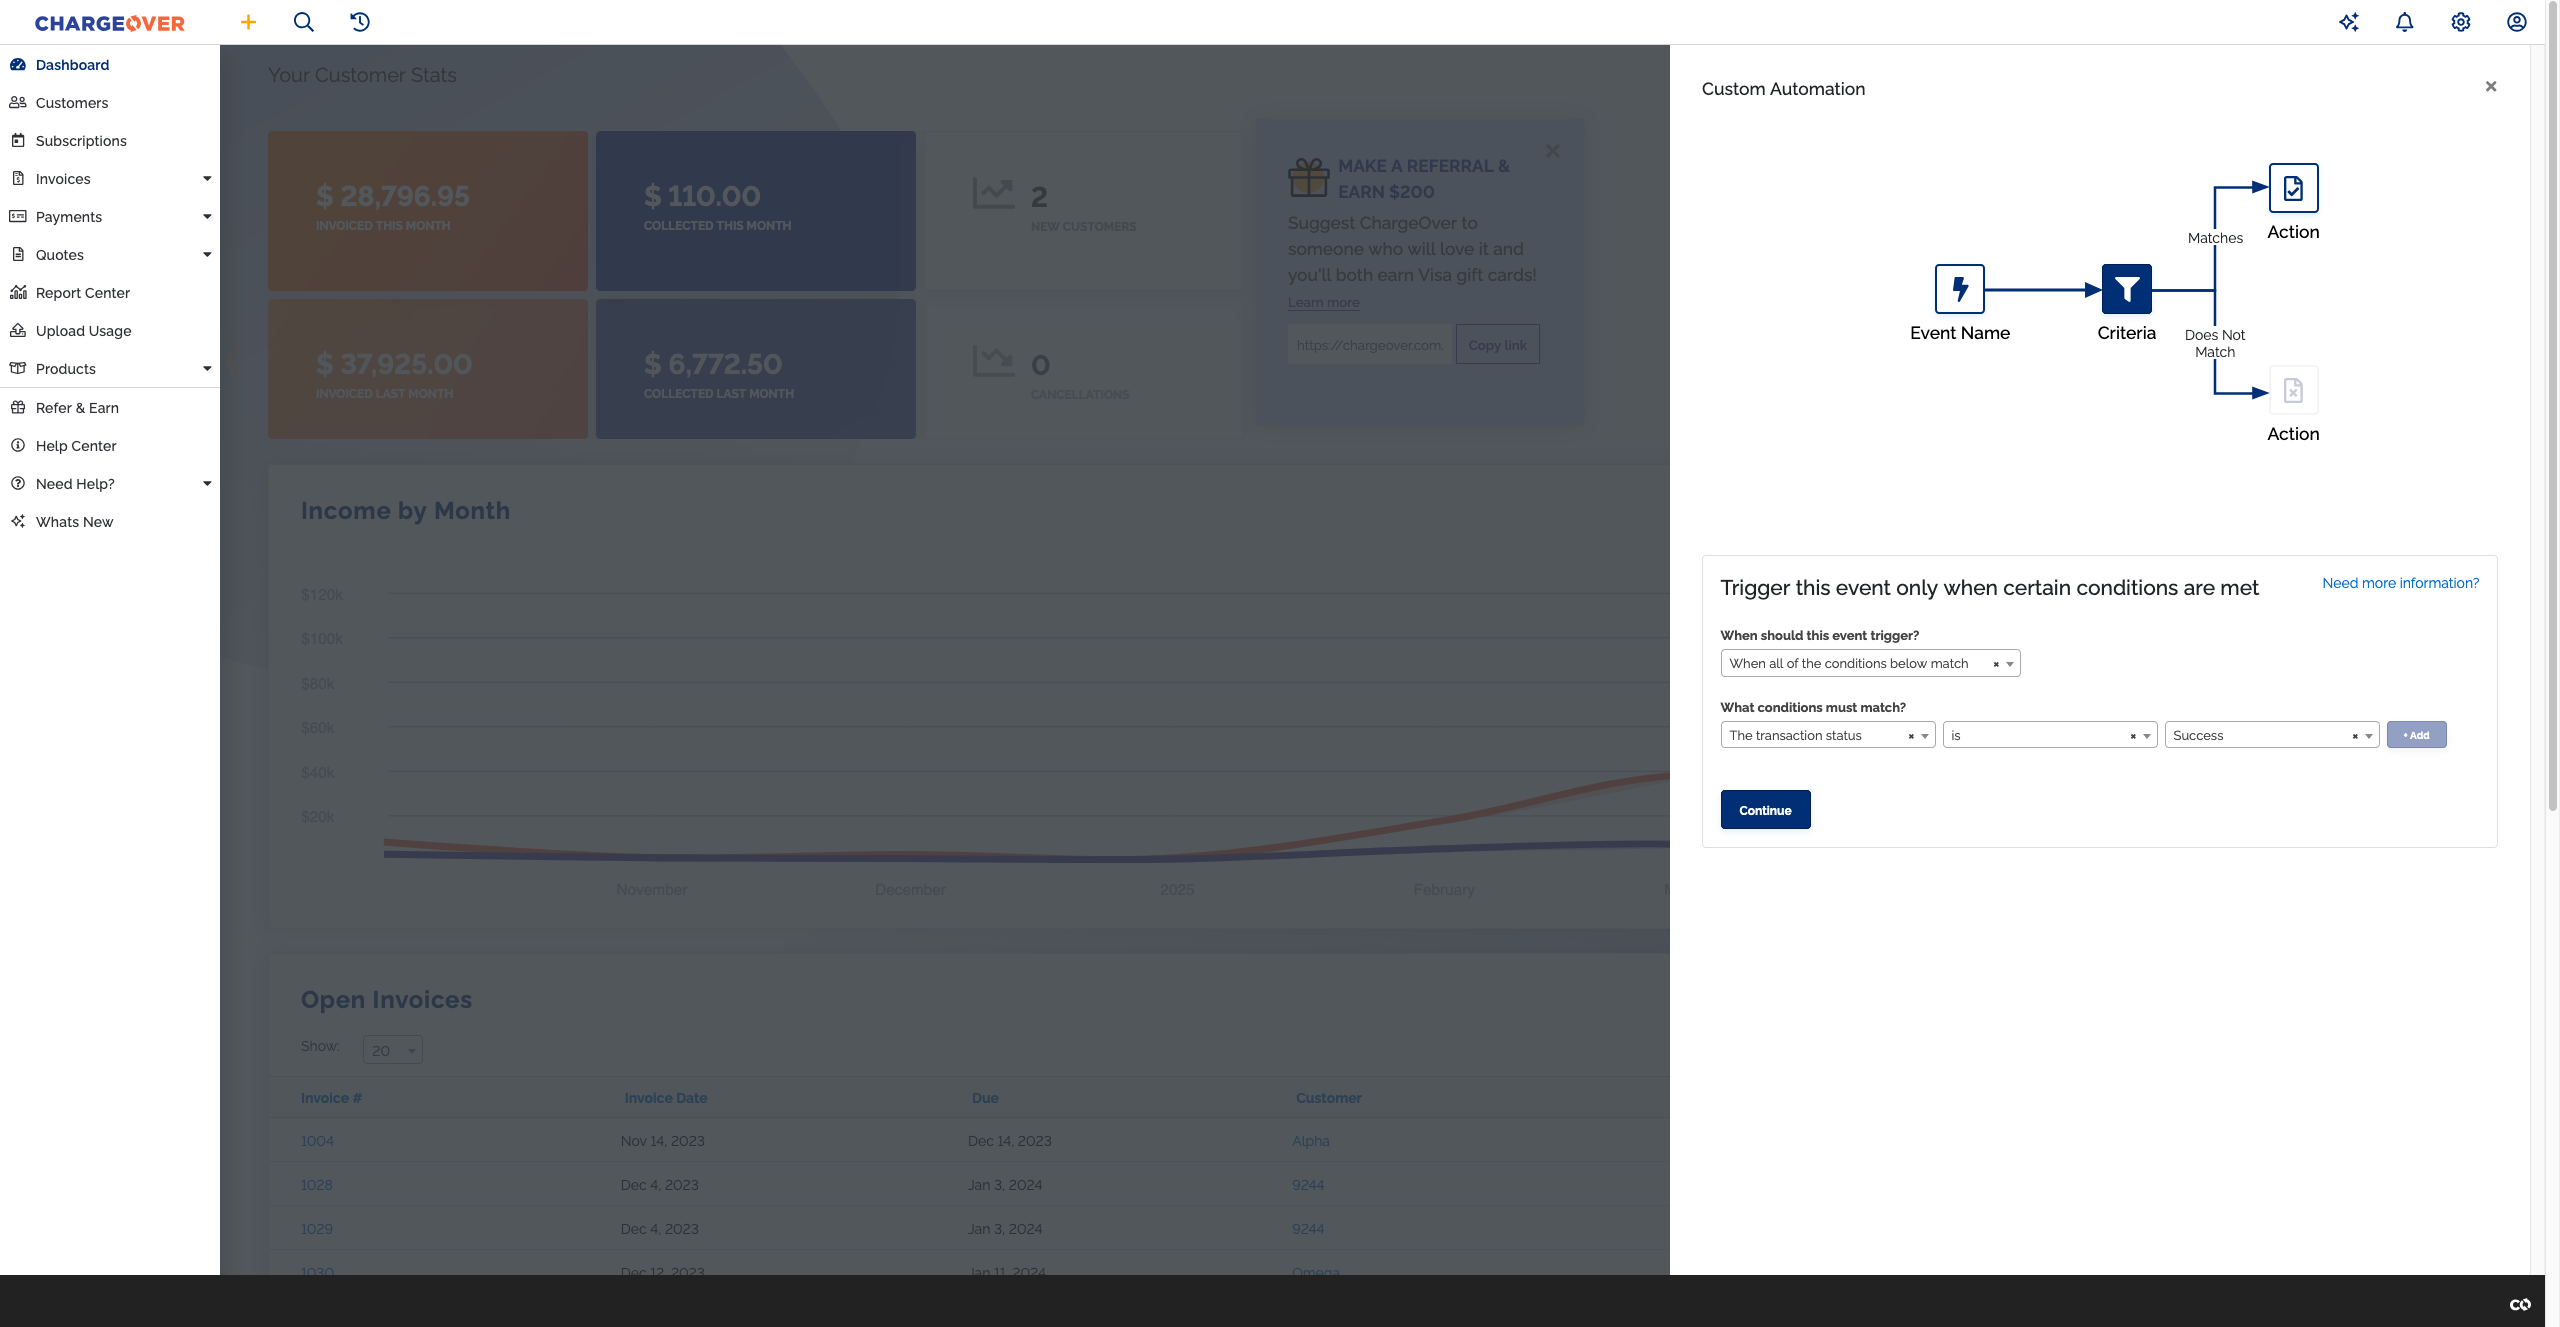
Continue... - Select When all of the conditions below match from the first dropdown
- Select The transaction status from the second dropdown
- Select is from the third dropdown
- Select Failed (decline) from the fourth dropdown

- Click
Continue - Select Send an email from the action dropdown
- Customize the email message with your own text or merge tags
- Example: Hello Team,
{{transaction.customer\_id}}from{{customer.company}}has had{{transaction.transaction\_id}}fail on{{transaction.transaction\_date}}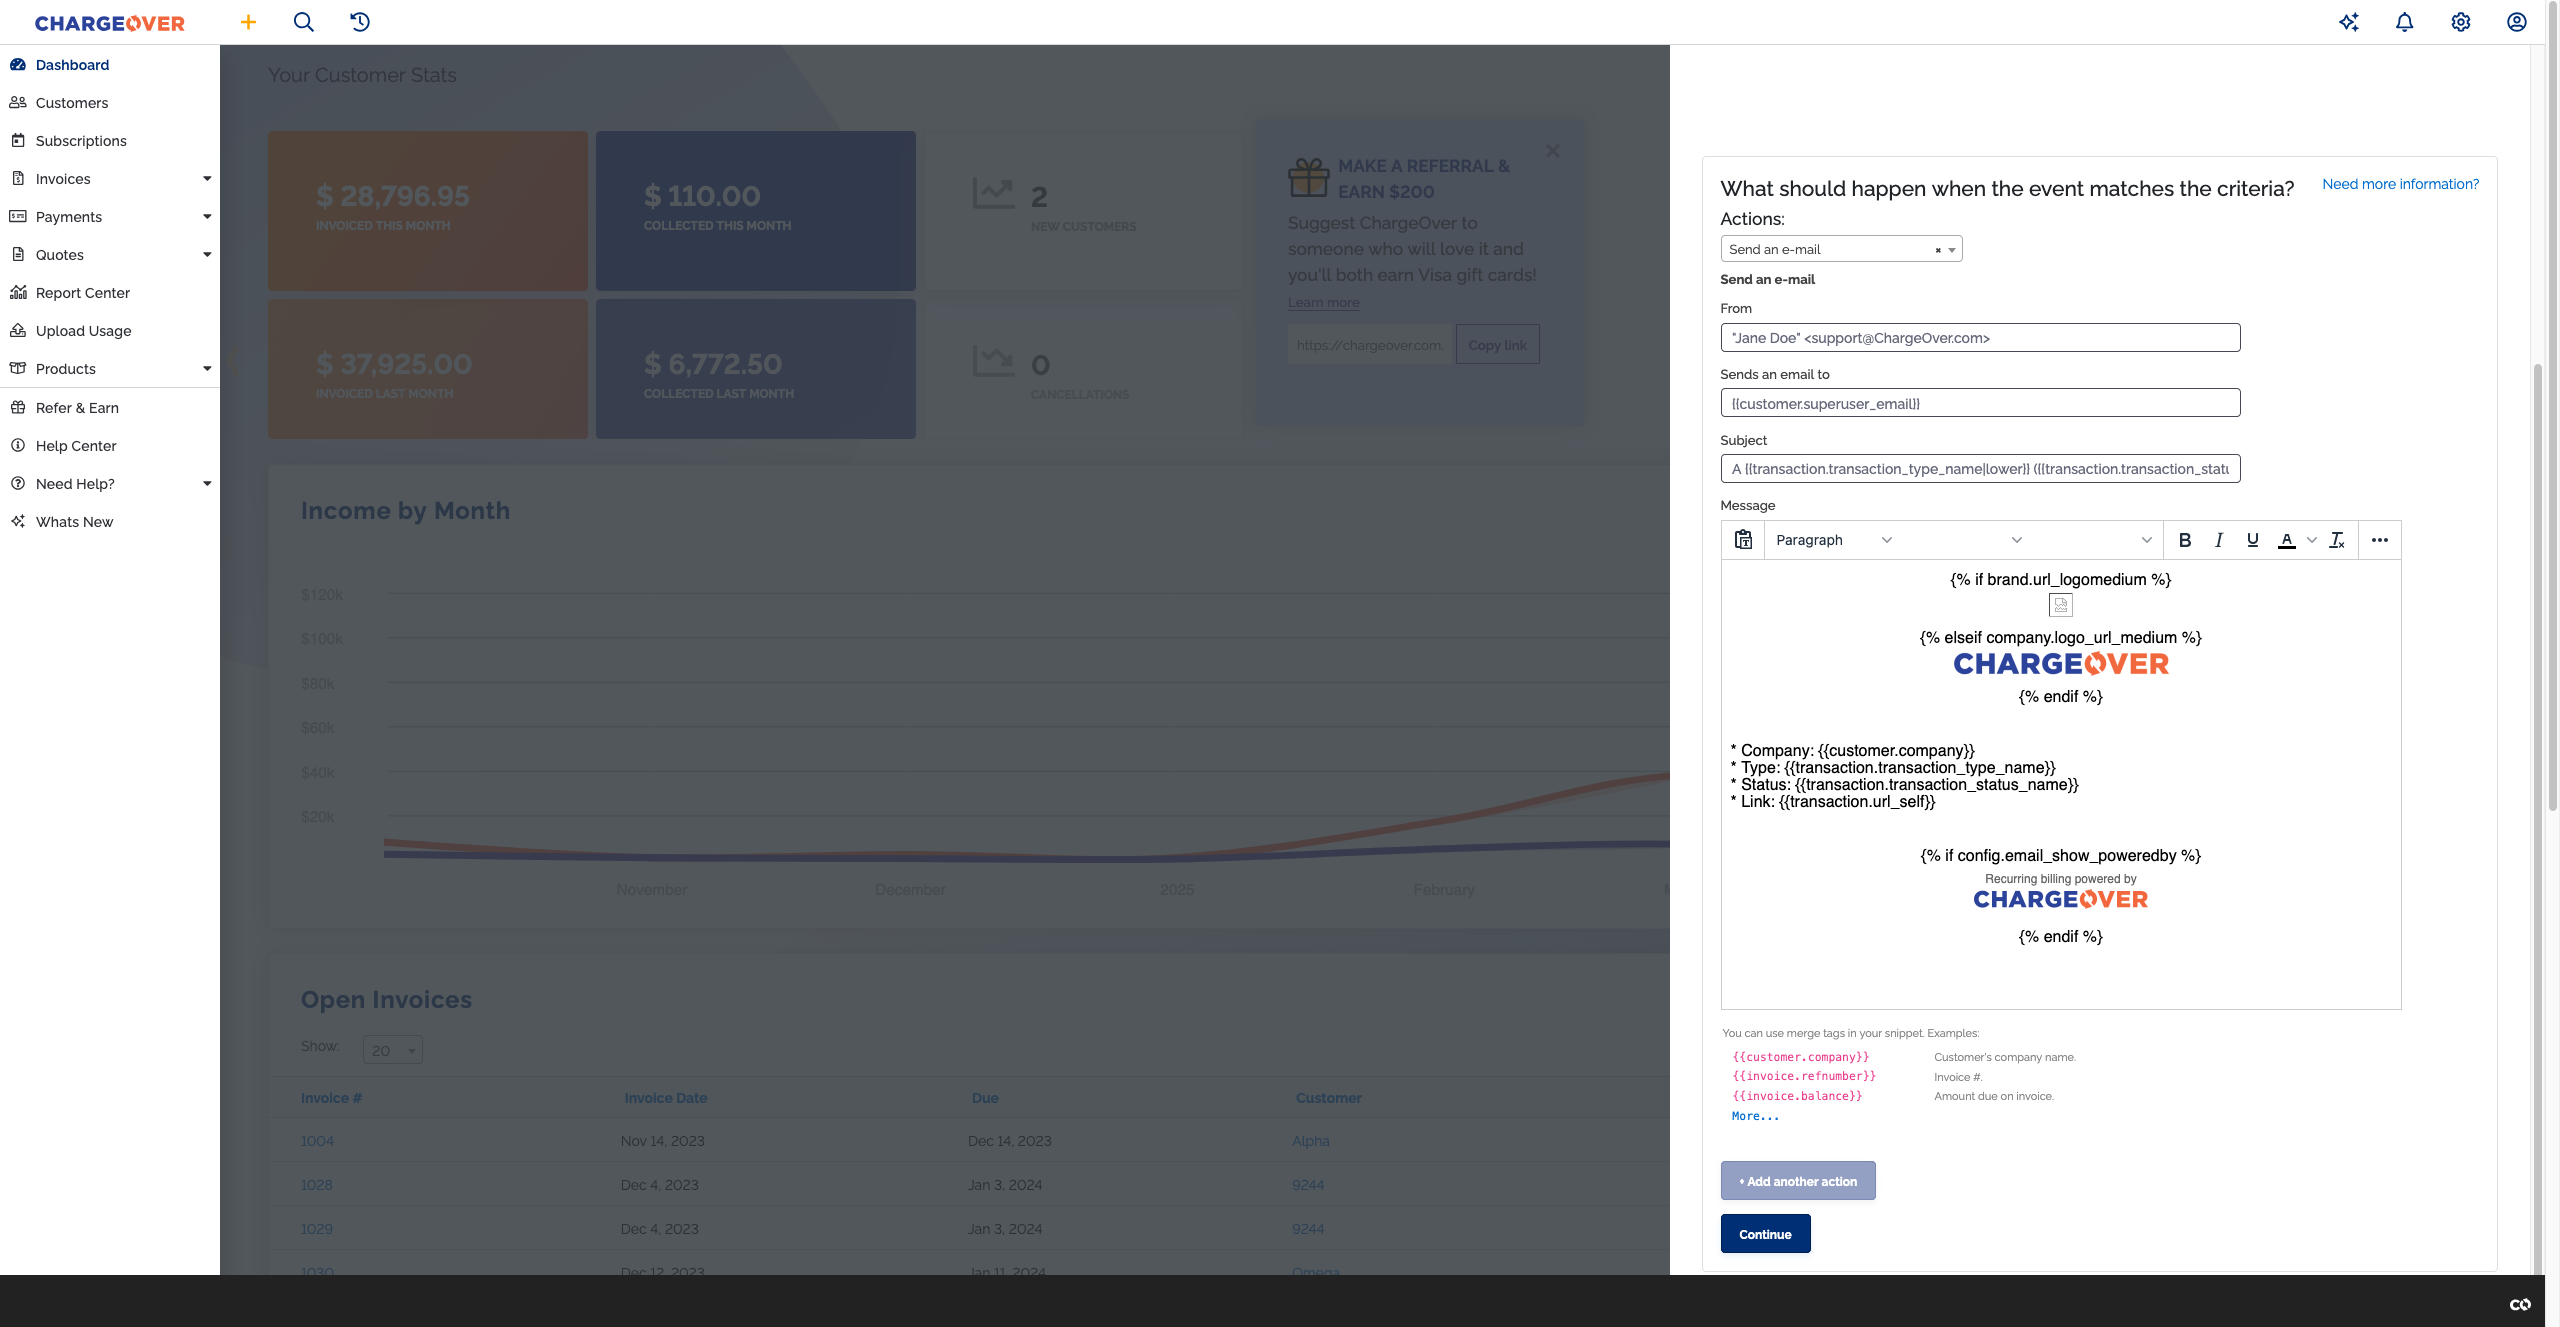
- Click
Continue 
- Click
Save
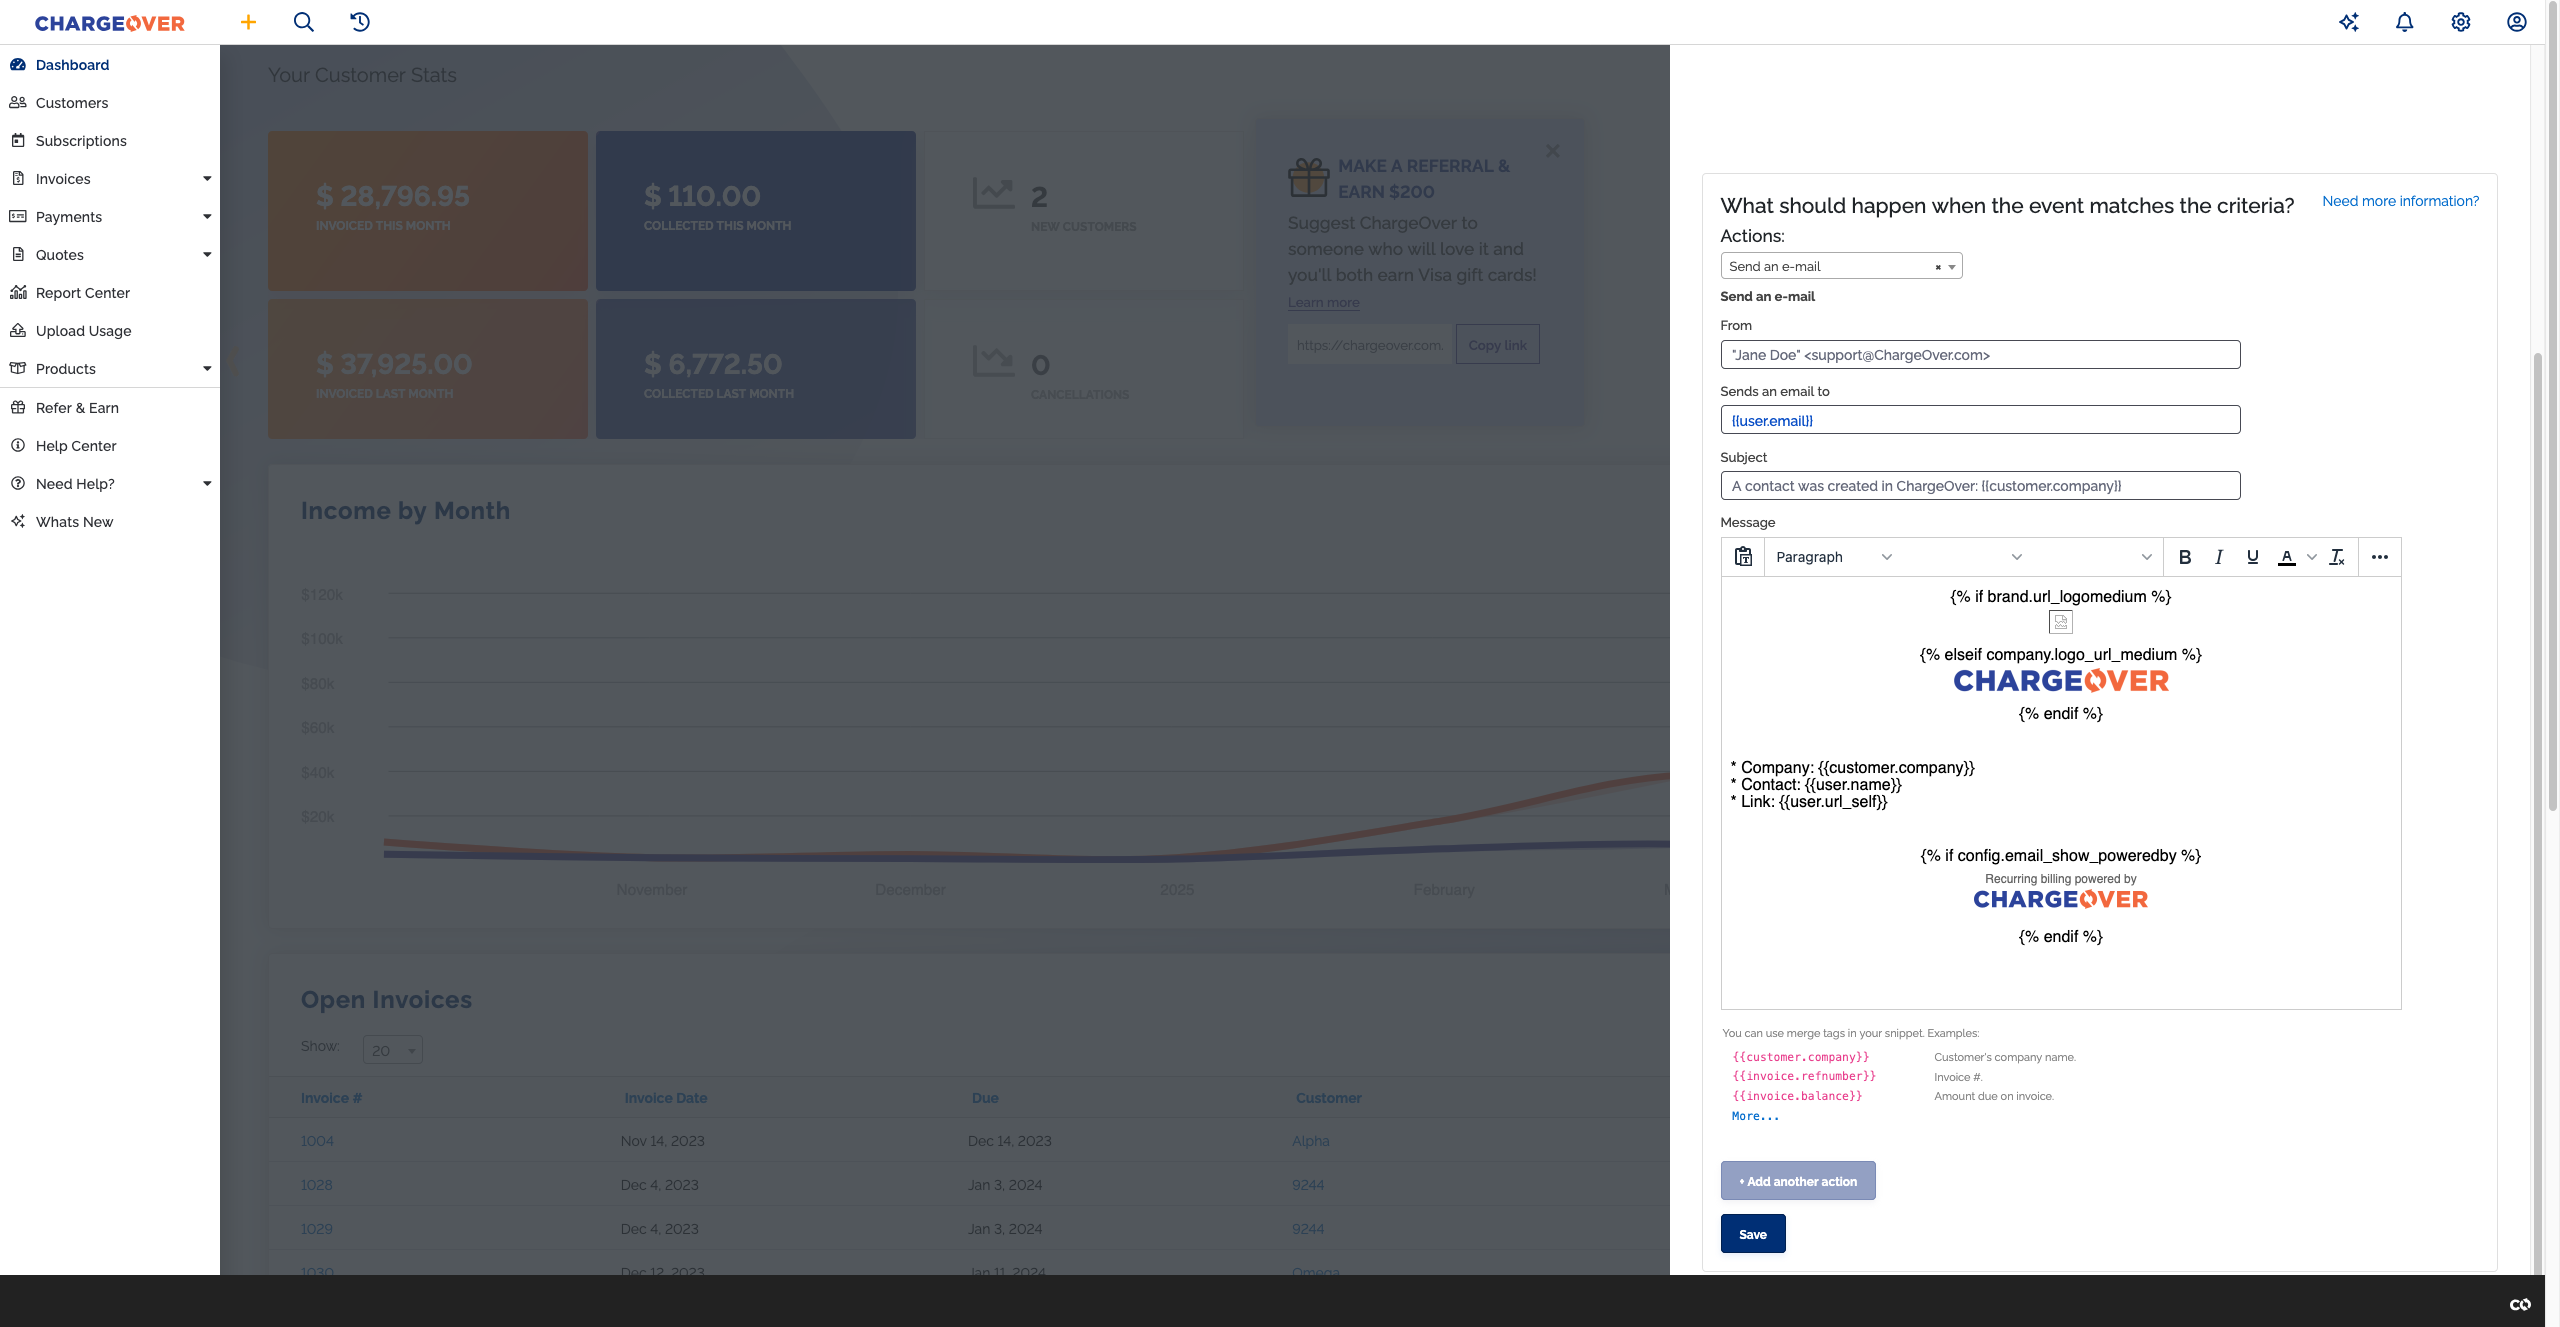
Send a contact instructions to set up their customer portal login
- On the custom automation slideout canvas, select New Custom Automation
- Give your custom automation a name
- Select Contact is created

- Click
Continue - Under ... for all contacts, click
Continue... 
- Select Send an email from the action dropdown
- Fill in the To: blank with this merge tag
{{ user.email }} - Customize the email message with your own text or merge tags
- Click
Save
Here's our best practice for setting up the email
- From - (enter the email address you want new the email to be sent from)
- Sends an email to -
{{user.email}} - Subject - (enter the subject line of the email)
- Message - fill in your message text
Get an email alert when an ACH or eCheck account is added
- On the custom automation slideout canvas, select New Custom Automation
- Give your custom automation a name
- Select ACH/eCheck Details is created

- Click
Continue - Under ... for all ACH/eCheck details, click
Continue 
- Select Send an email from the action dropdown
- Fill in
{{user.email}}in the To: email address blank - Customize the email message with your own text or merge tags
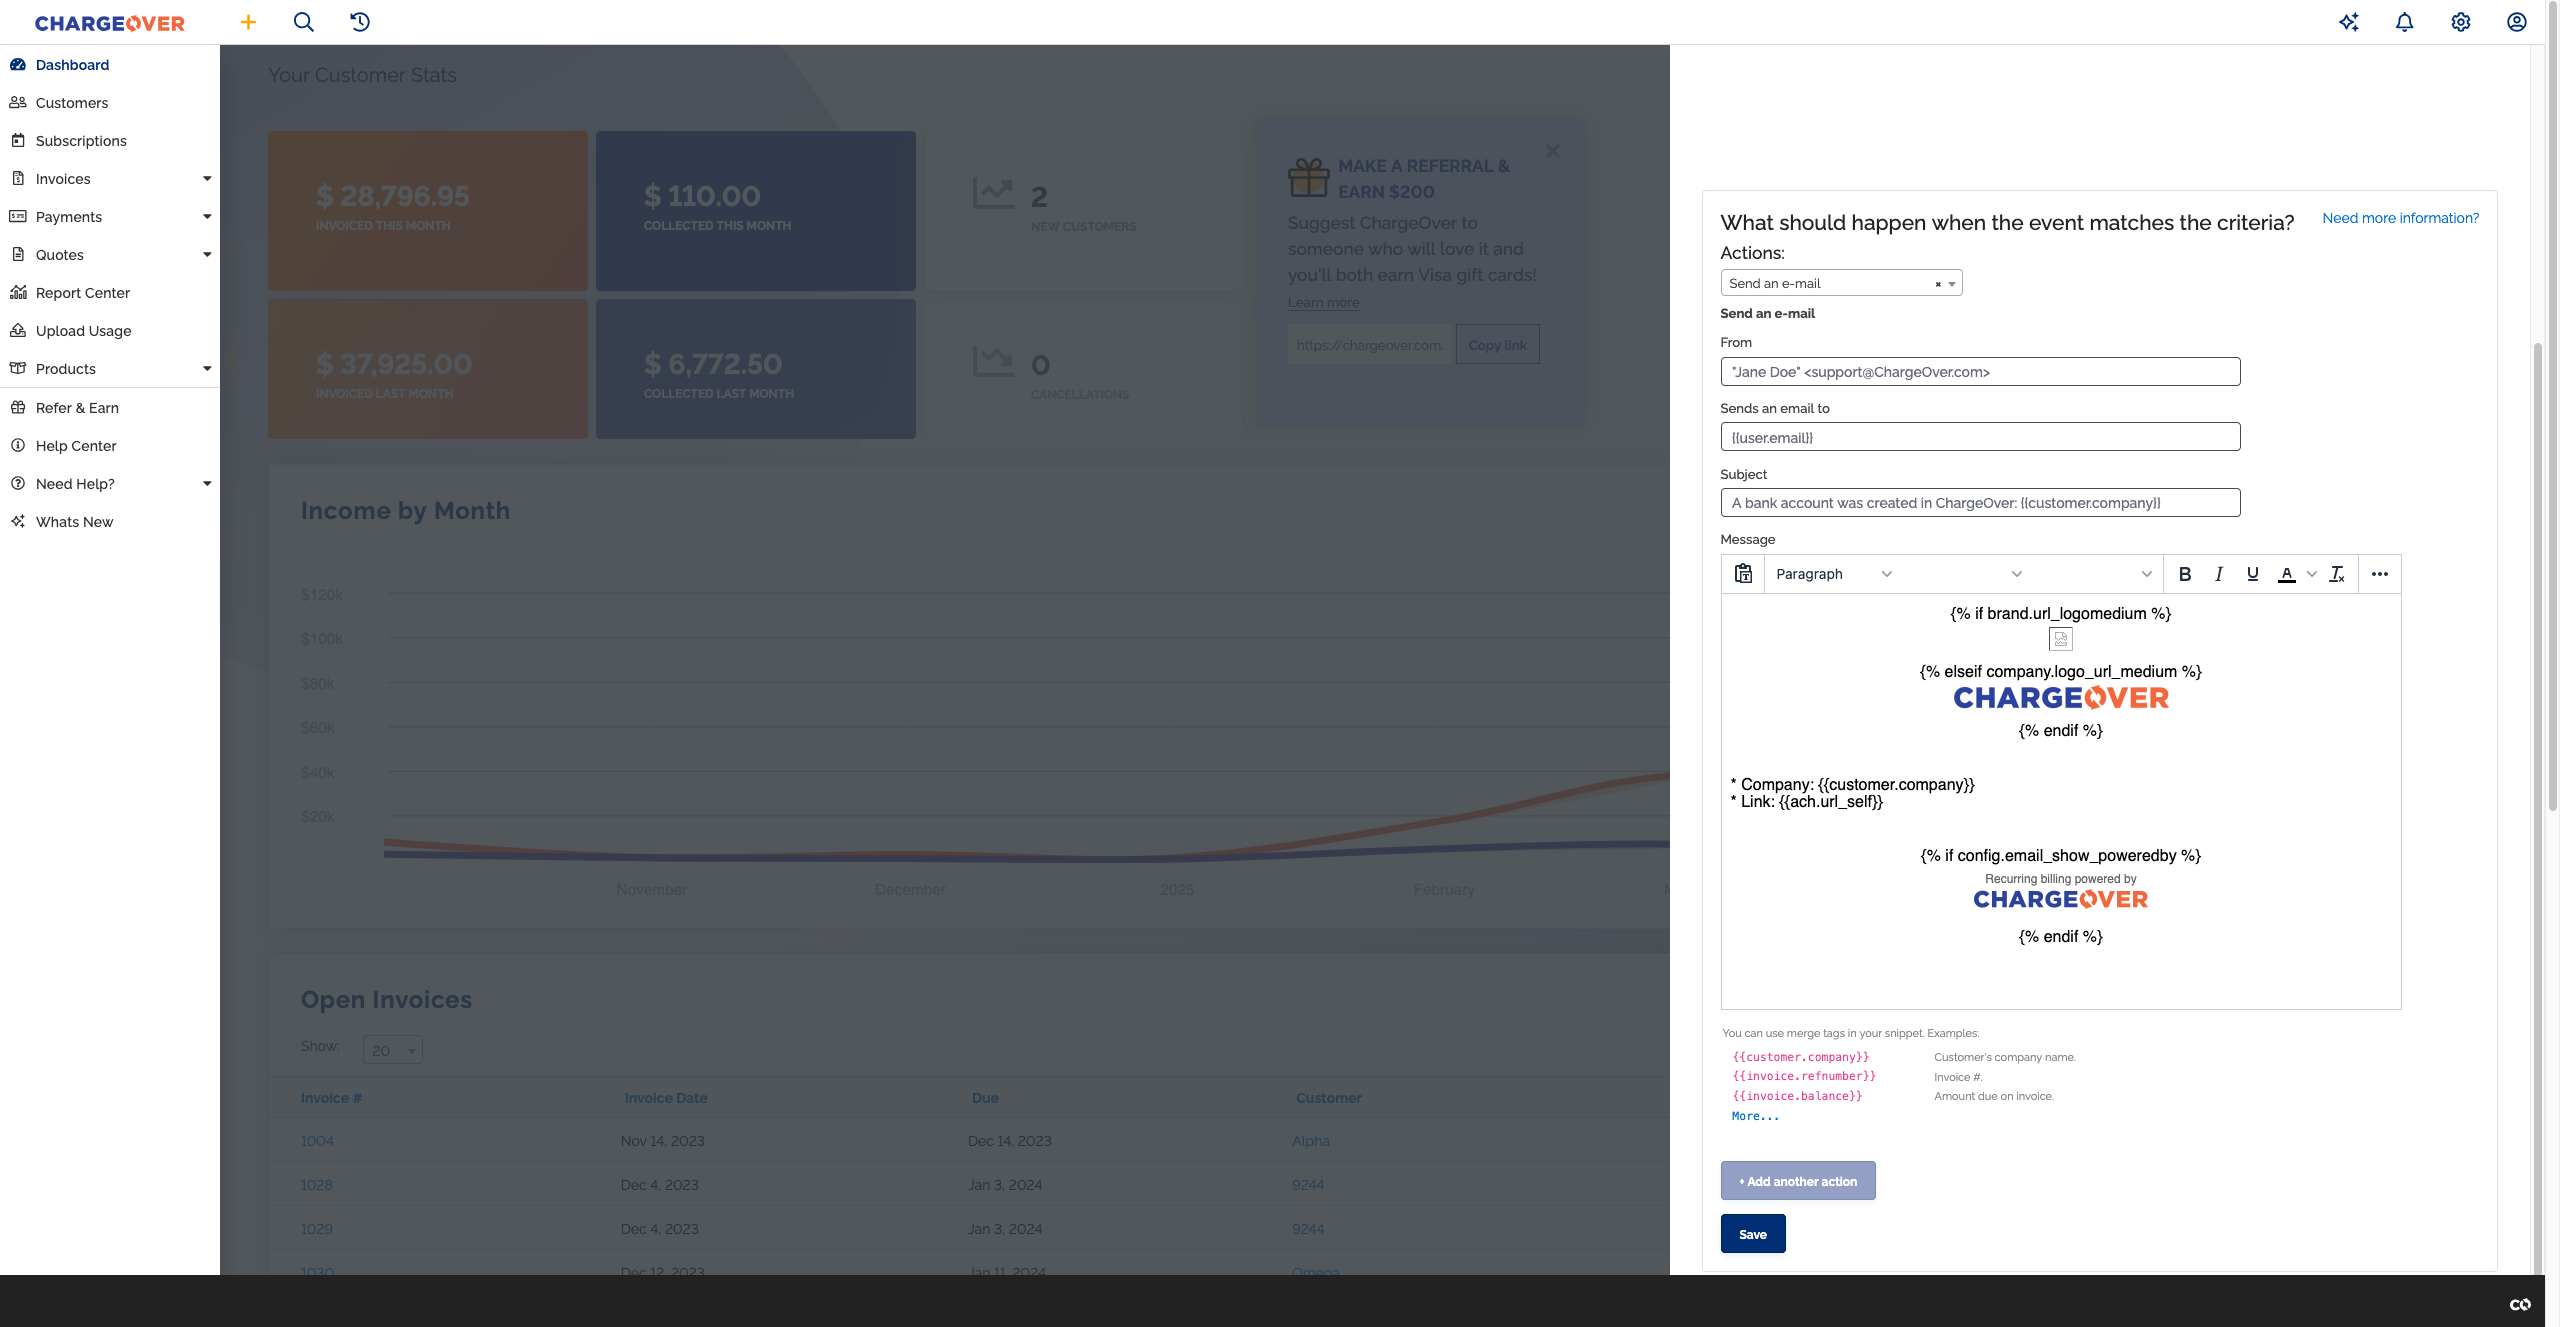
- Click
Save
Send automatic emails to select customers
If you have some emails you only want to send to some customers and don't want to use dunning to do this, you can set up a customer custom automation.
- On the custom automation slideout canvas, select New Custom Automation
- Give your custom automation a name
- Select Customer is created

- Click
Continue - Under ... only for some customers, click
Continue - Select your rules for when the event should be triggered
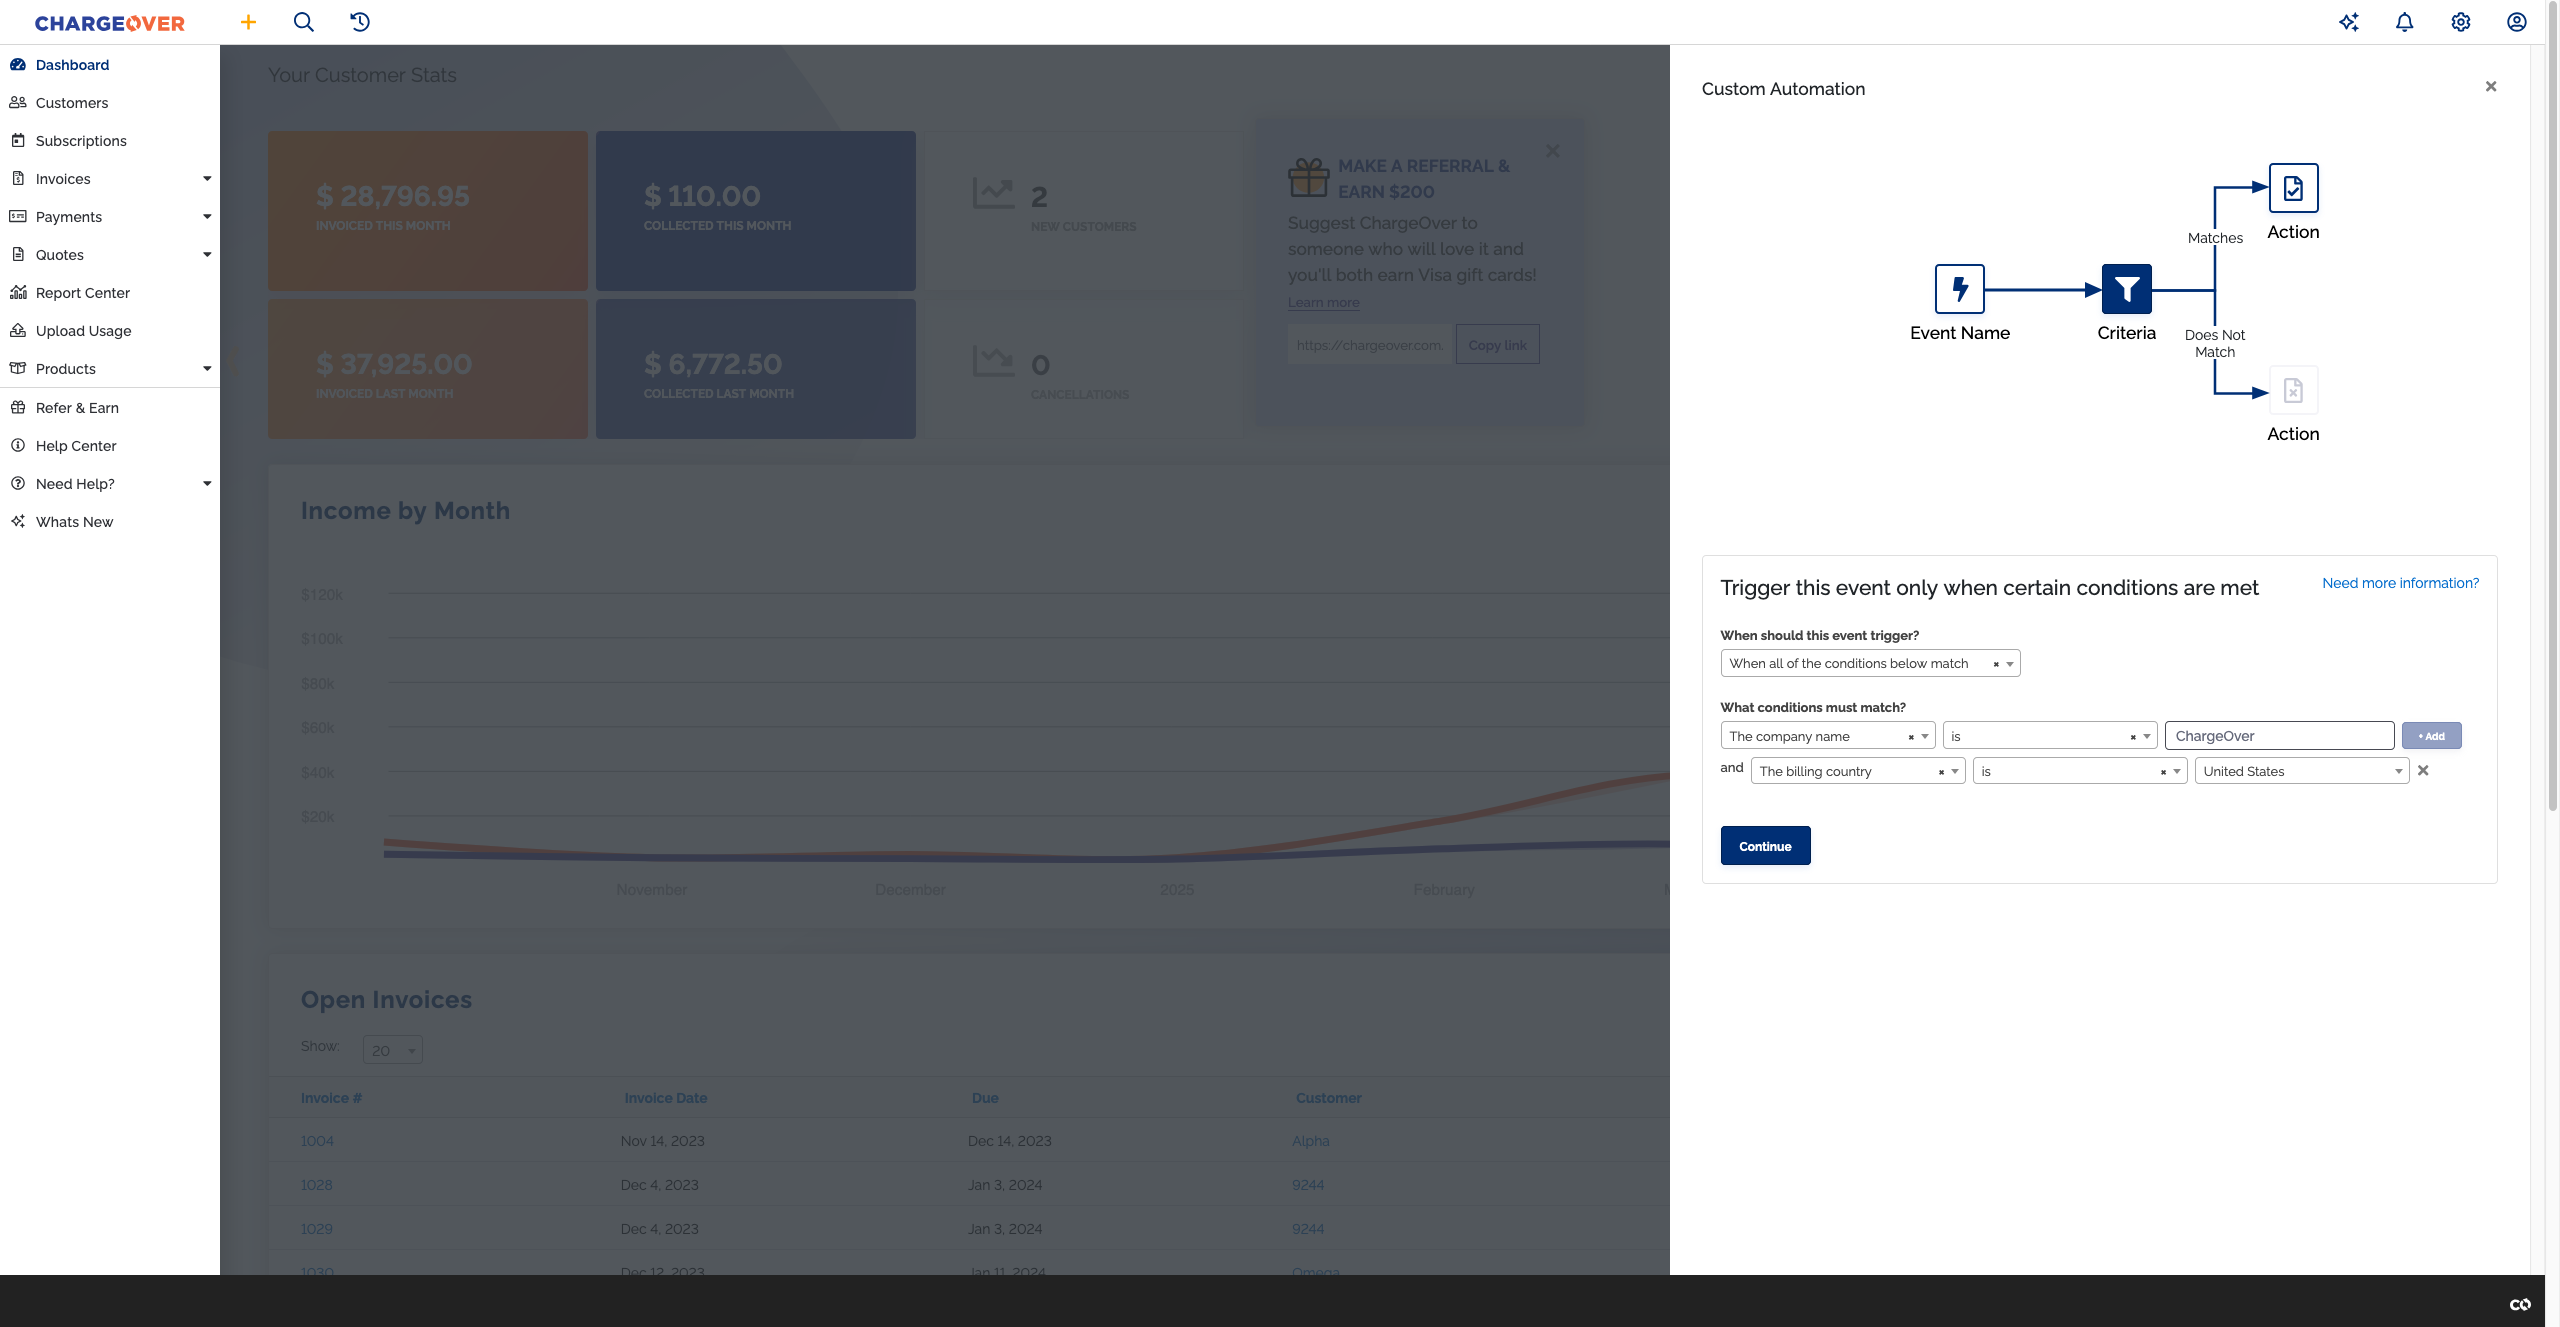
- Click
Continue - Select Send an email from the action dropdown
- Fill in
{{user.email}}in the To: email address blank - Customize the email message with your own text or merge tags
- Click
Continue 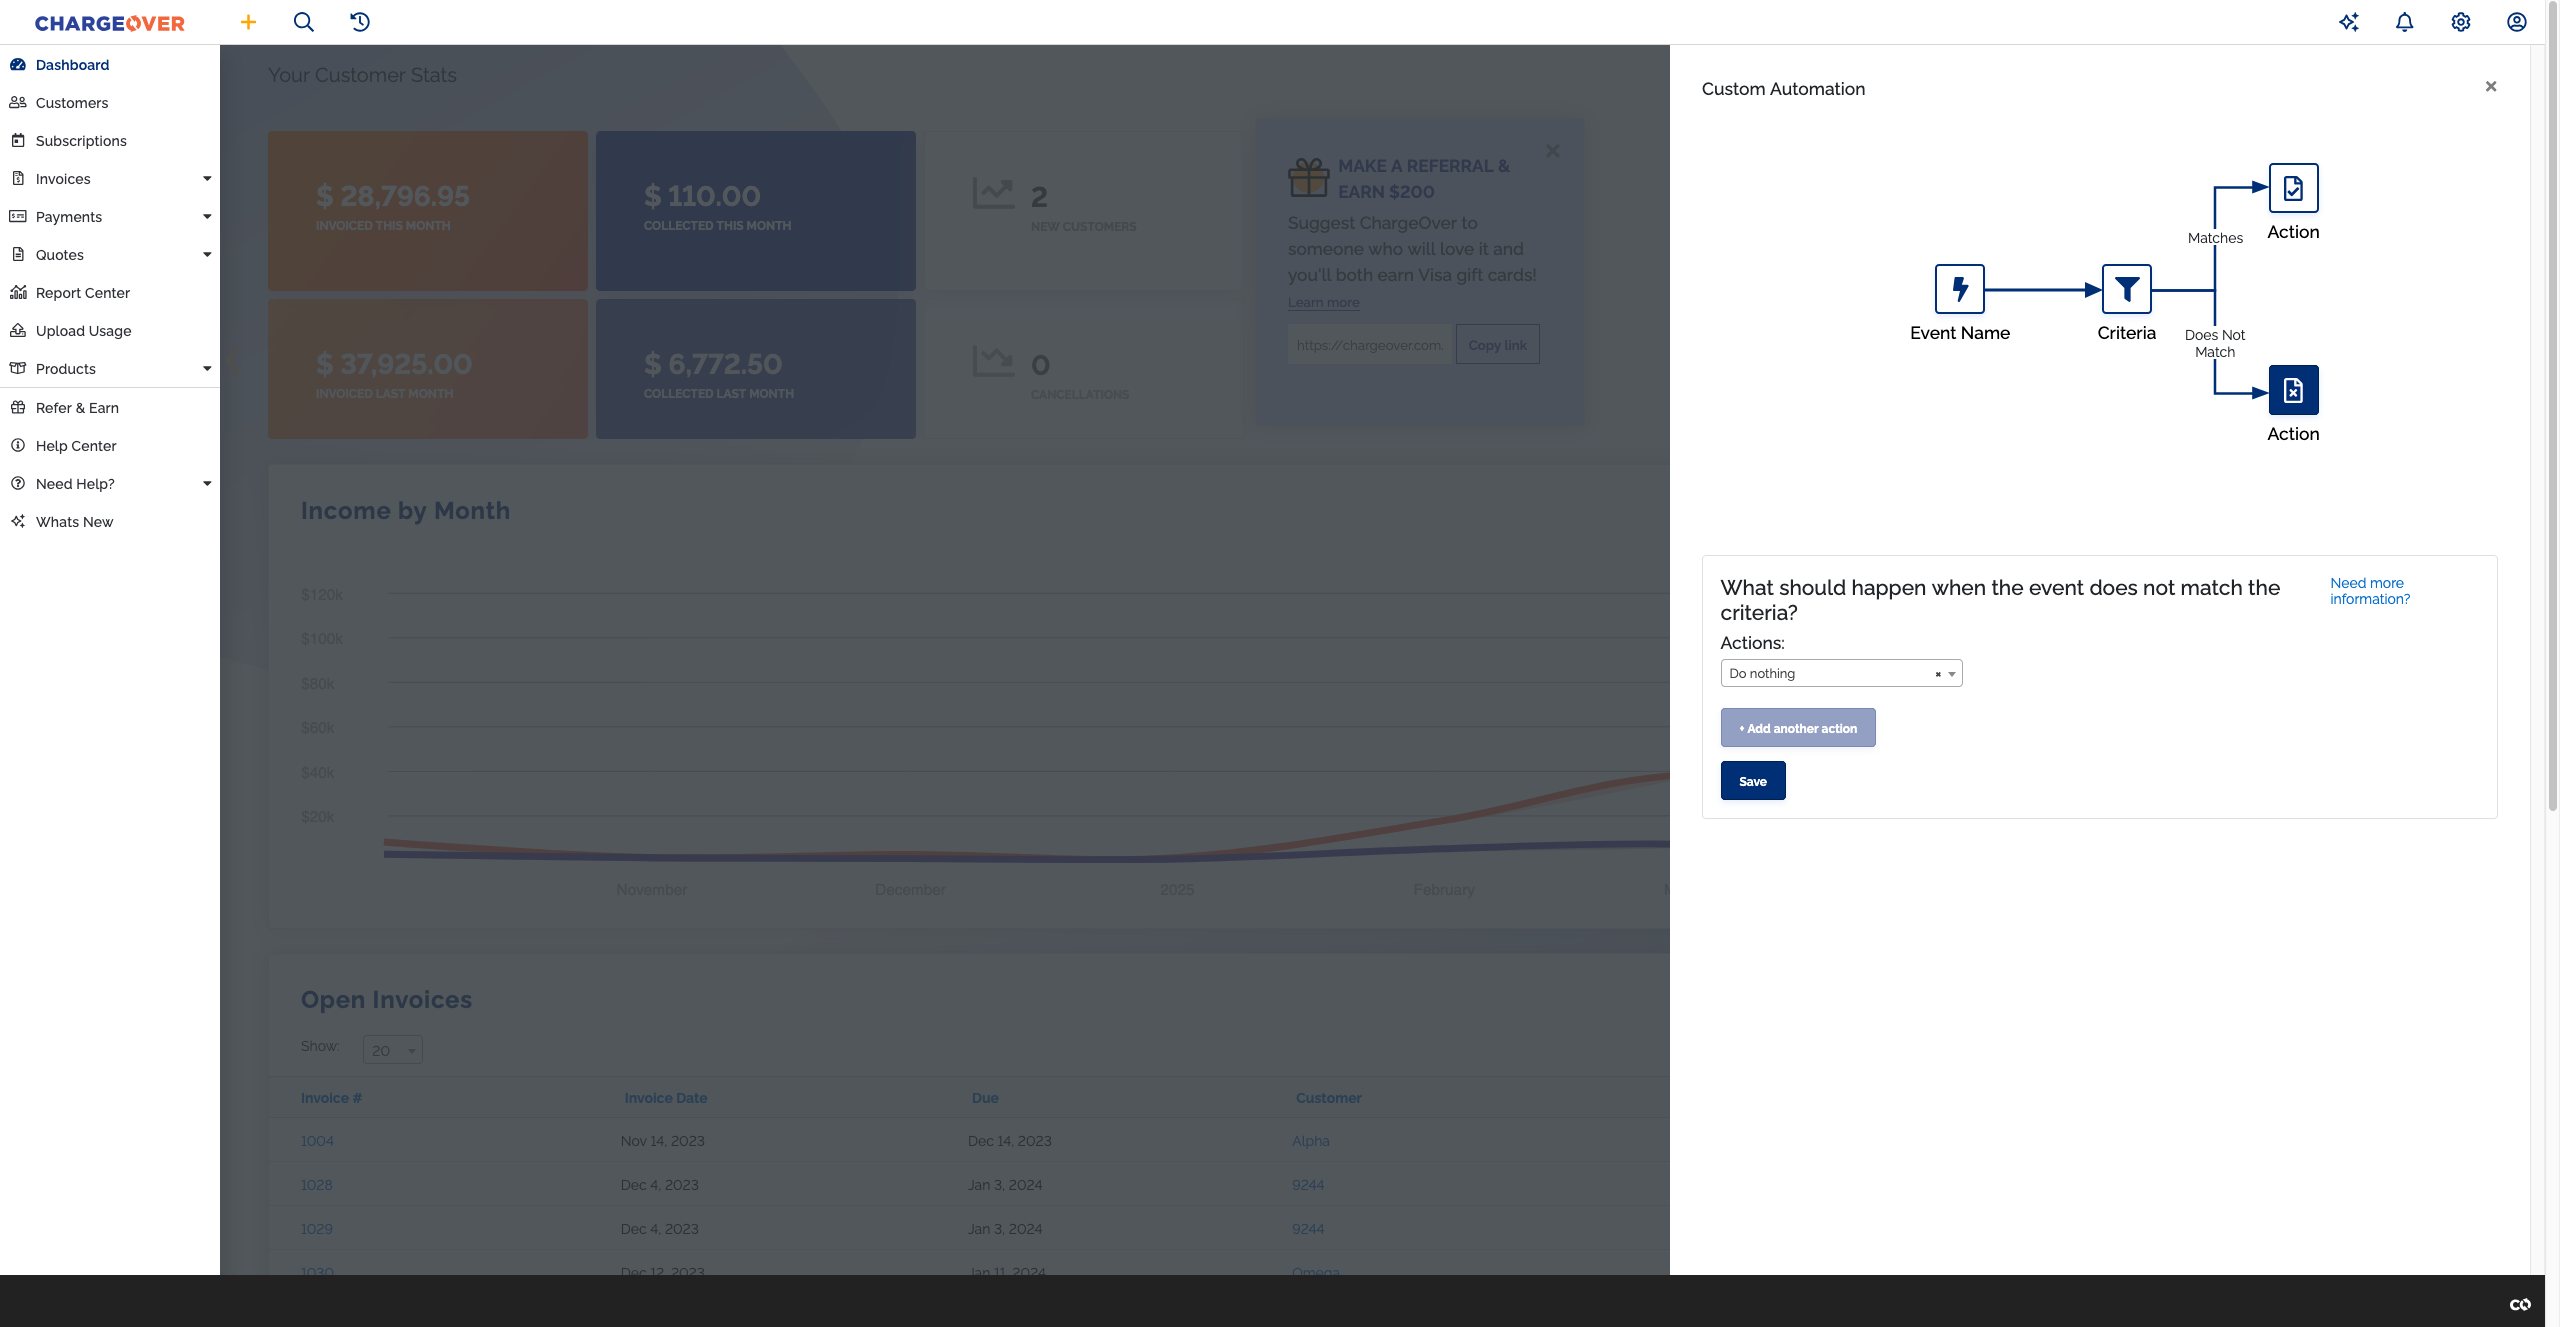
- Click
Save
Notify different people based on payment success or failure
Let’s say we need to notify different teams based on a payment’s outcome. If a payment succeeds, notify the accounting team, so they can update records and reconcile the books. If a payment fails, notify the sales representative, so they can follow up with the customer and arrange payment.
- On the custom automation slideout canvas, select New Custom Automation
- Give your custom automation a name
- Select Transaction (Payment, Credit, Refunds) is created

- Click
Continue - Under ... only for some transactions, click
Continue - Select All from the first dropdown
- Select The transaction status from the second dropdown
- Select is from the third dropdown
- Select Success from the fourth dropdown
- Click
Continue - Select Send an email from the action dropdown
- Customize the email message with your own text or merge tags

- Click
Continue - Select Send an email from the action dropdown
- Customize the email message with your own text or merge tags
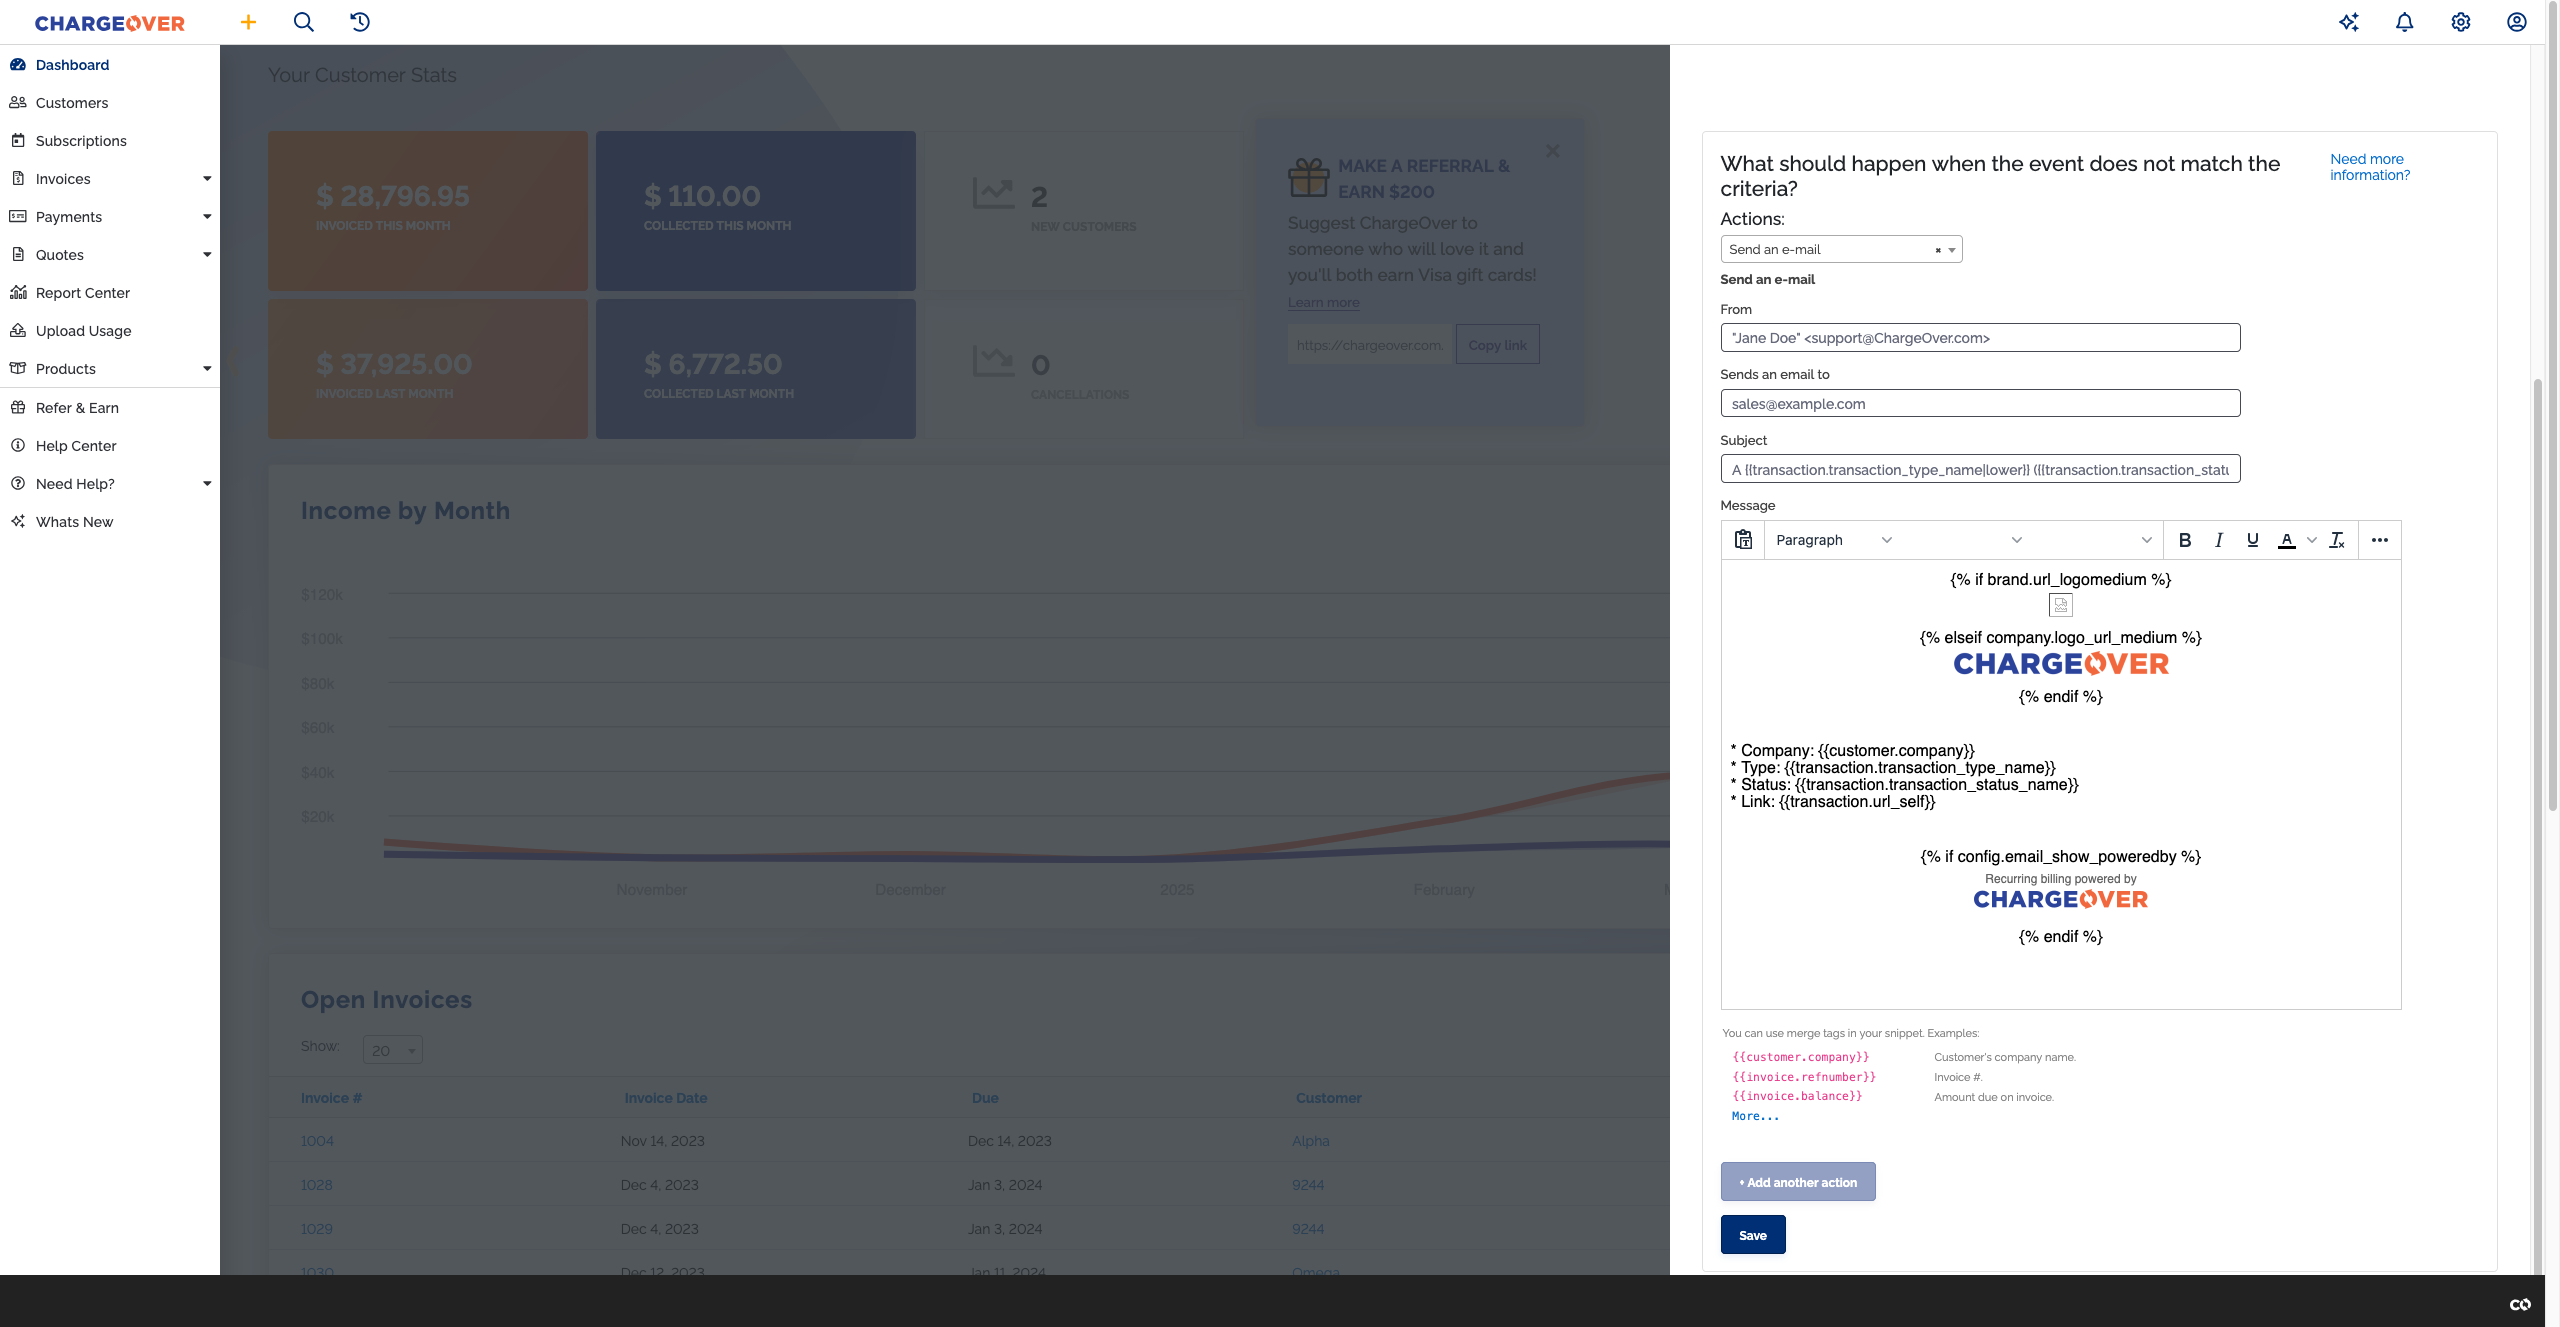
- Click
Save
Custom automations are very customizable. You could set your custom automation up by customer name to allow for more versatility if all the customers you are sending an email to do not have a commonality. You could also group them by shipping address, a custom field you create and more.