Custom Fields
Overview
A custom field in ChargeOver allows you to add additional pieces of data to an object. These fields can be added to reports, used to identify customers in unique ways, track different sign up dates and more.
Objects that support custom fields
- Admin Users
- Brands
- Contacts
- Customers
- Invoices
- Invoice Lines
- Products & Discounts
- Quotes
- Quote Lines
- Subscriptions
- Subscription Lines
- Transactions (Payments, refunds, credits)
Types of custom fields
You can also specify the type of custom field you want.
- Text: Will accept any type of text input, including numbers, dates, etc...
- Dropdown: This option allows you to create a list of items to select from a drop down menu
- Date: Presents the user with a date picker and stores the data in a date format.
- Number: Will only accept a numeric value
- Text Area: Multi line text field, great for large blocks of text
- URL: Will only accept URLs (e.g.
http://example.com/page) - Rich-text/HTML: Text editor to add headings, text, links, etc. All formatted in HTML.
Use-cases for custom fields
- Add custom fields to your hosted signup pages to collect more information from the customer
- Add a unique PO number to your customer's invoices or subscriptions
- Record a unique date on a subscription like a service installation date
Enable custom fields
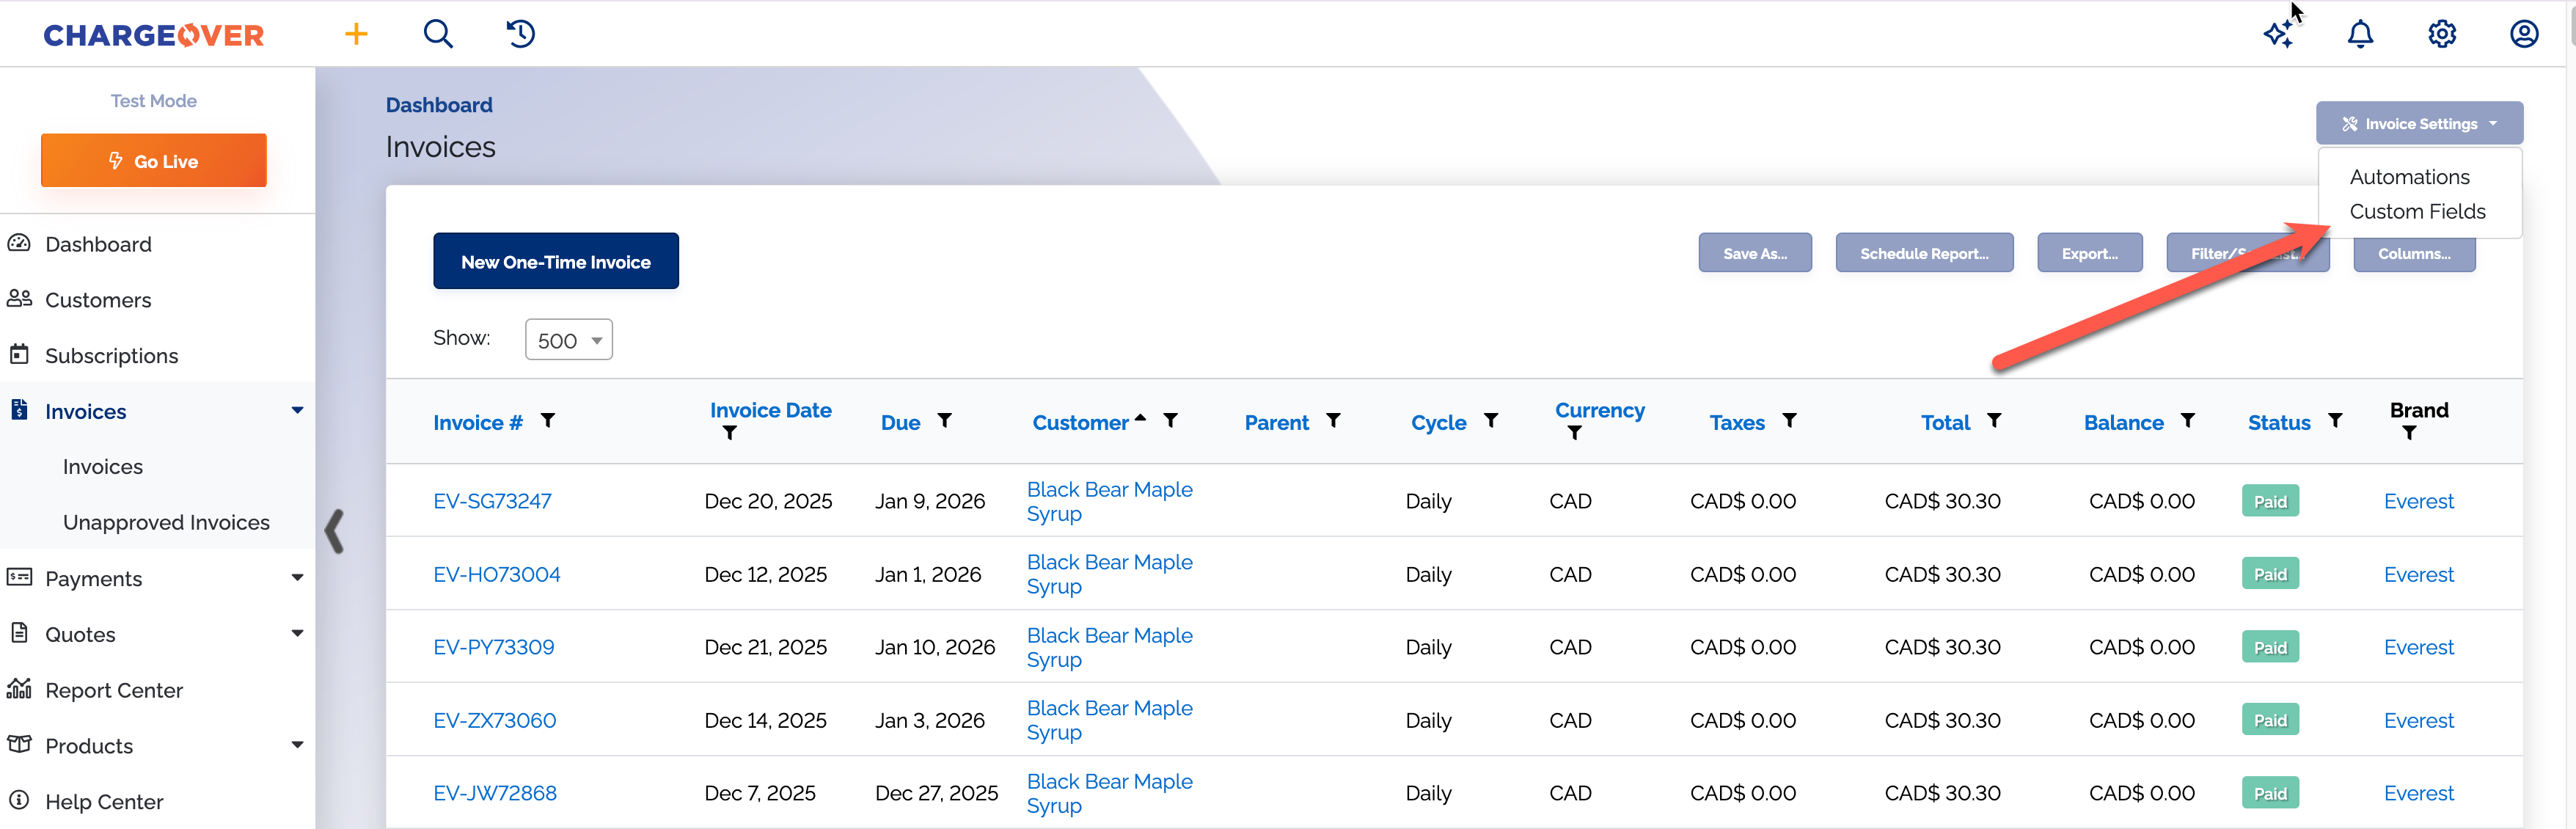
Custom fields should already be enabled in your account. You can tell if they are enabled by going to one of your tabs on the left navigation and clicking into one of them. For example, you can click into the Invoices tab and then click the invoice settings dropdown that is in the upper right hand corner of your screen. You should see custom fields listed there.
If you do not see the custom fields tab, you might need to enable custom fields. Here's how:
- To get started, go to your Settings and select the
Features tab. ThenMore Features - From the list of features, search for "Custom Fields" and select
Get Started
Create a custom field
- Select one of your tabs from the left navigation that you want to create a custom field for
- Click the dropdown called 'invoice settings' and select custom fields
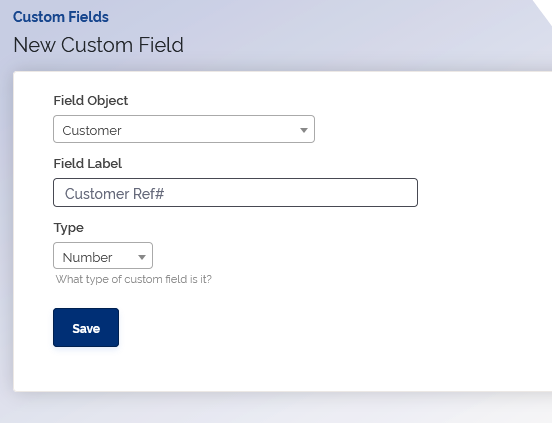
- Click
New Custom Field - Select the object you want the custom field associated with
- Enter the name of the custom field
- Specify the type of field, then hit
Save
Once you hit save, the custom field will be available for use. When you go to create a new customer or object in ChargeOver, you'll see the custom field and enter information into it.

Copy subscription custom fields to invoice custom fields
- First, head over to your Settings, select =Features
on the left, and then select Custom Fields== - Next, find the subscription custom field you want to have also exist on the invoice. You can also create a new custom field

- On the next page, you'll see an toggle option titled [Copy to Invoice?]
Set that to
Yes and select which invoice field you want to copy the data to or you can create a new one
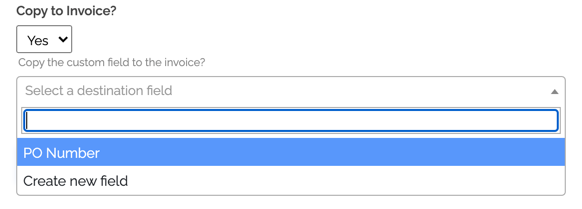
If you're choosing to copy to an existing invoice field, make sure the data types are the same. For example, put in a number if its a number custom field, or URL into a URL custom field.
If you choose to create a new field, we'll automatically create a new invoice custom field with the same name.
After you've saved the subscription custom field, all of your upcoming invoices will have this custom field now as well. Any data in the subscription custom field will begin to flow over to the invoice custom field.
Copy quote custom fields to subscription and invoice custom fields
- First, head over to your Settings, select
Features on the left, and then selectCustom Fields - Next, find the Quote custom field you want to have also exist on the invoice. You can also create a new custom field
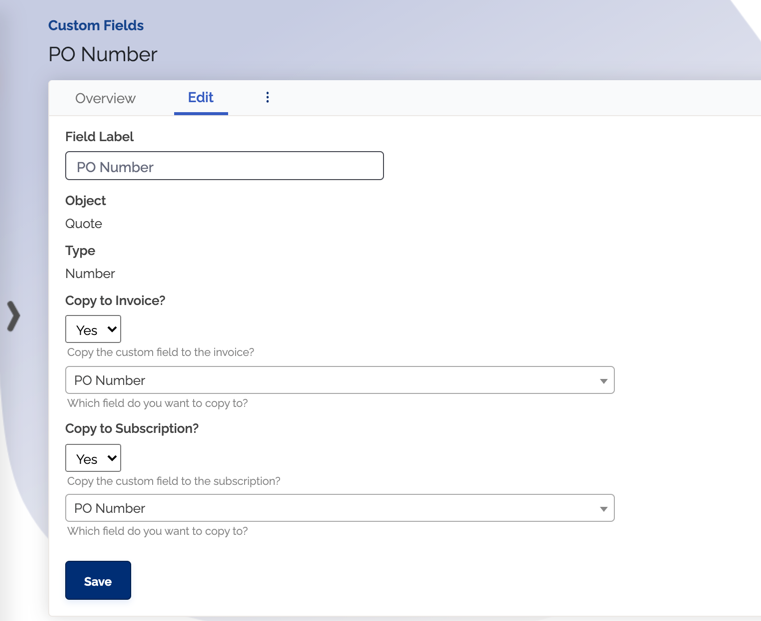
-
On the next page, you'll see two toggle options titled
Copy to Invoice? andCopy to Subscription? -
Set one or both of them to
Yes and select which custom field you want to copy the data to or you can create a new one
After you've saved the Quote custom field, all of your upcoming subscriptions and invoices will have this custom field now as well. Any data in the Quote custom field will begin to flow over to the invoice and subscription custom field.
Custom field limits
There is a hard maximum number of custom fields you can create for each type of object. Once you exceed the limit, you cannot create any more custom fields. If you exceed these limits and need more custom fields created, contact us and we can explore your options! These limits are below.
- Admin Users - 5
- Brands - 5
- Contacts - 5
- Customers - 50
- Invoices - 20
- Invoice Lines - 20
- Products & Discounts - 20
- Quotes - 20
- Quote Lines - 20
- Subscriptions - 20
- Subscription Lines - 20
- Transactions (Payments, refunds, credits) - 5
Delete a custom field
- To begin deleting a custom field, navigate to your Settings and click on
Features . Then selectCustom Fields - Next, select the custom field from your list
- Last, select the vertical 3 dots and select
Delete Custom Field
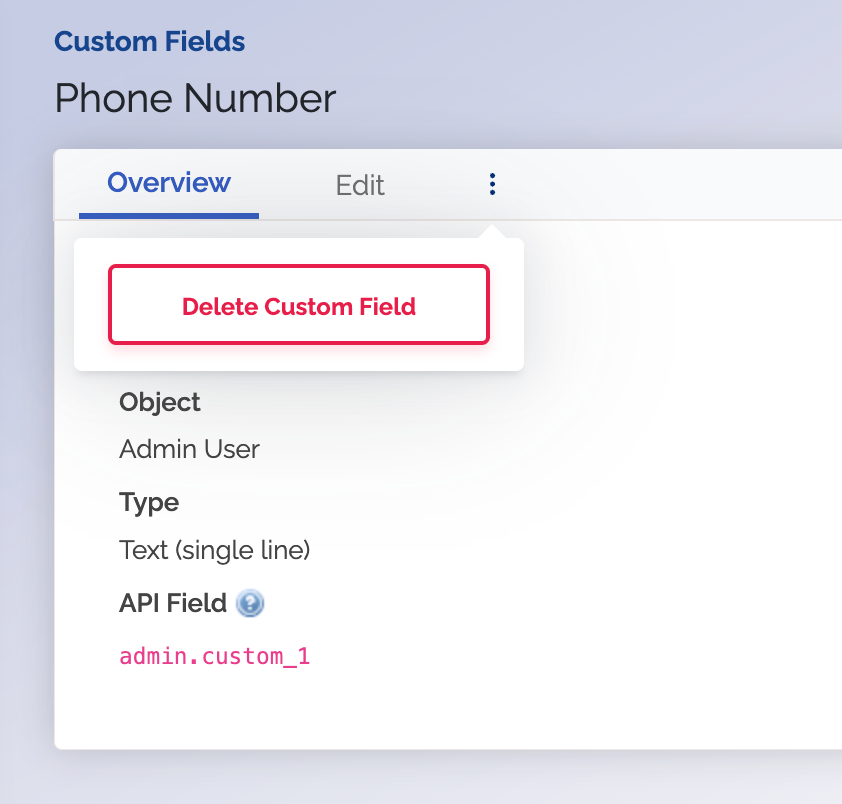
If a custom field has been used already, it cannot be deleted, only disabled.
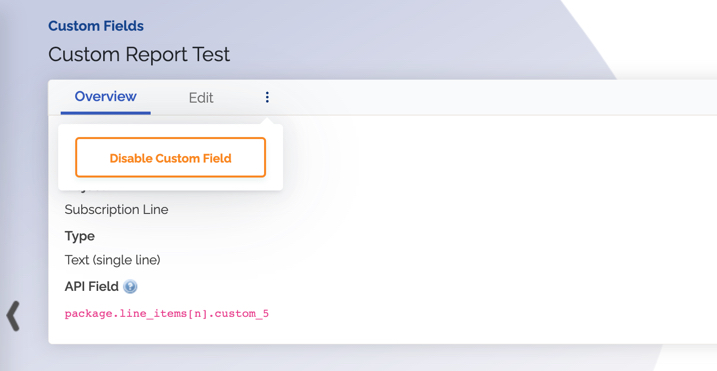
Disable a custom field
- To begin disabling a custom field, navigate to your Settings and select
Features Then selectCustom Fields - Select the custom field you want to disable from your list
- Select the vertical 3 dots and click
Disable Custom Field