Managing invoicing
Create a one-time invoice
As you can guess, one-time invoices occur once, before they stop. You can schedule one-time invoices if you want to spread out what a client is paying, over a period of time. You can also use one-time invoices if you want to create an invoice immediately instead of waiting for a subscription to invoice your customer. This is usually used in special cases, but can be prove to be highly effective if you are on a time crunch and need to invoice a customer immediately.
Steps
- Select
Invoices from the left menu
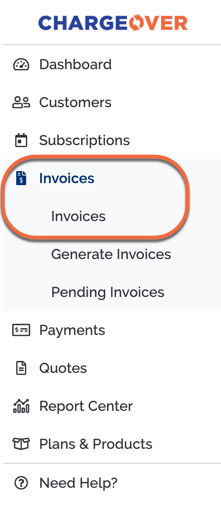
- Click on the
New Invoice button
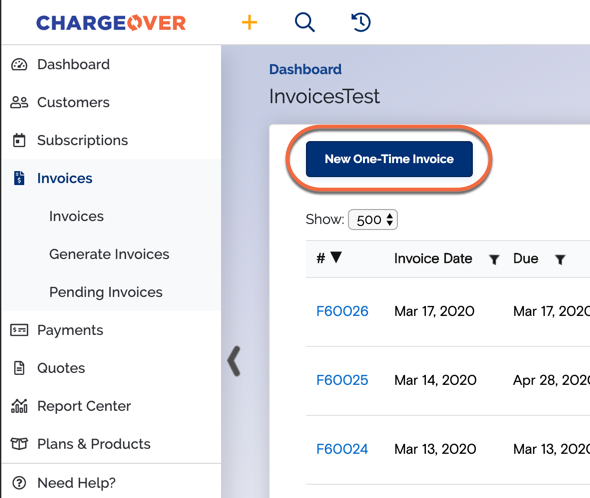
- From the dropdown, select the customer you're making the invoice for
- Add your products and make any changes to the descriptions, quantity, and rate as needed
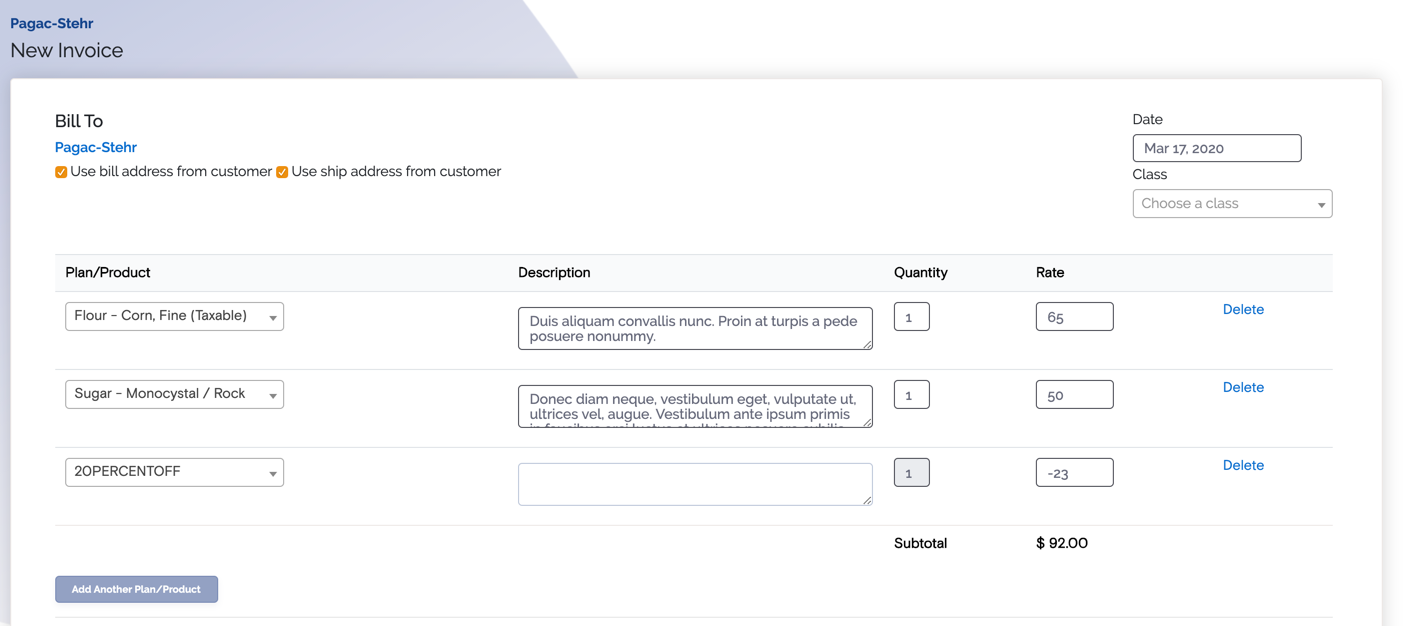
- Once you've selected the products you want to invoice, click
Save Invoice
The invoice has been created and is now ready to be emailed.
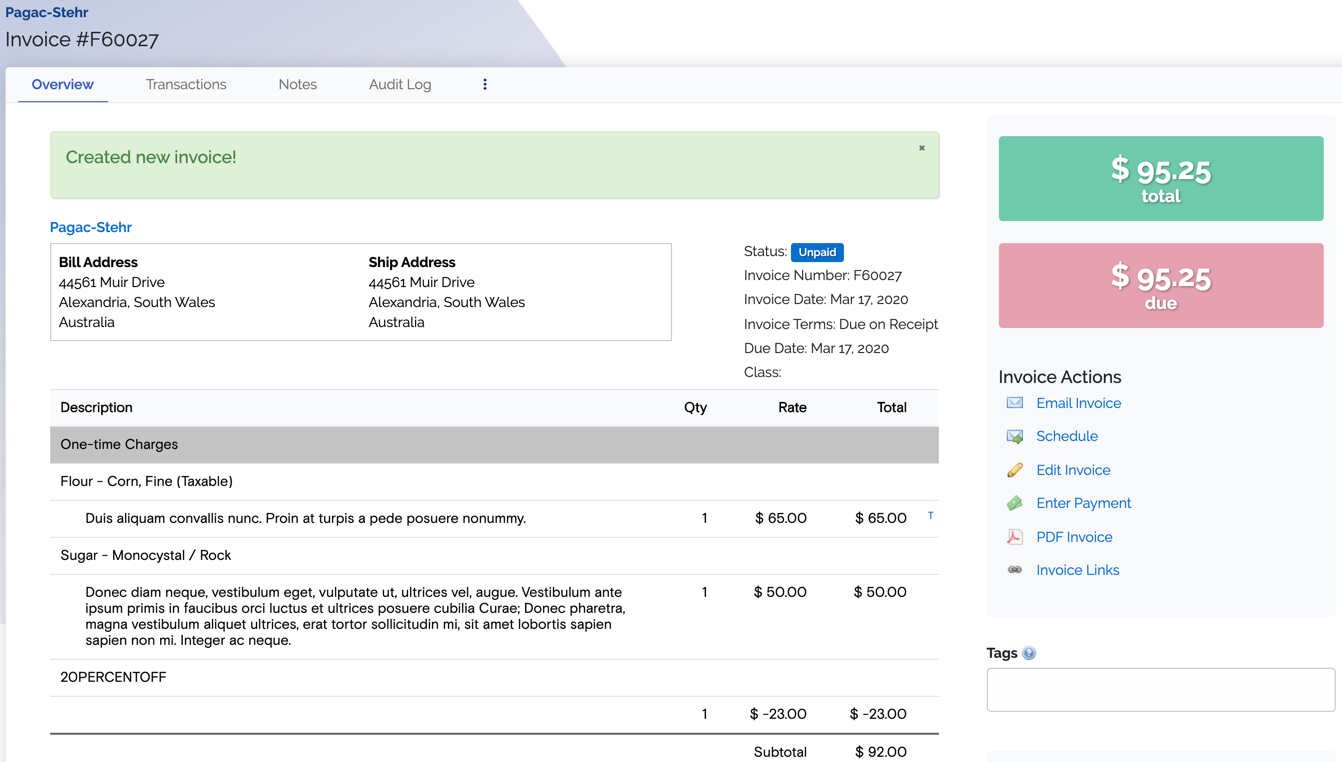
Edit an invoice
ChargeOver allows you to edit an invoice once it's been created. Editing an invoice will let you change line items, the rate for the line items, billing address, net terms, and much more!
- First, you'll want to navigate to the invoice you're looking to edit.
- Then, underneath "Invoice Actions" you'll find an option to "Edit Invoice"
Save changes when done
Unapproved invoices
The Unapproved Invoices feature allows you to review invoices that are automatically generated before they are sent to customers or charged. It is also possible to selectively choose which subscriptions generate an "unapproved" invoice, and which ones do not and thus automatically send emails and run payments.
If you would like this feature turned on in your account please contact us, and a ChargeOver support representative will make the necessary configuration adjustments in your account.
While the unapproved invoices feature is turned on, no invoices will be sent out to customers or paid automatically, until you approve them.
Invoices that are not yet approved will appear on the Unapproved Invoices section of the menu.
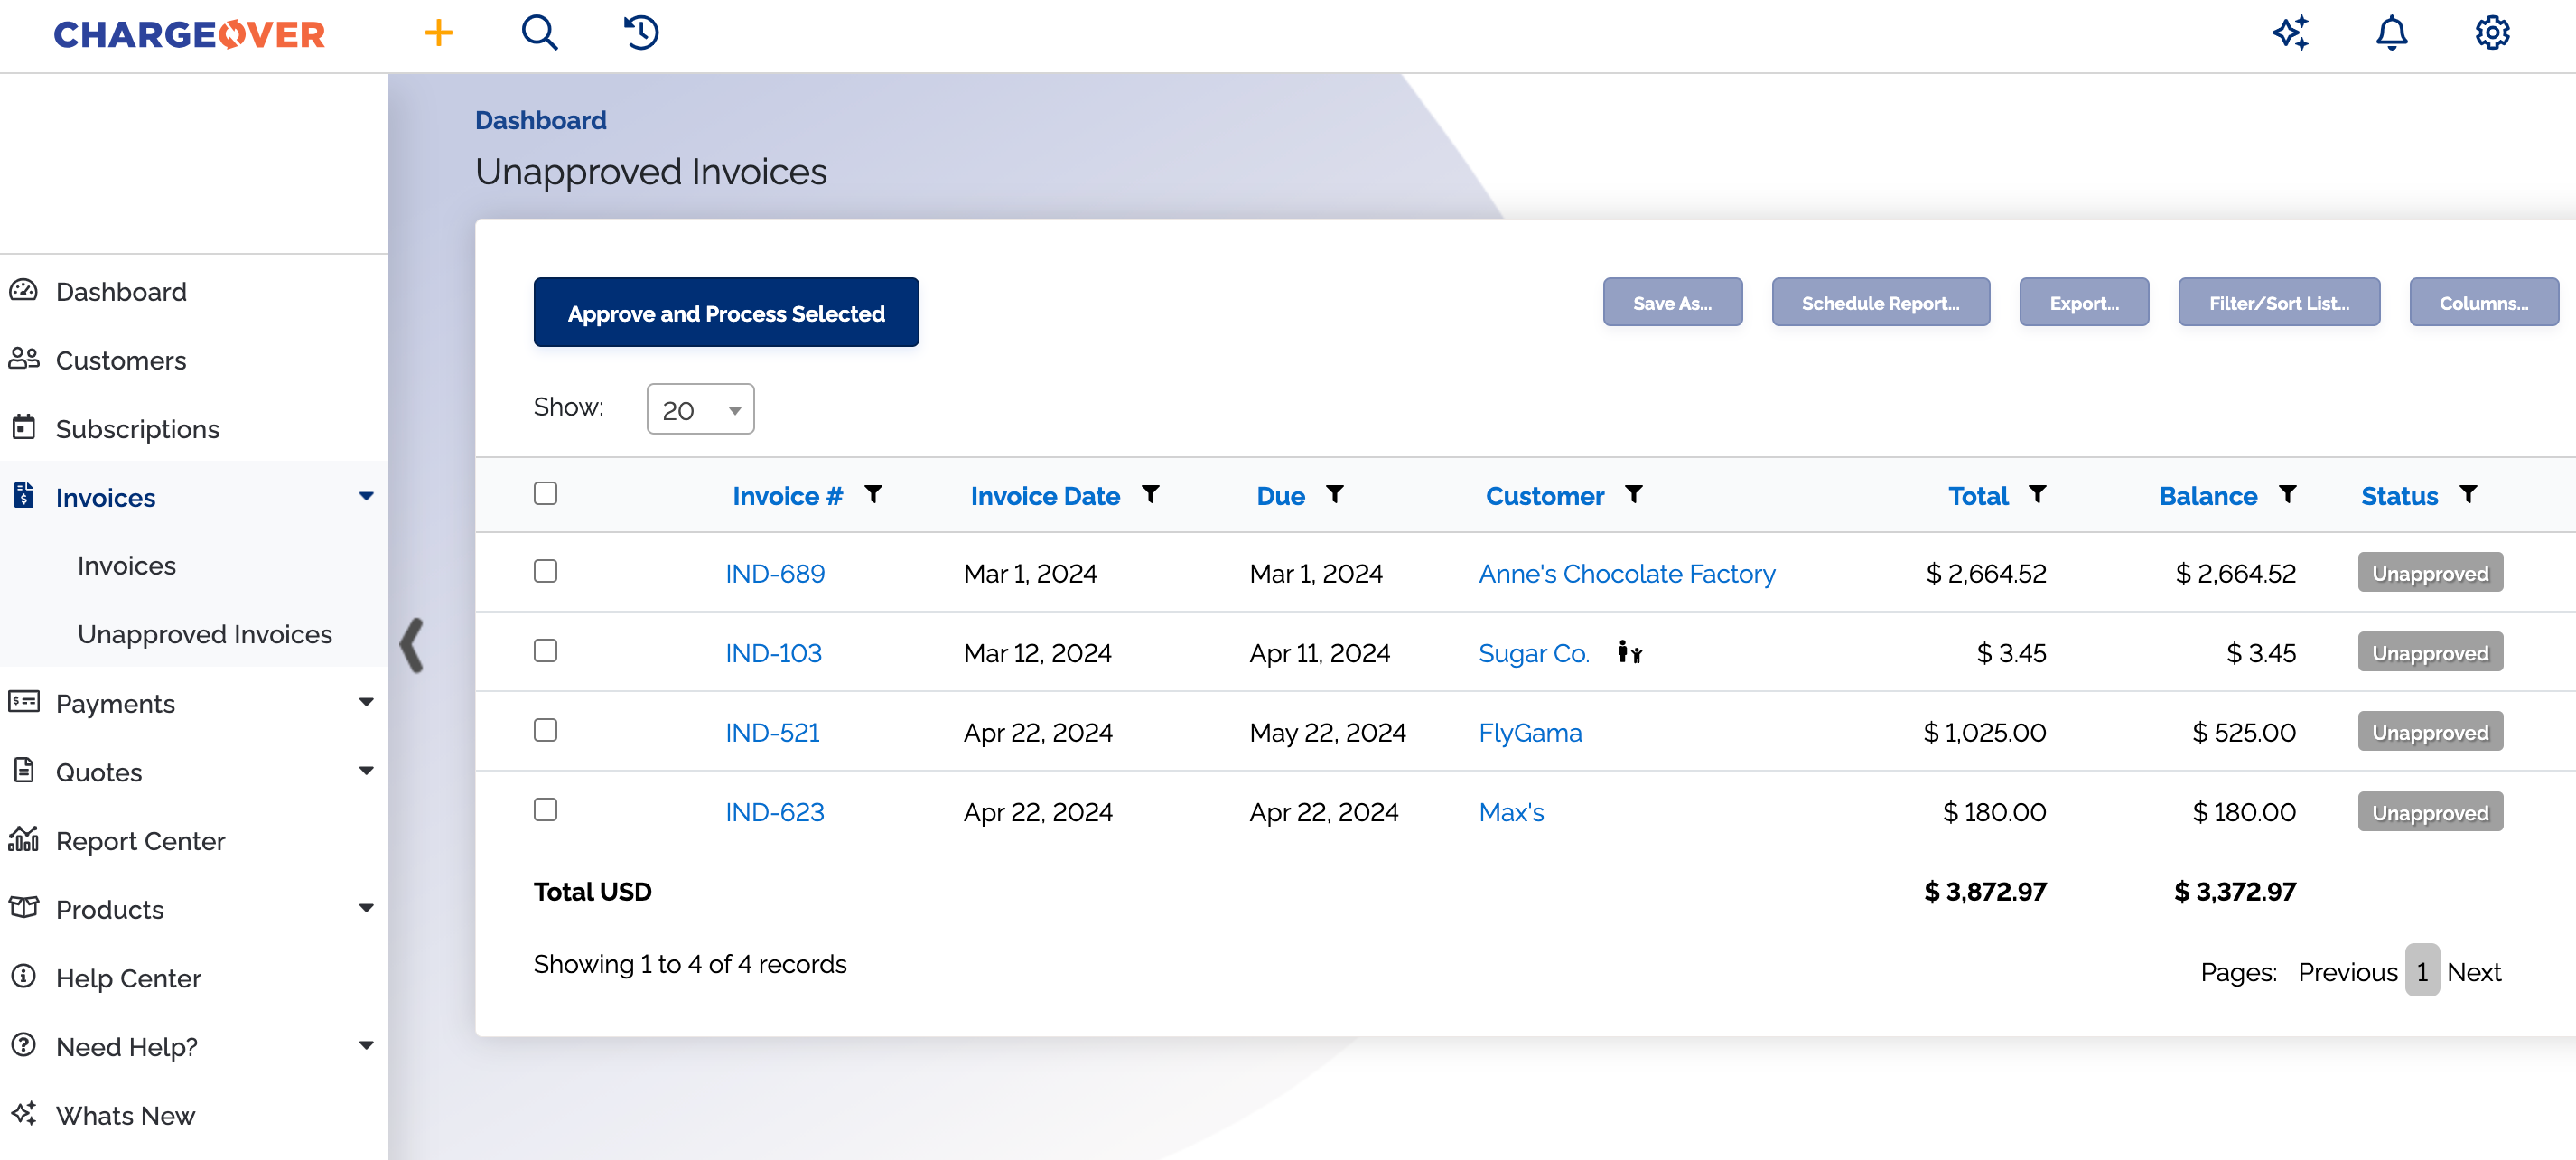
When you process an invoice, the invoice will be sent to the customer, and a payment will be ran if the customer is on auto-pay.
You can also approve an invoice at any time when looking at the invoice itself.
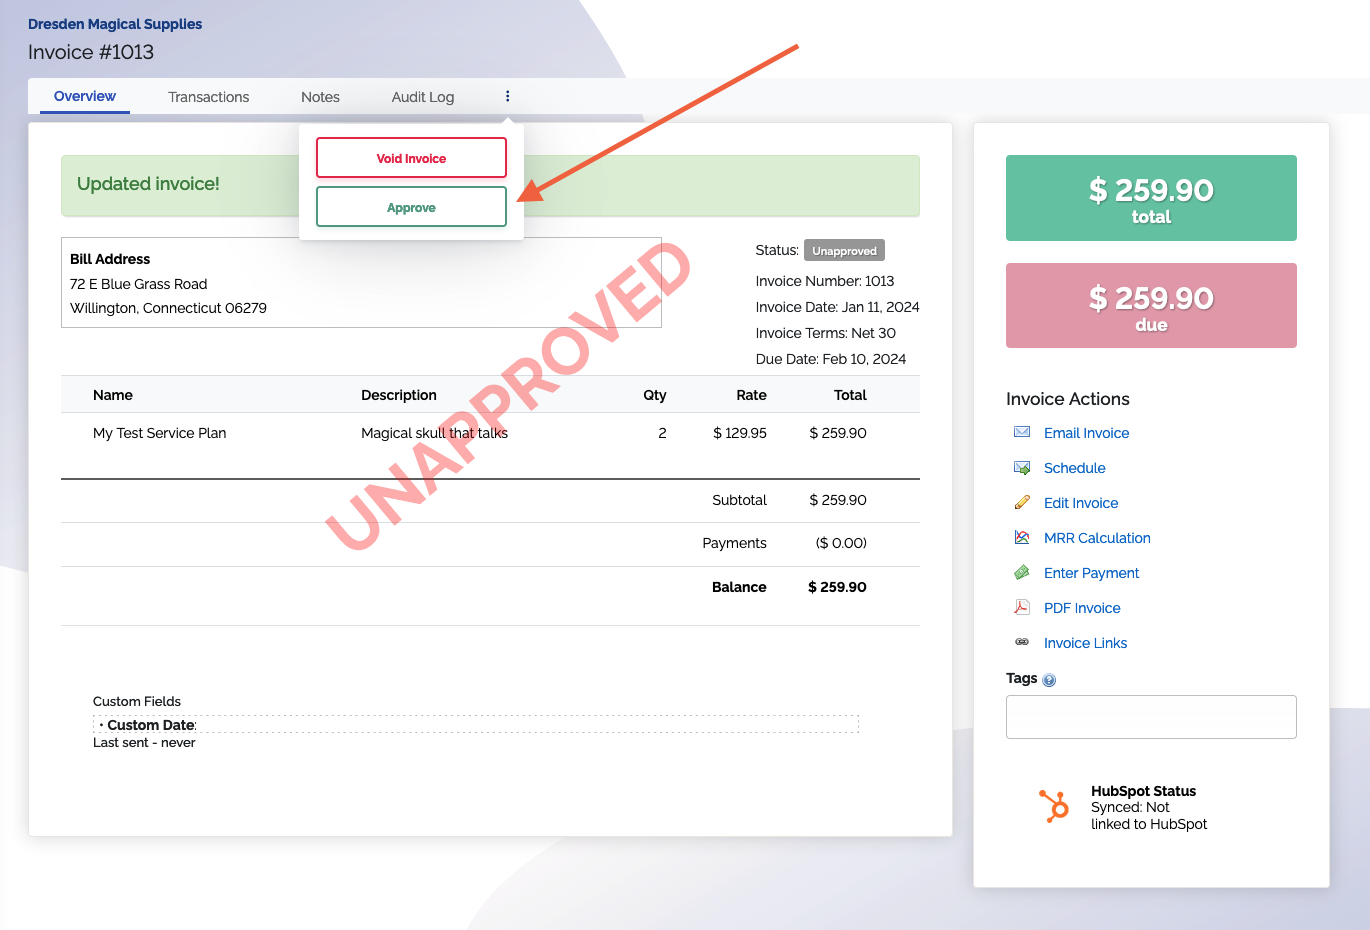
Unapproved invoices are not visible to customers. You must approve an invoice before a customer will be able to view or pay for the invoice.
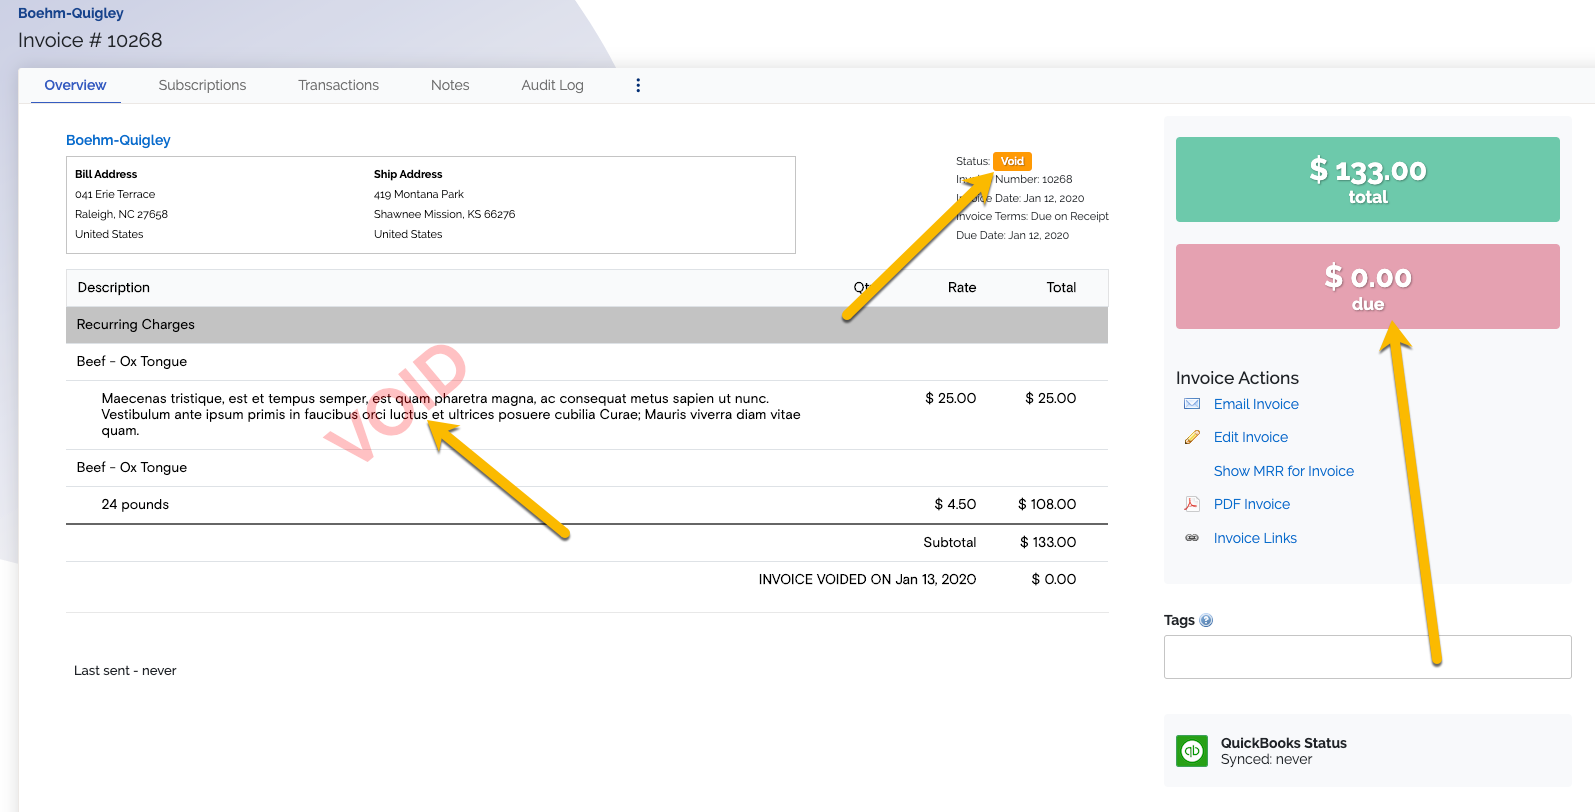
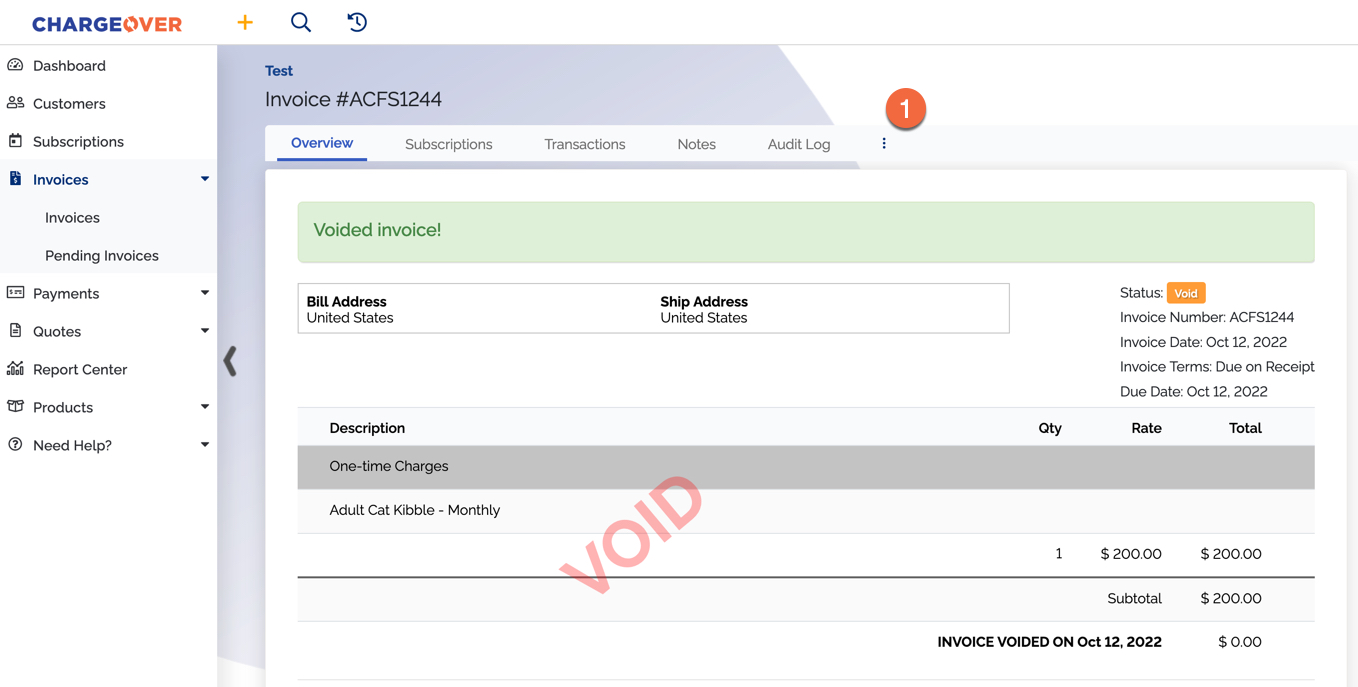
Void an invoice
If you've accidentally created an invoice or have a customer that no longer needs the invoice, ChargeOver allows you to void that invoice.
Marking an invoice as void will essentially set the total of the invoice to zero, so no money will be owed or collected.
Keep in mind
- If there is a payment applied to the invoice, you must refund the payment first. You cannot void an invoice if there is a payment, full or partial, applied
- If you are integrated with QuickBooks Online, QuickBooks for Windows, or Xero, then the invoice will be marked void in those systems as well
Steps to void
- Find the invoice, and look at the invoice details
- Click the three vertical dots in the invoice header, this will reveal the "Void Invoice" button
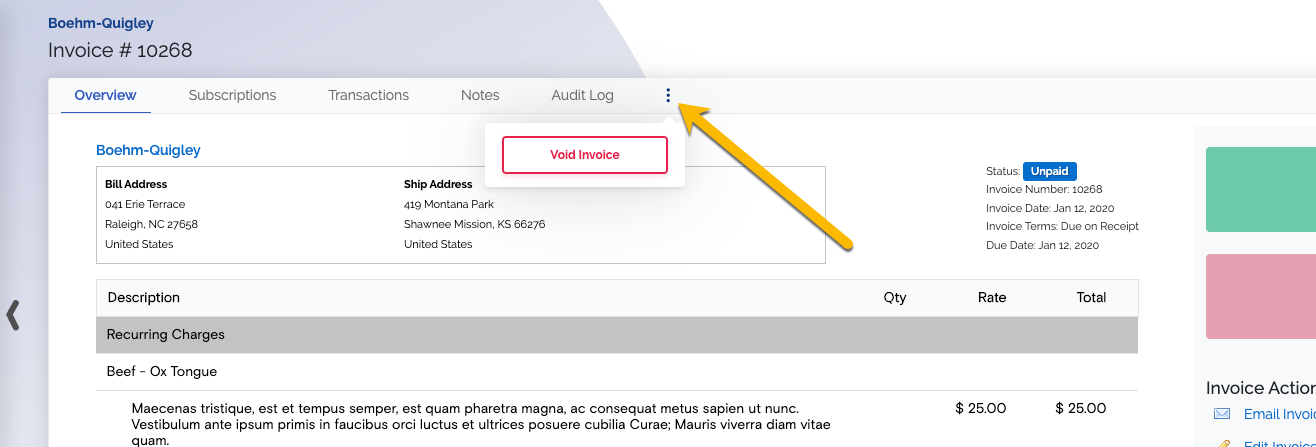
- You will be prompted to confirm your choice to void the invoice
- One you confirm, the invoice will be marked as void and the balance of the invoice will move to zero!
If you're not sure if you should void the invoice or would like another option to deal with the balance, don't hesitate to contact us and we'll be more than happy to help!
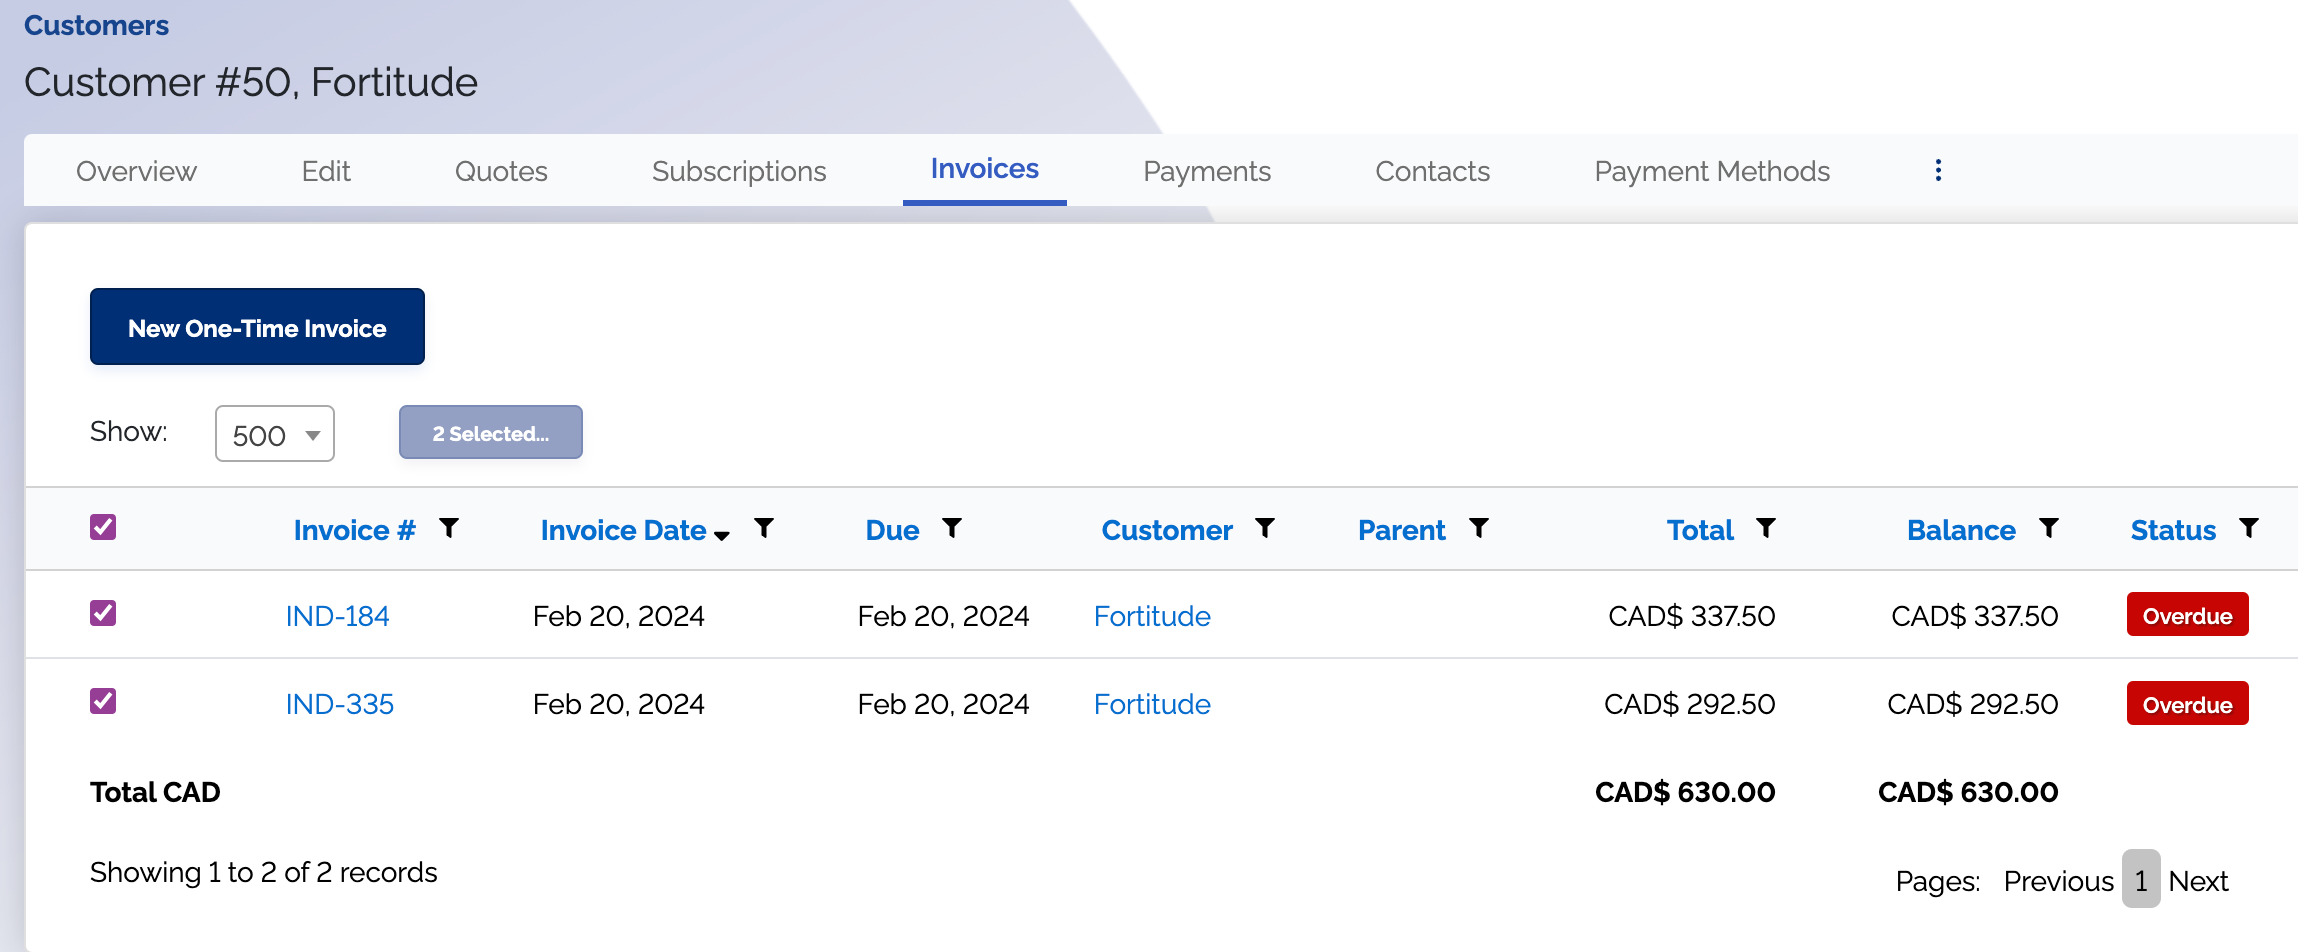
Mass void invoices
If you would like to mass void invoices for a customer, you can do so.
- Go to the customer you want to void invoices for
- Then go to the Invoices tab under the customer
- Select the invoices you want to void
- Click the button that says
# selected 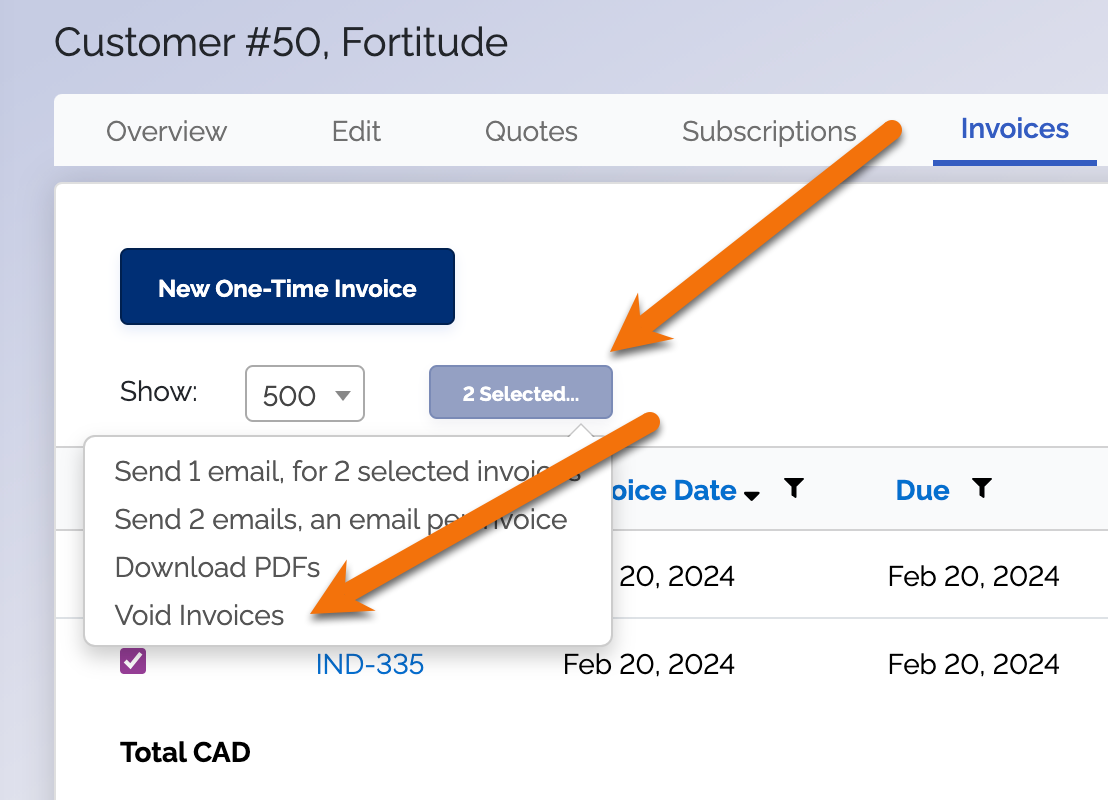
- Select Void Invoices
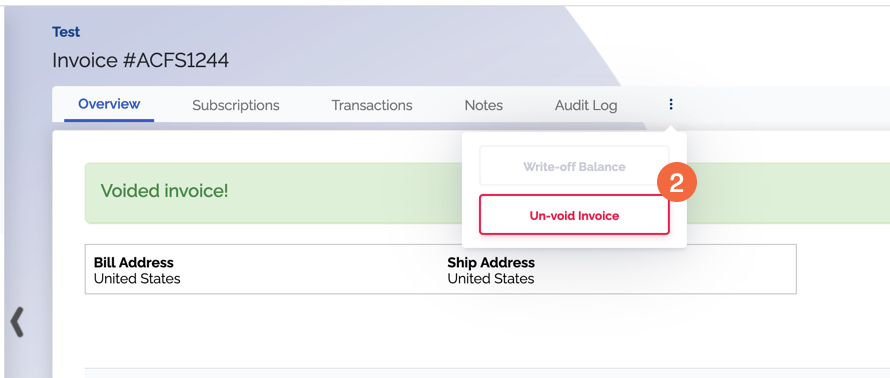
Unvoid an invoice
It happens to the best of us, quickly clicking through the different invoices and you accidentally void an invoice. No worries, we've made it simple to unvoid an invoice.
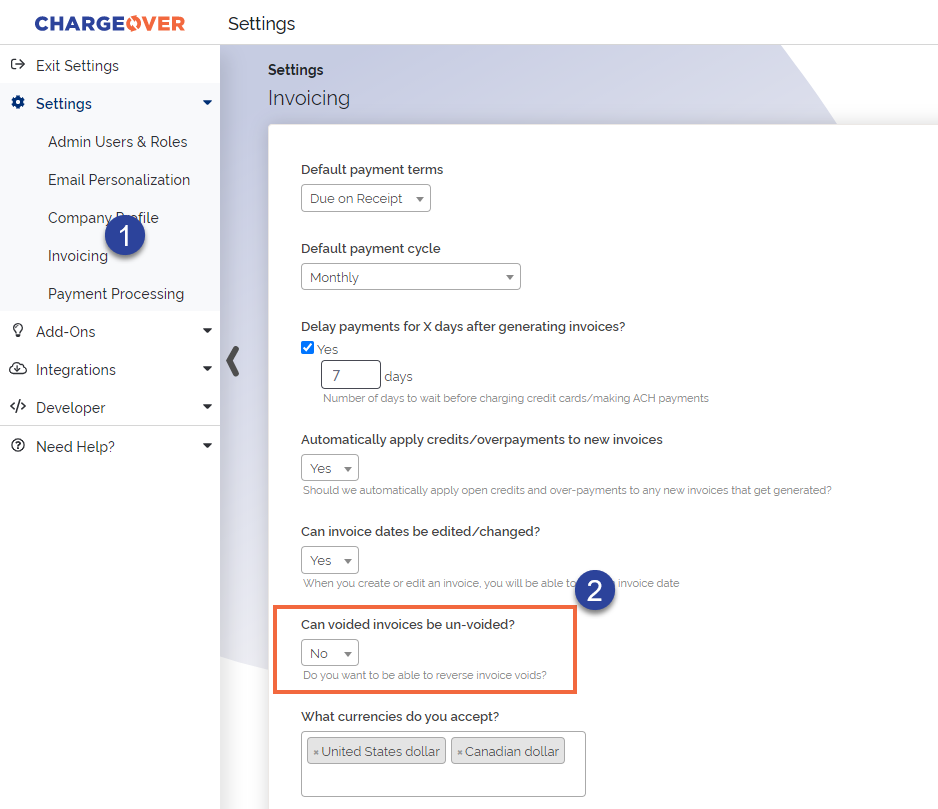
You will want to make sure you have the ability to unvoid the invoice, enabled in your account settings.
Steps
- Head over to your account settings and select
Invoicing from the left menu - Once you're on the invoicing page, select
Yes from the dropdown "Can voided invoices be unvoided?
Now that it is enabled, let's go back to the invoice. You can unvoid the invoice the same way you voided it.
- Go to the invoice and click the three vertical dots
- Click
Unvoid Invoice
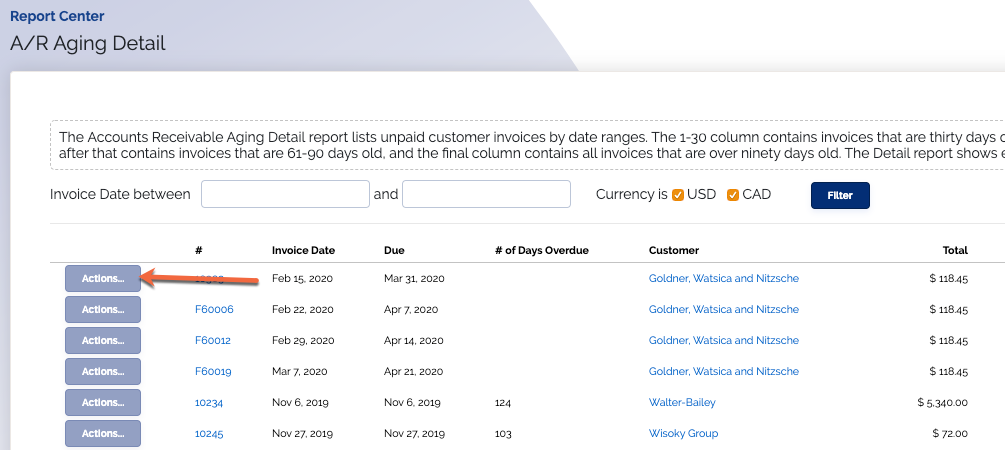
Mark an invoice for collections
ChargeOver's Collections status functions only as a way to keep track of and report on invoices you have sent to a collections agency.
Do you have an overdue invoice that was sent to collections? ChargeOver supports marking these invoices with a Collections status, making them reportable and allowing you to easily keep track of what invoices you have sent to collections.
Steps
- Go to the
Report Center
- If you want to mark all overdue invoices a customer has for collections, click into the A/R Aging Summary report. Or, if you want to mark each invoice for collections individually, click into the A/R Aging Detail report
- On each of these reports, you will see an
Actions button in the leftmost column of each row - Click the
Actions button and selectMark for collections
If you click into the invoice, you will now see that the invoice status is "Collections"
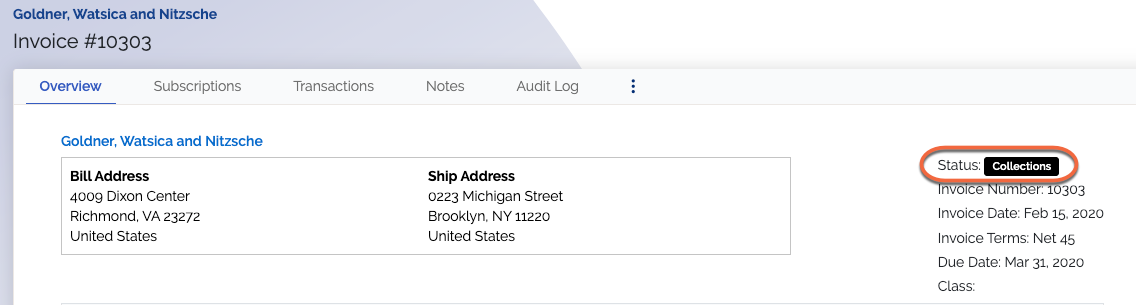
Marking an invoice for Collections in ChargeOver does not actually send the invoice to a collections agency, so you make sure you don't forget to go do that.
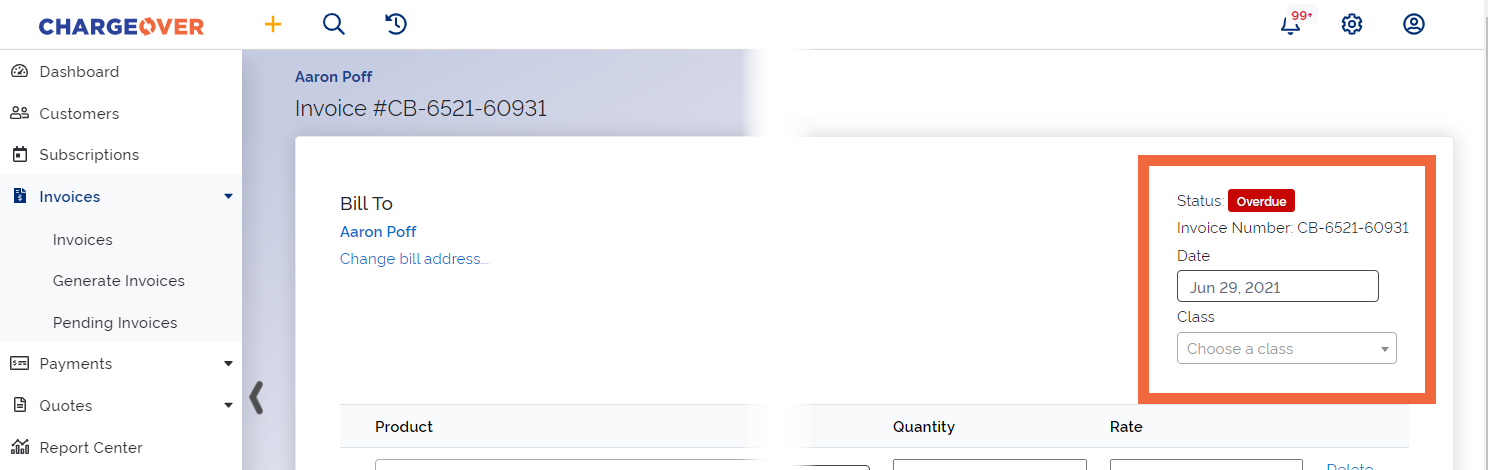
Change an invoice date
Invoice dates can be changed when creating the invoice or after the invoice has been generated.
- Go to your Settings page and click the
Invoicing tab on the left dashboard - Change "Can invoice dates be edited or changed?" to Yes
When editing or creating an invoice, you will now see a date dropdown in the top corner of the page.
If you want to change the date of a transaction, contact support@chargeover.com.
Create custom invoice numbers
By default, ChargeOver will use an incrementing sequence for invoice numbers.
For example, the first invoice generated will be invoice number one, the second will be invoice number two and so on.
If you would rather use a custom invoice number format, ChargeOver supports that too.
Steps
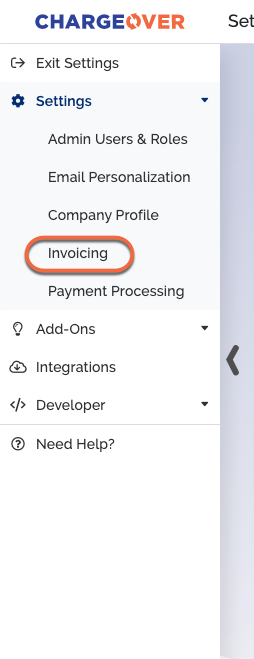
- Go to Settings then click on
Invoicing
- From here you can scroll down to the "Custom invoice reference number format" field
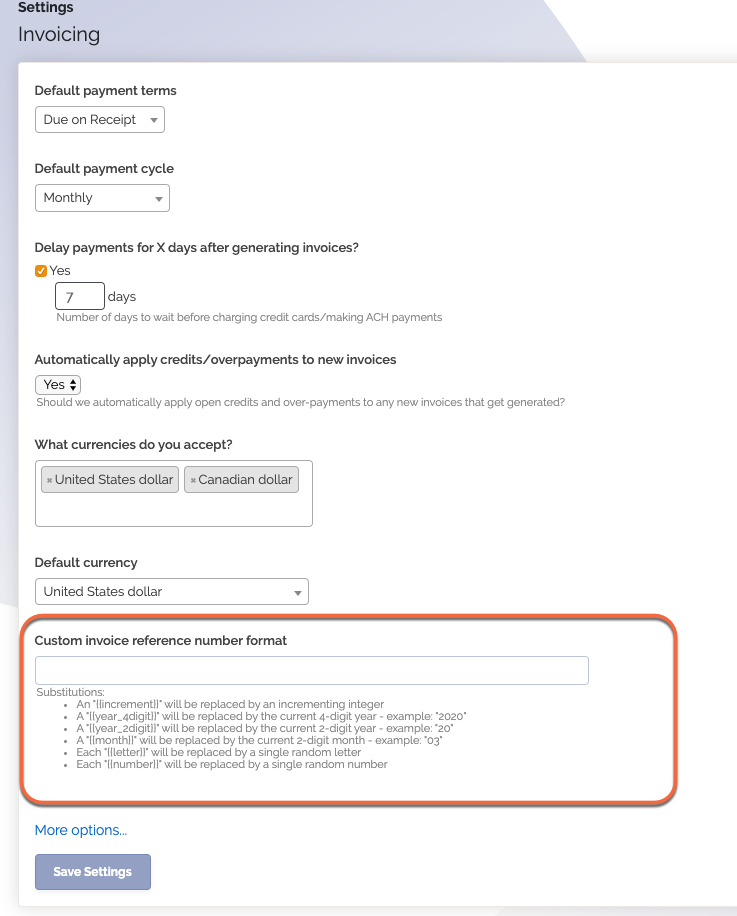
- You can use placeholders to invent a custom invoice number format
Supported placeholders or substitutions are the following
{{letter}}- will be replaced by a random letter{{number}}- will be replaced by a random number{{increment}}- will be replaced by an incrementing integer”{{year\_2digit}}will be replaced by the last 2 digits of the current year (e.g. "21"){{year\_4digit}}- will be replaced by the current year (e.g. "2021")
Example invoice number formats
{{letter}}``{{letter}}``{{number}}``{{number}}-{{increment}}-{{year\_4digit}}- will result in two random letters, two random digits, an incrementing number, and this year. For example- BE62-1-2021
- KE73-2-2021
- JK98-3-2021
- web
{{increment}}-{{year\_4digit}}- will result in the word “web”, an incrementing number, and this year. For example- web1-2021
- web2-2021
- web3-2021
- **
{{number}}``{{number}}``{{number}}``{{number}}-{{letter}}``{{letter}}``{{letter}}``{{letter}}-**will result in 4 random digits, and 4 random letters. For example- EKBW-8623
- BMEG-2386
- KEGD-8347
The possibilities are endless. If you have any other questions about how to use custom invoice numbers, don't hesitate to contact us.
Require certain fields at checkout
You can choose what information is required for your customers to give you when making a payment.
For example, if you want to make sure the customer always enters their phone number, you can set that field to be required when the customer is checking out.
By default, we only prompt for the card number, expiration date and cardholder name when paying.
This is what it looks like.
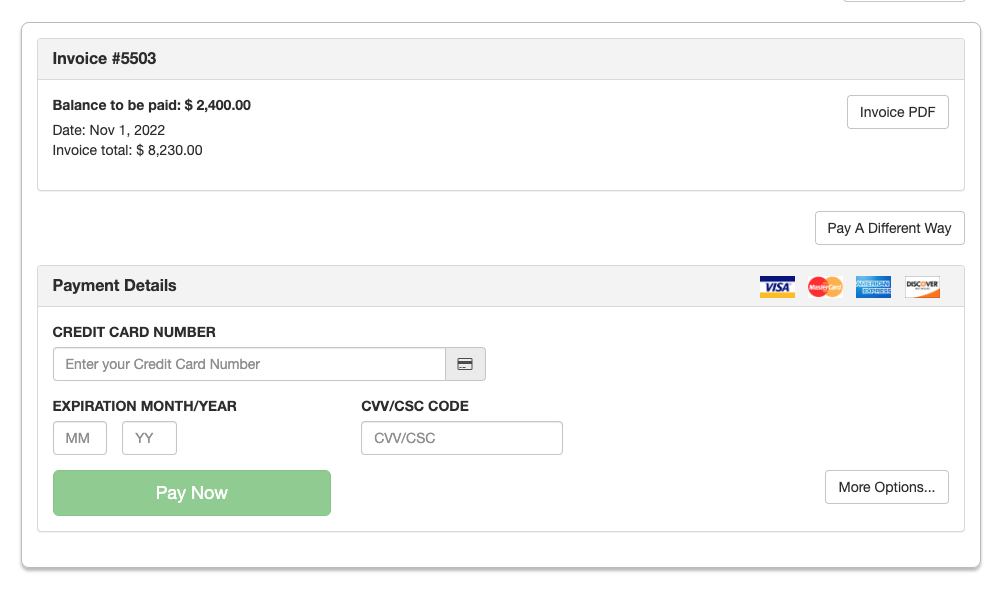
If you would like other information mandatory when a custom is checking out, you can make the fields required by editing your payment gateway settings in ChargeOver.
Steps
- Navigate to your settings by selecting the gear icon in the top right corner
- From the left menu, select
Payment Processing - Select the payment gateway/payment method you want to enable the requirements on
- Click on 'More Options...'
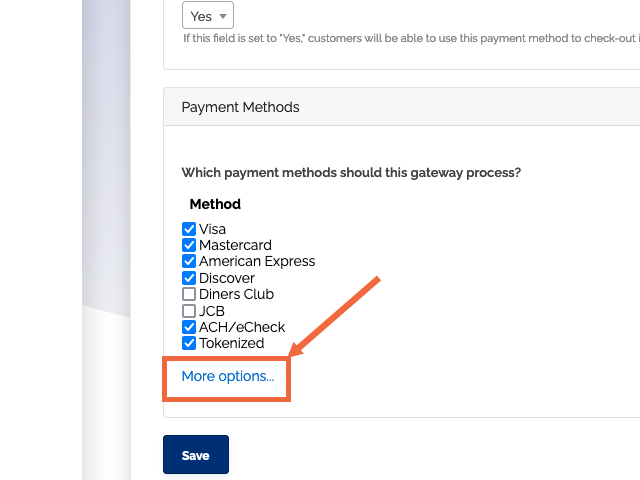
- Select which fields you want to be required when customers are using this payment method to pay
Save your changes
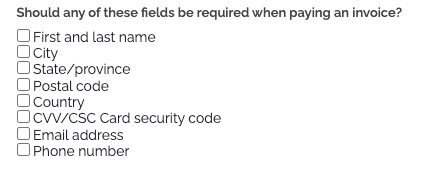
From then on the fields you have chosen will show up on the invoice payment page when a customer wants to pay an invoice.
Fields you can set as required
- First and last name
- City
- State or province
- Zip or postal code
- Country
- Email address
- Phone number