Hosted Sign-Up Pages
Overview
ChargeOver provides hosted sign-up pages or checkout forms for each of your plans and products. Customers can go to these pages straight from your website and sign up for subscriptions all on one page. All of their information will be saved in ChargeOver after they have checked out.
Enable hosted sign-up pages
- Go to your Settings then click the tab
Features , thenMore Features - Search for "Hosted Sign-up Pages"
- Click
Get Started - To add and customize a new hosted signup template, click the
New Hosted Form button- You can also edit an already existing template by clicking the name of the form you want to edit and select the "Edit Tab"
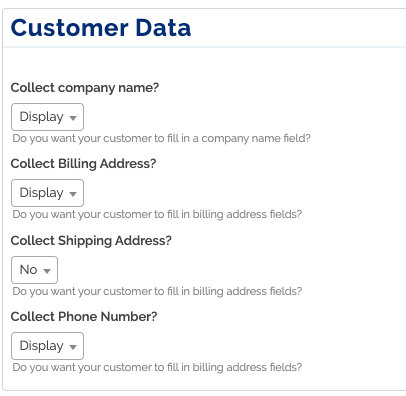
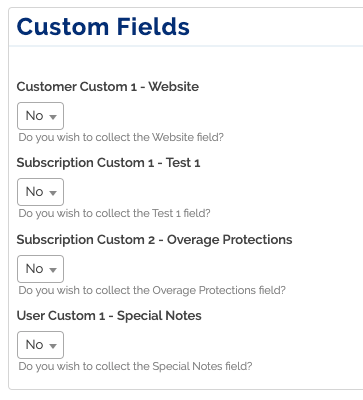
- You'll be brought to a page with an array of options that allow you to choose things like the following.
- What fields are on the form
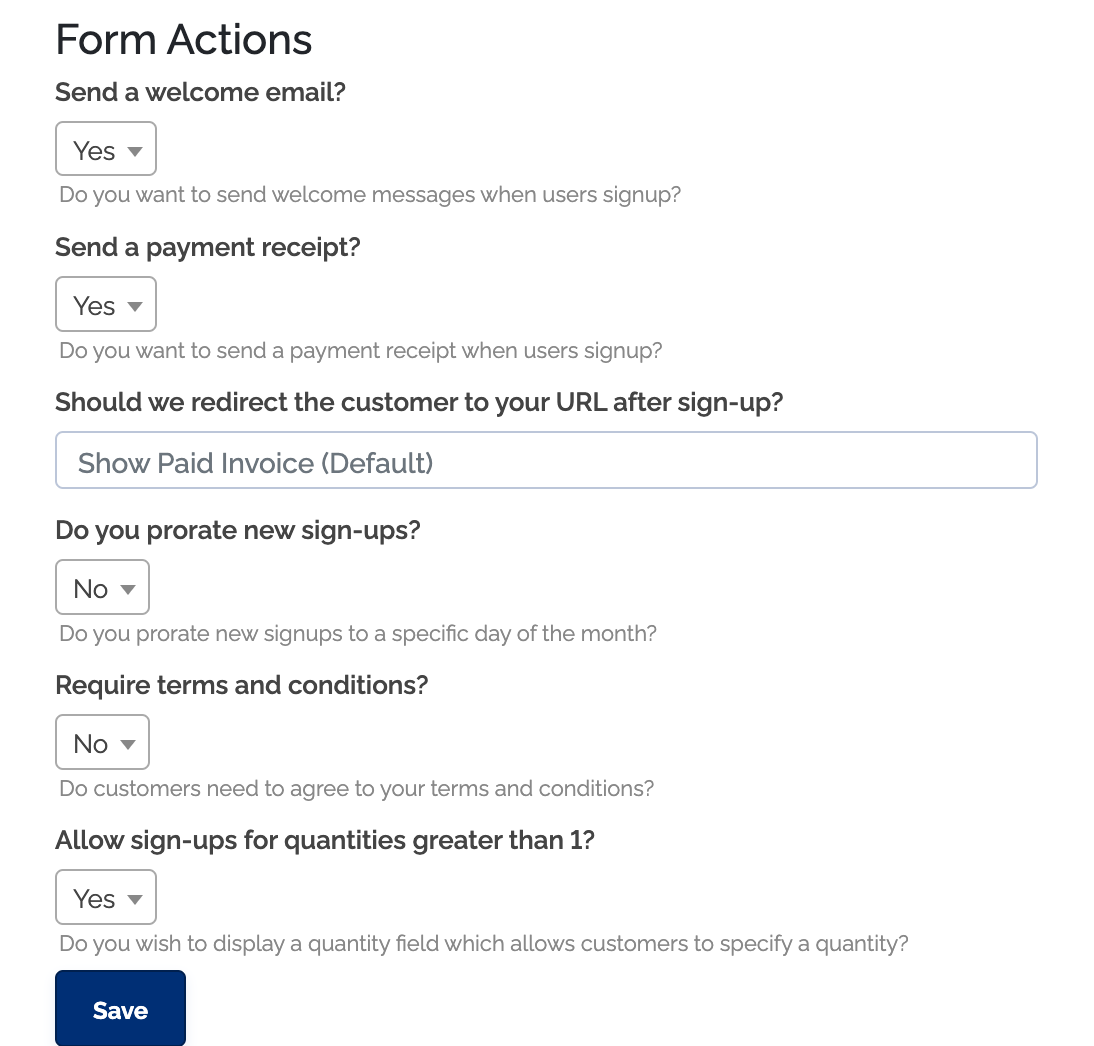
- Whether the customer should be sent a welcome email or payment receipt after signing up
- Whether to show terms and conditions
If you do not see the option for a customization you would like to make, you can contact us. We may be able to make additional changes for you that are not available in the UI.
Find sign-up page link on a specific plan or product
- Go to your
Products tab - Click on the product you want to find the link for
- Under Plan and Product Overview, click the
Hosted Sign-up Form button

- This will give you the link to the hosted signup form. You can send this link to your customers or link to it from your webpage
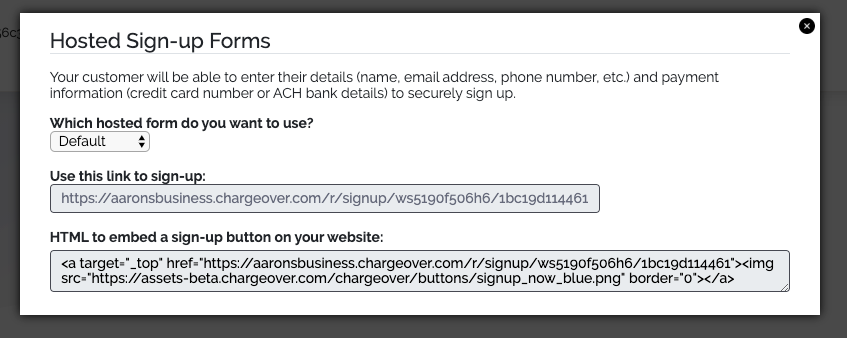
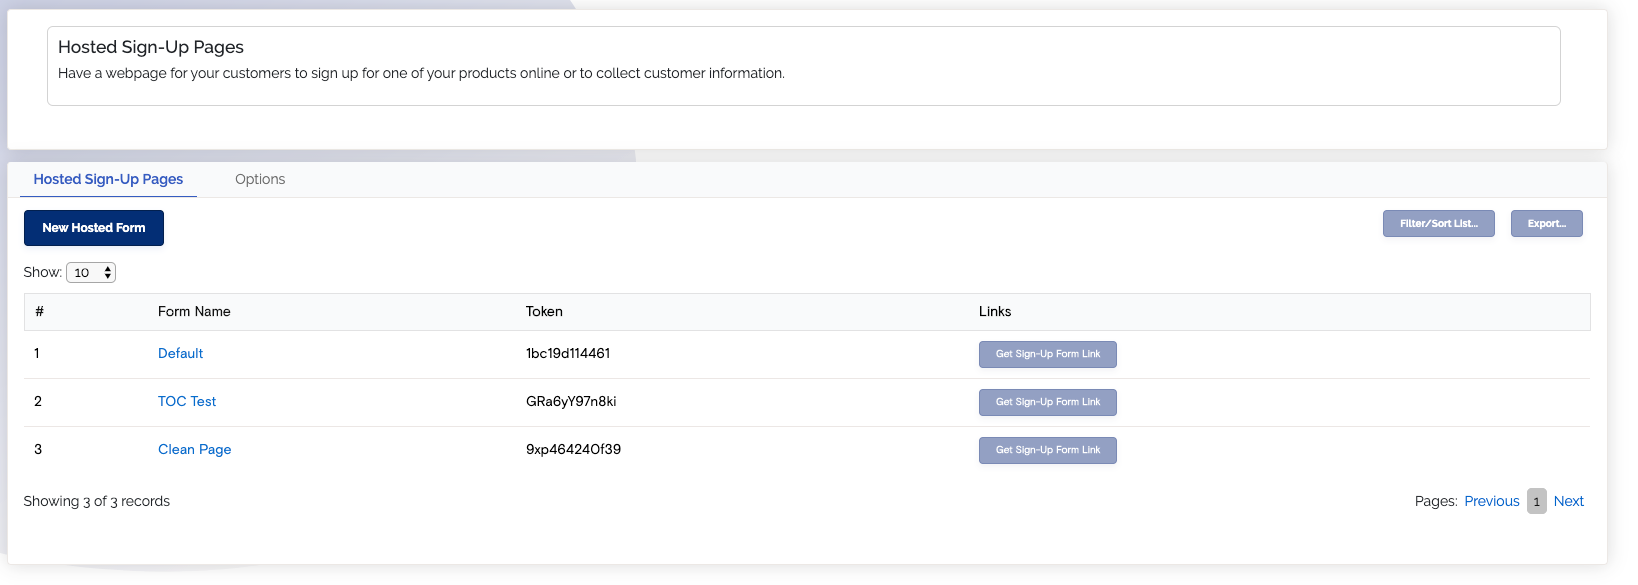
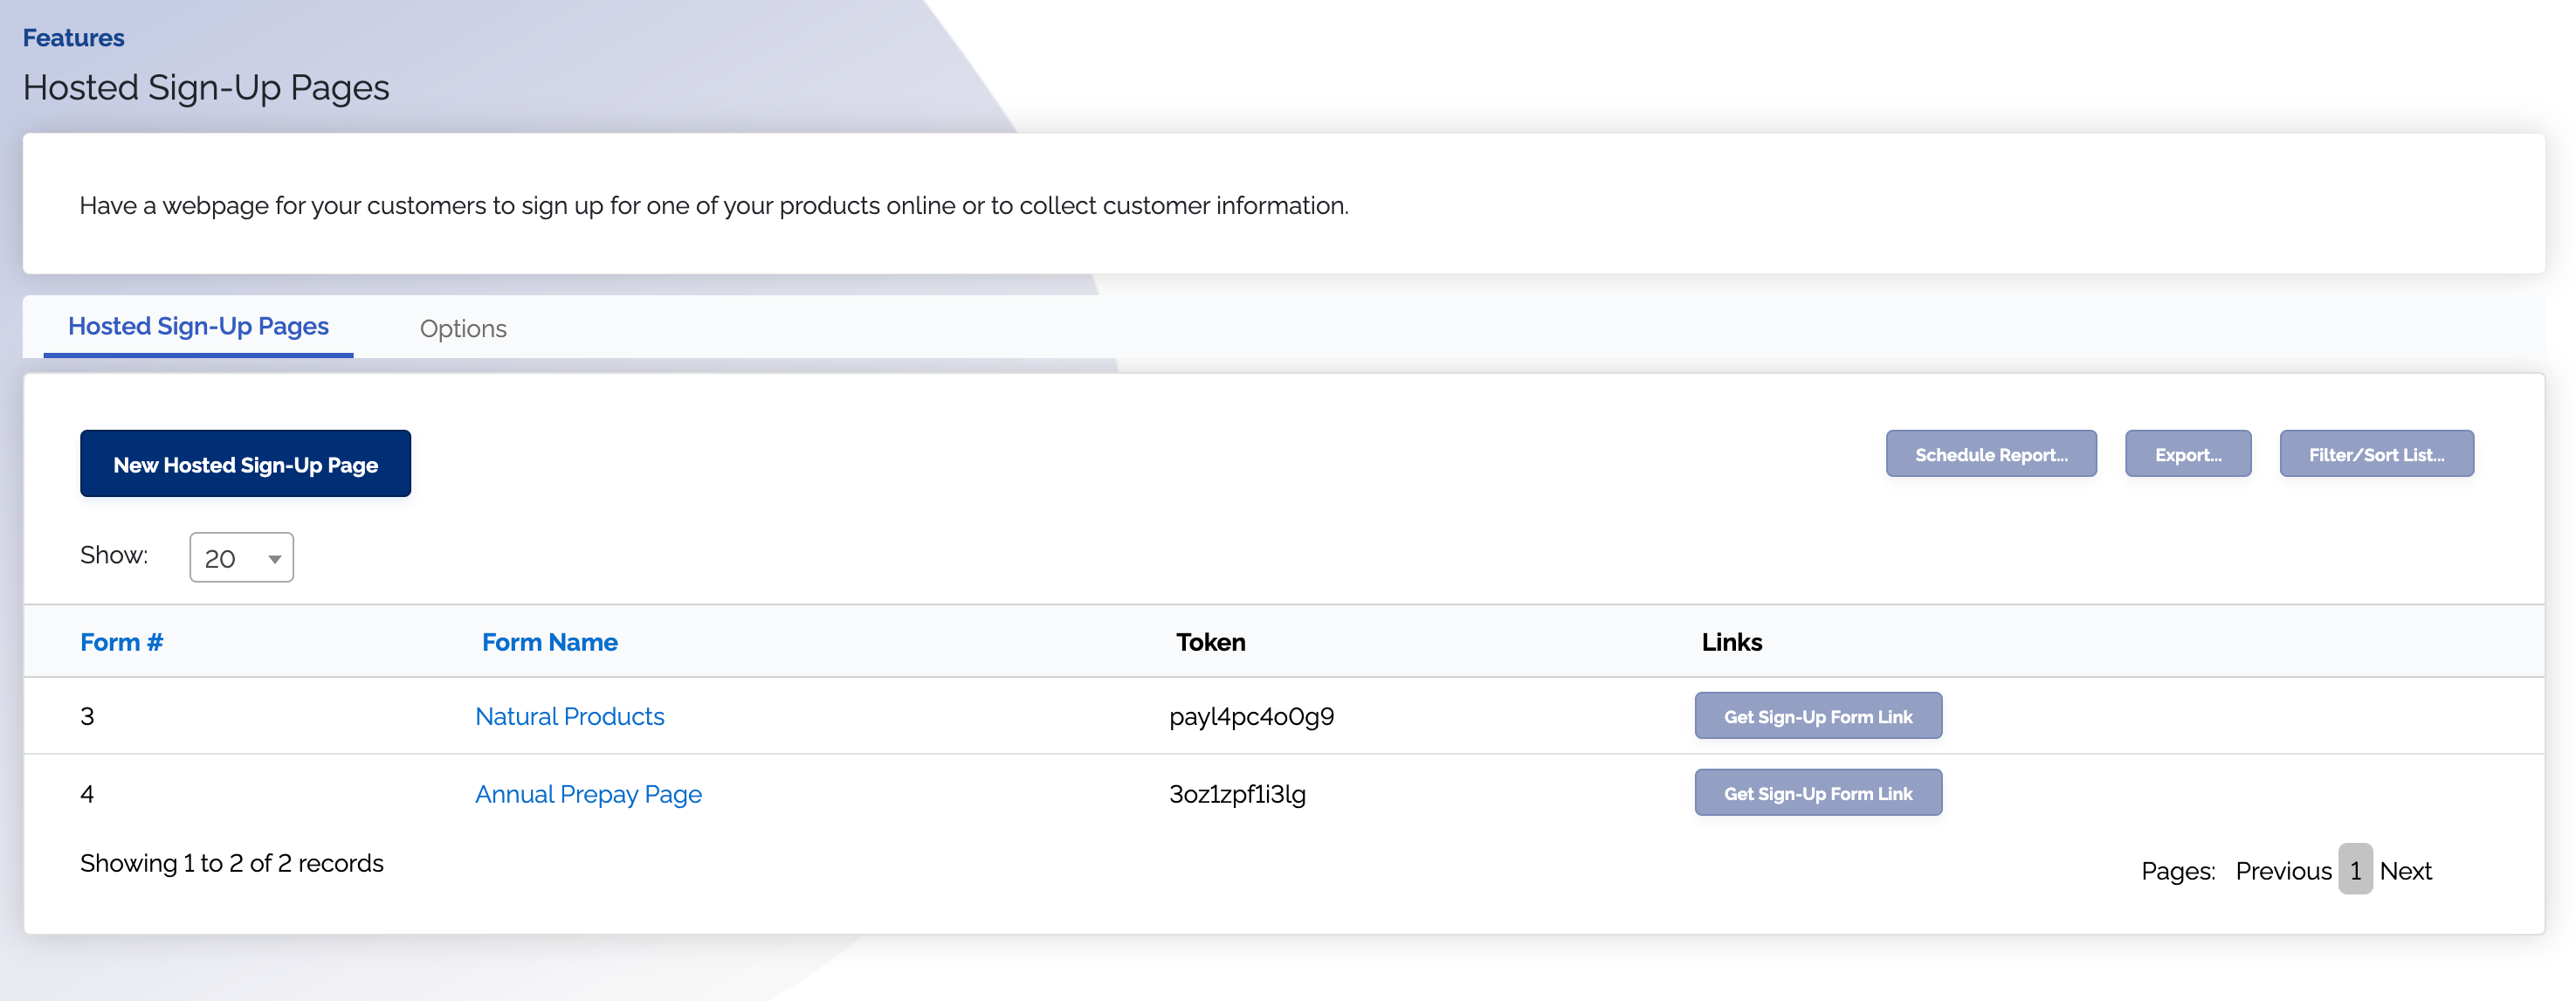
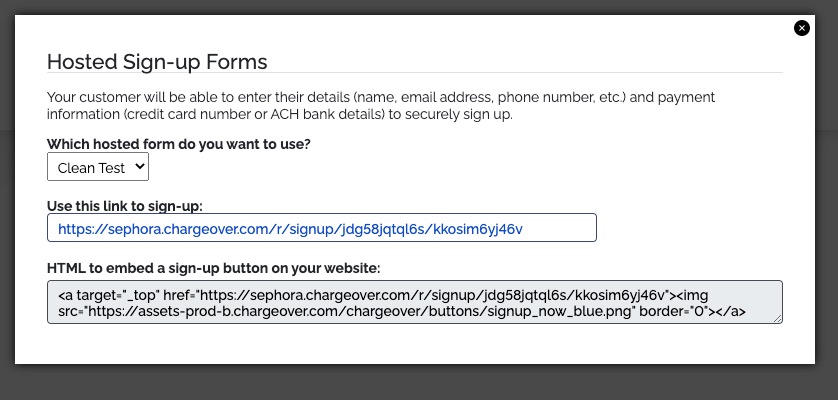
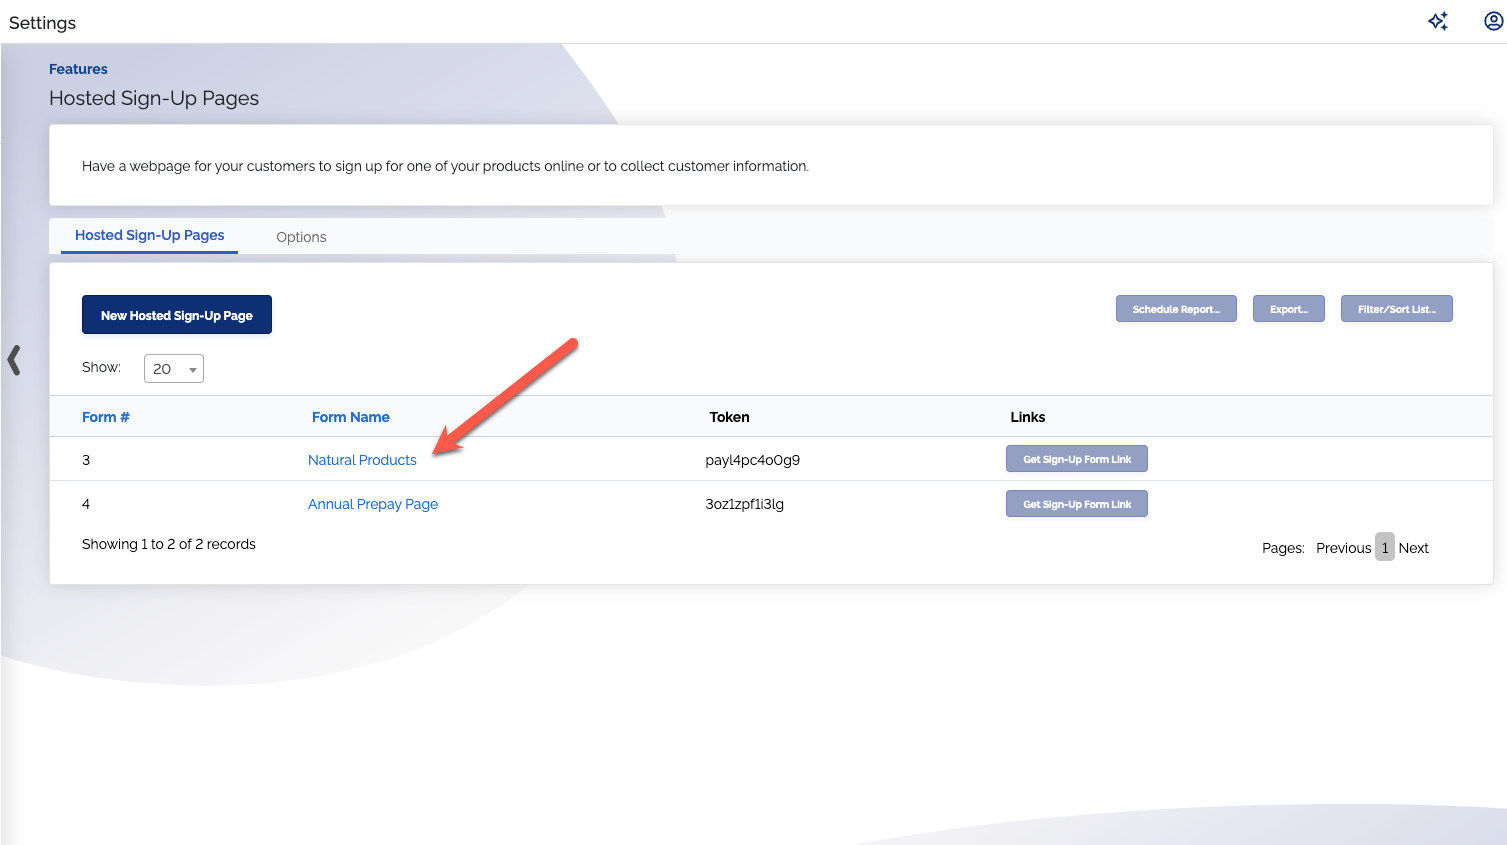
Hosted sign up page links
- Go to Settings then click on the
Features tab. SelectHosted Sign-Up Pages - Click the
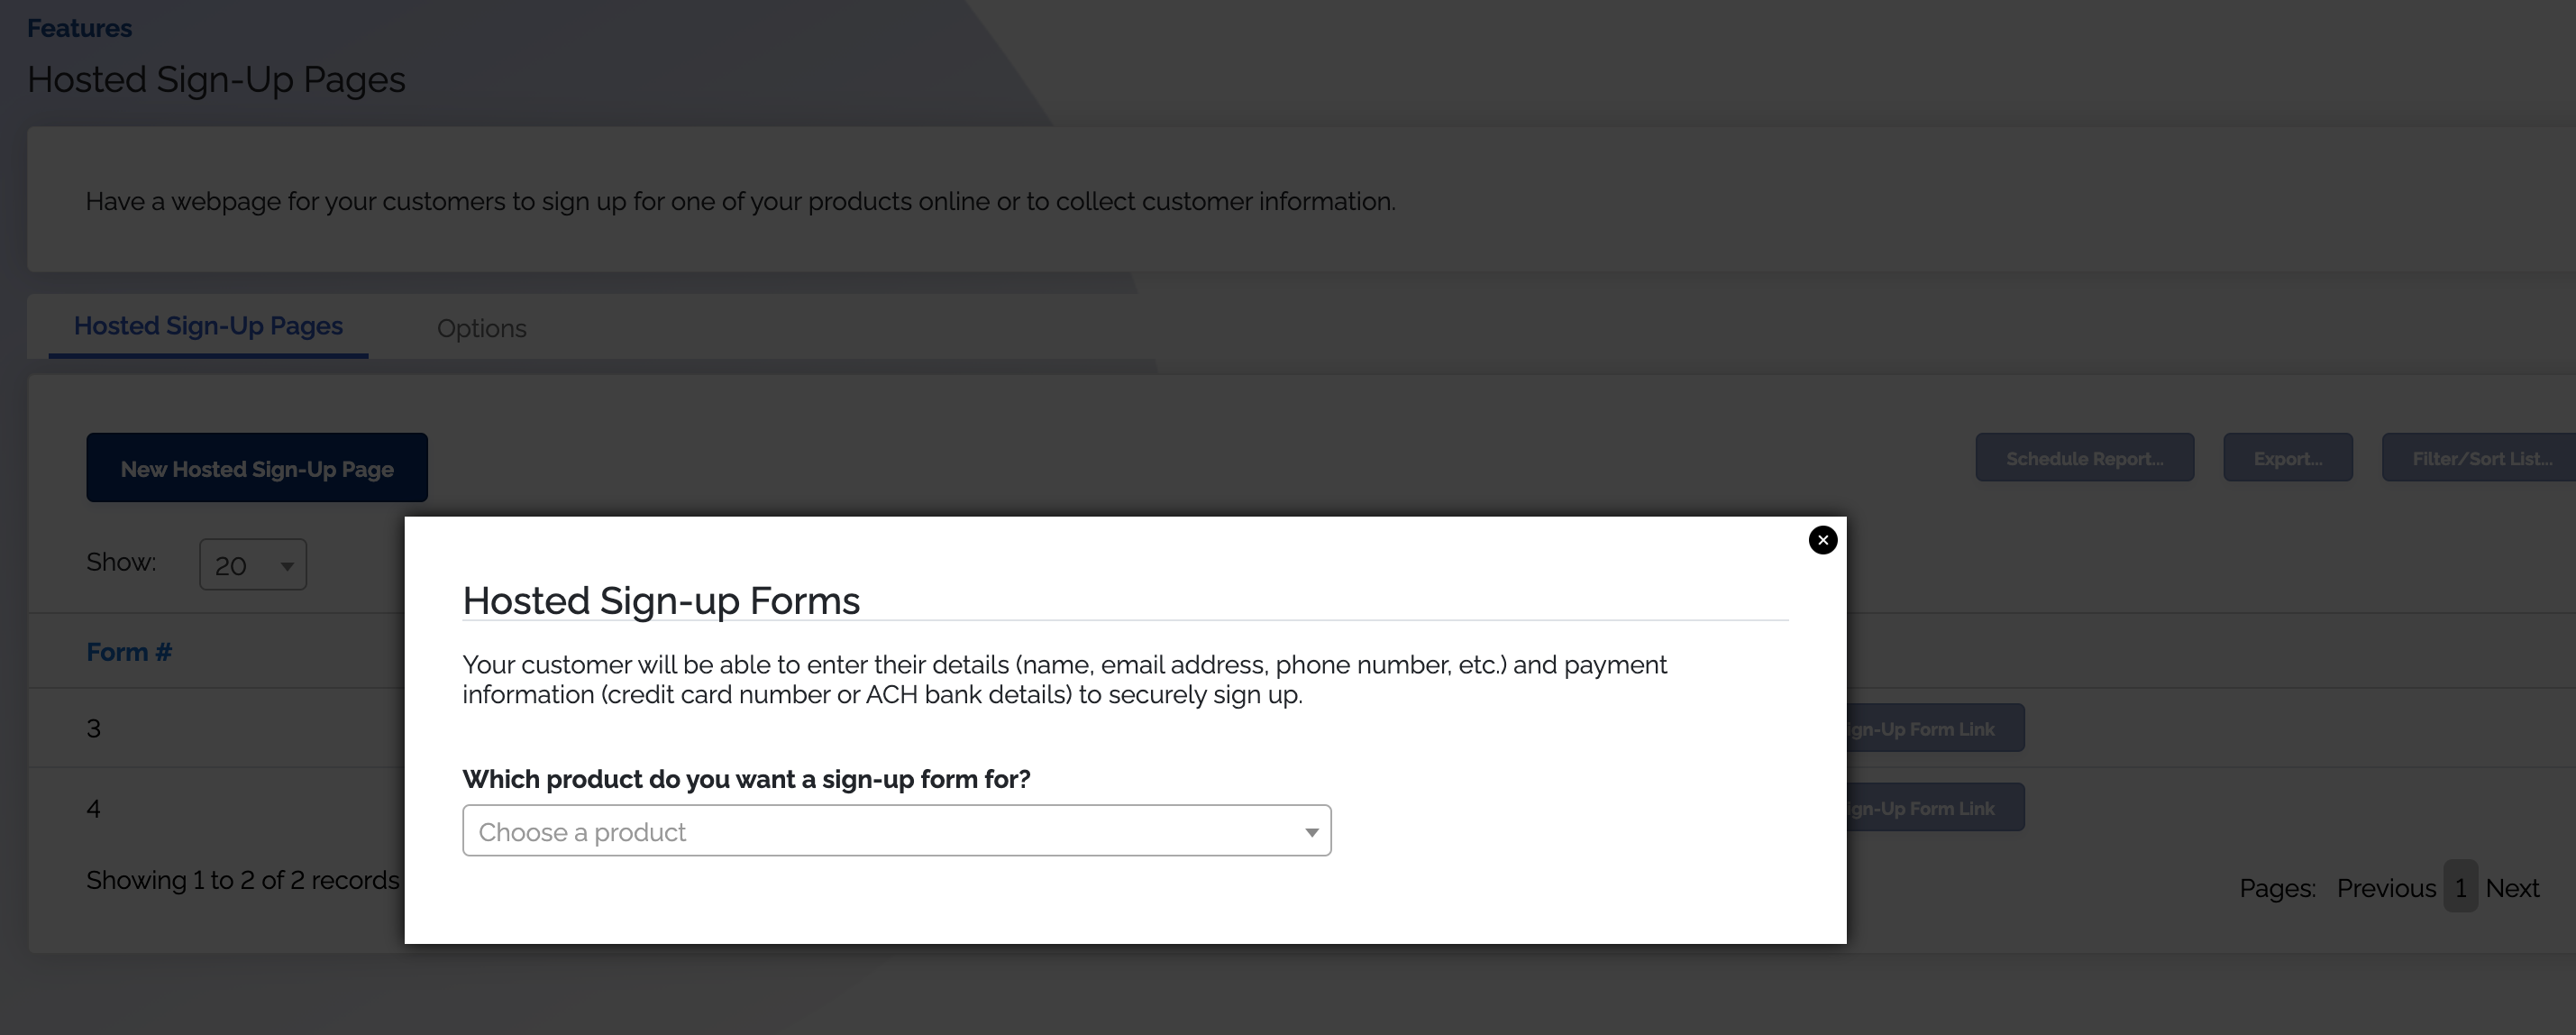
Get Sign-Up Form Link button under the Links column
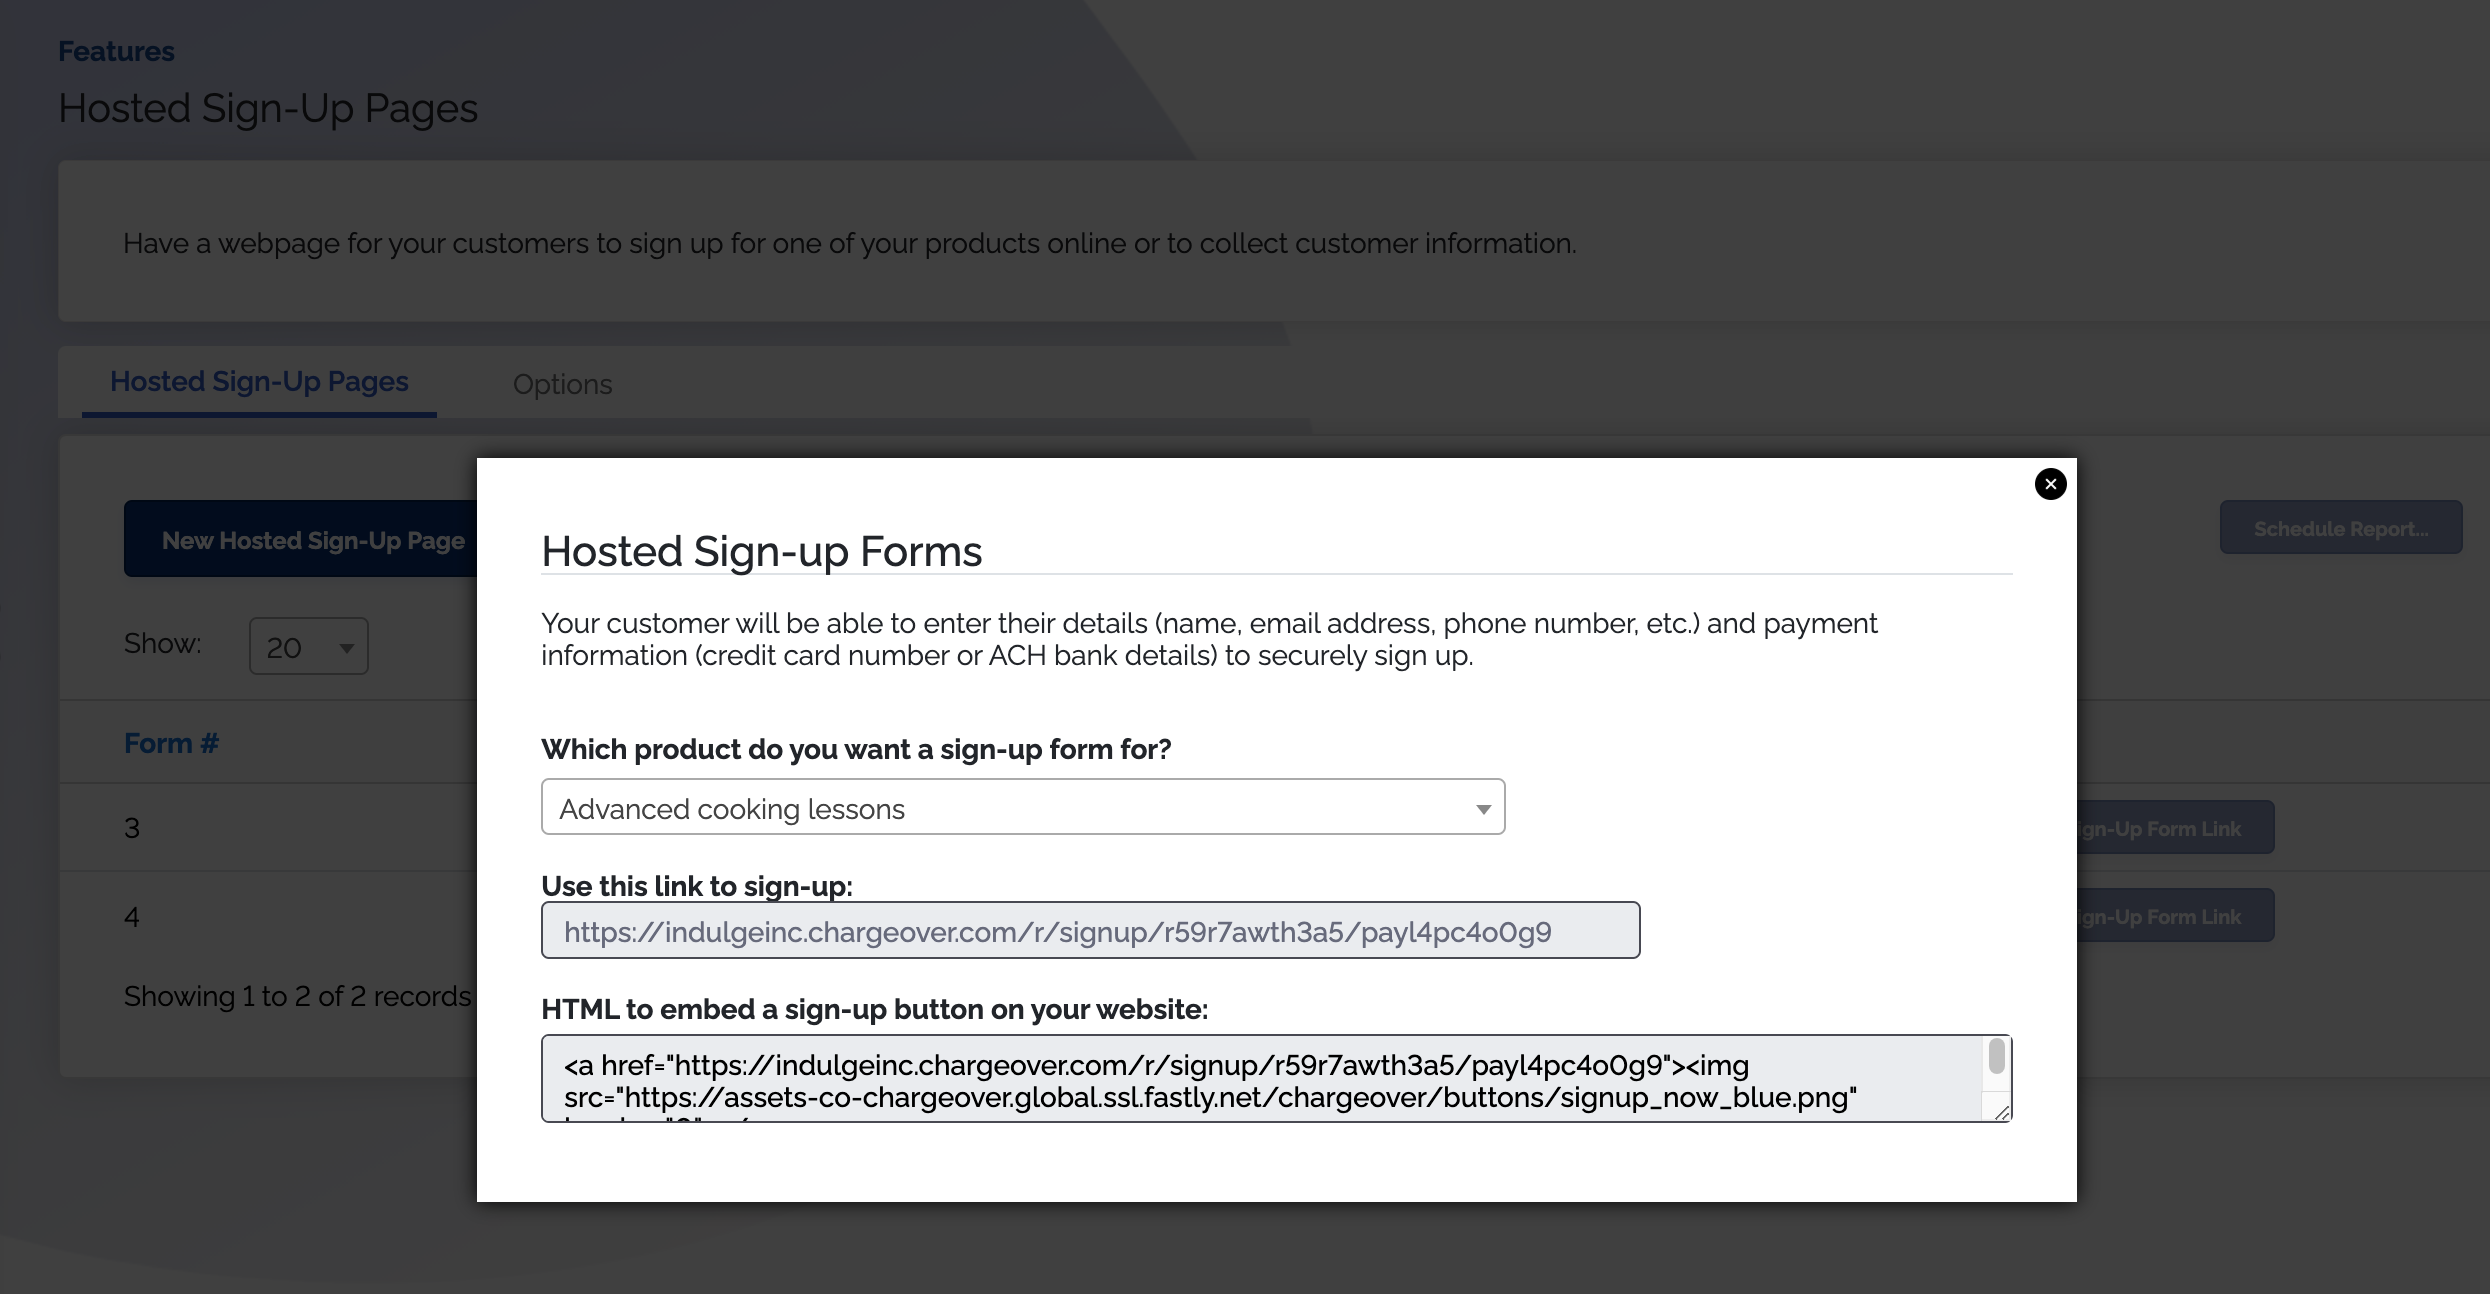
- Select the product that you want the sign-up form link for from the drop down menu
You will be given the sign-up form link for the product you have selected.
Checkout-style pages
We do not support checkout style hosted-sign up pages, where the customer could add multiple products on one hosted sign up form. To get around this limitation, you can use our Bundles feature, to offer multiple products on one hosted sign up form.
Processing fees on hosted sign up pages
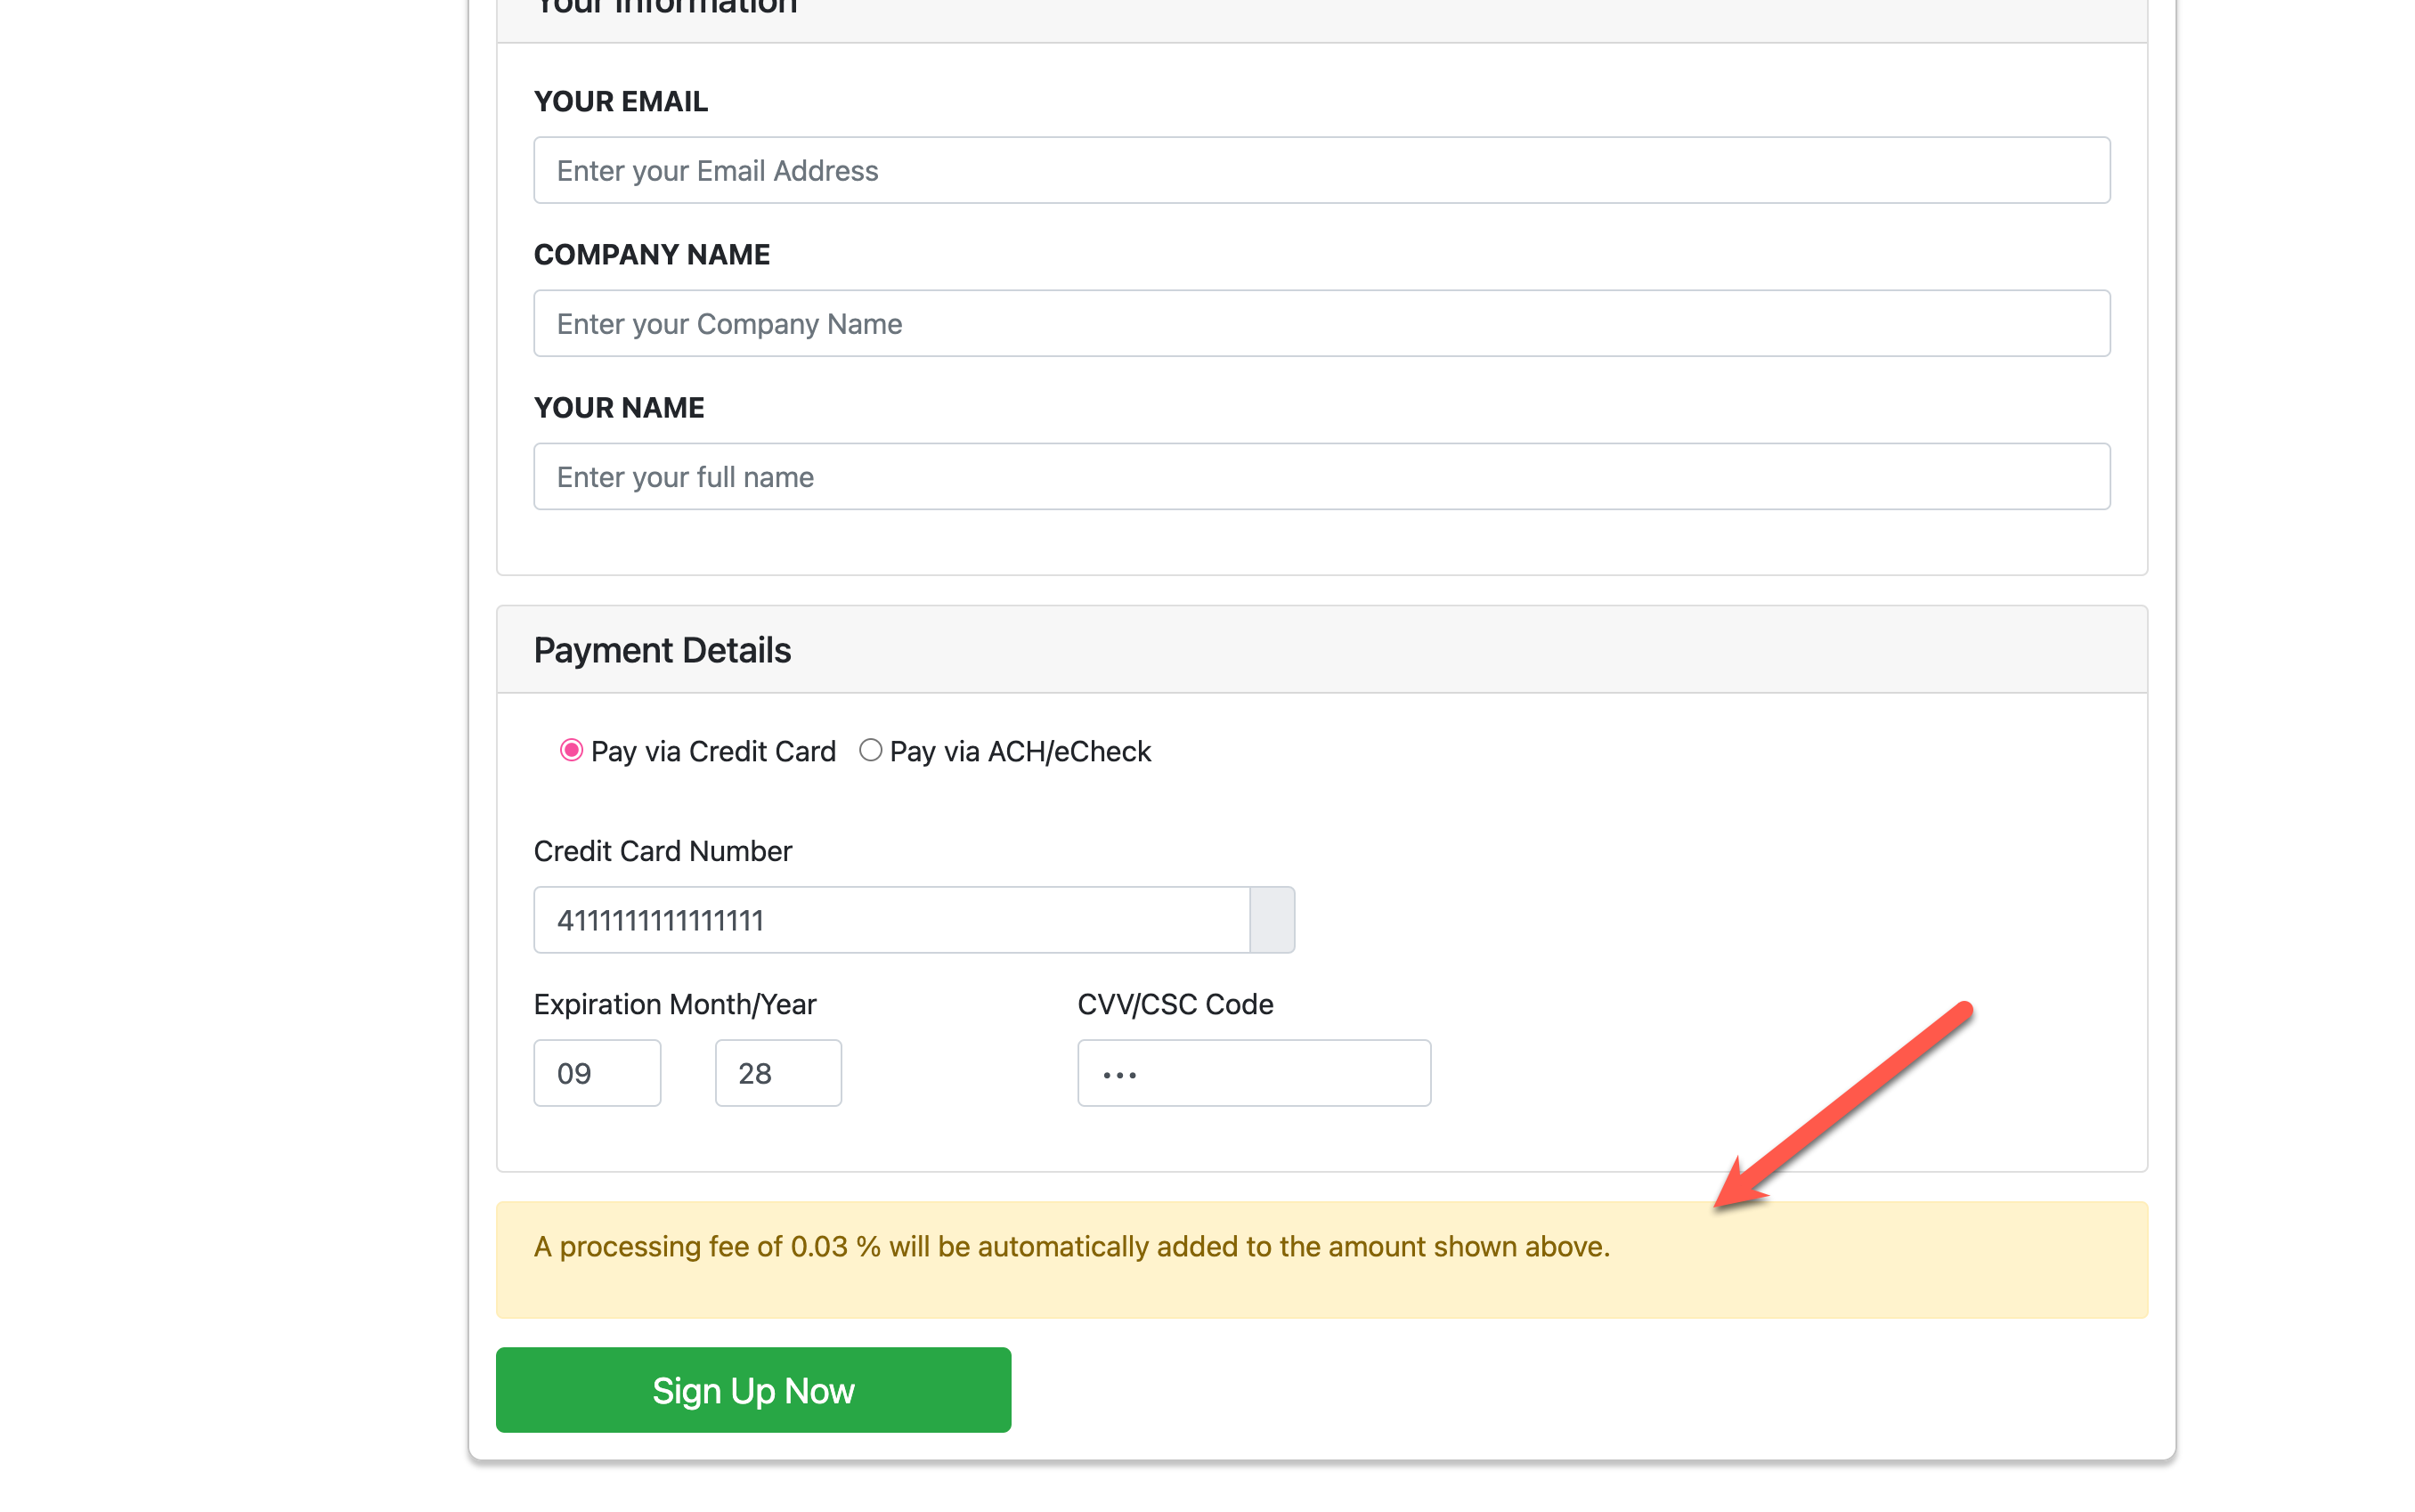
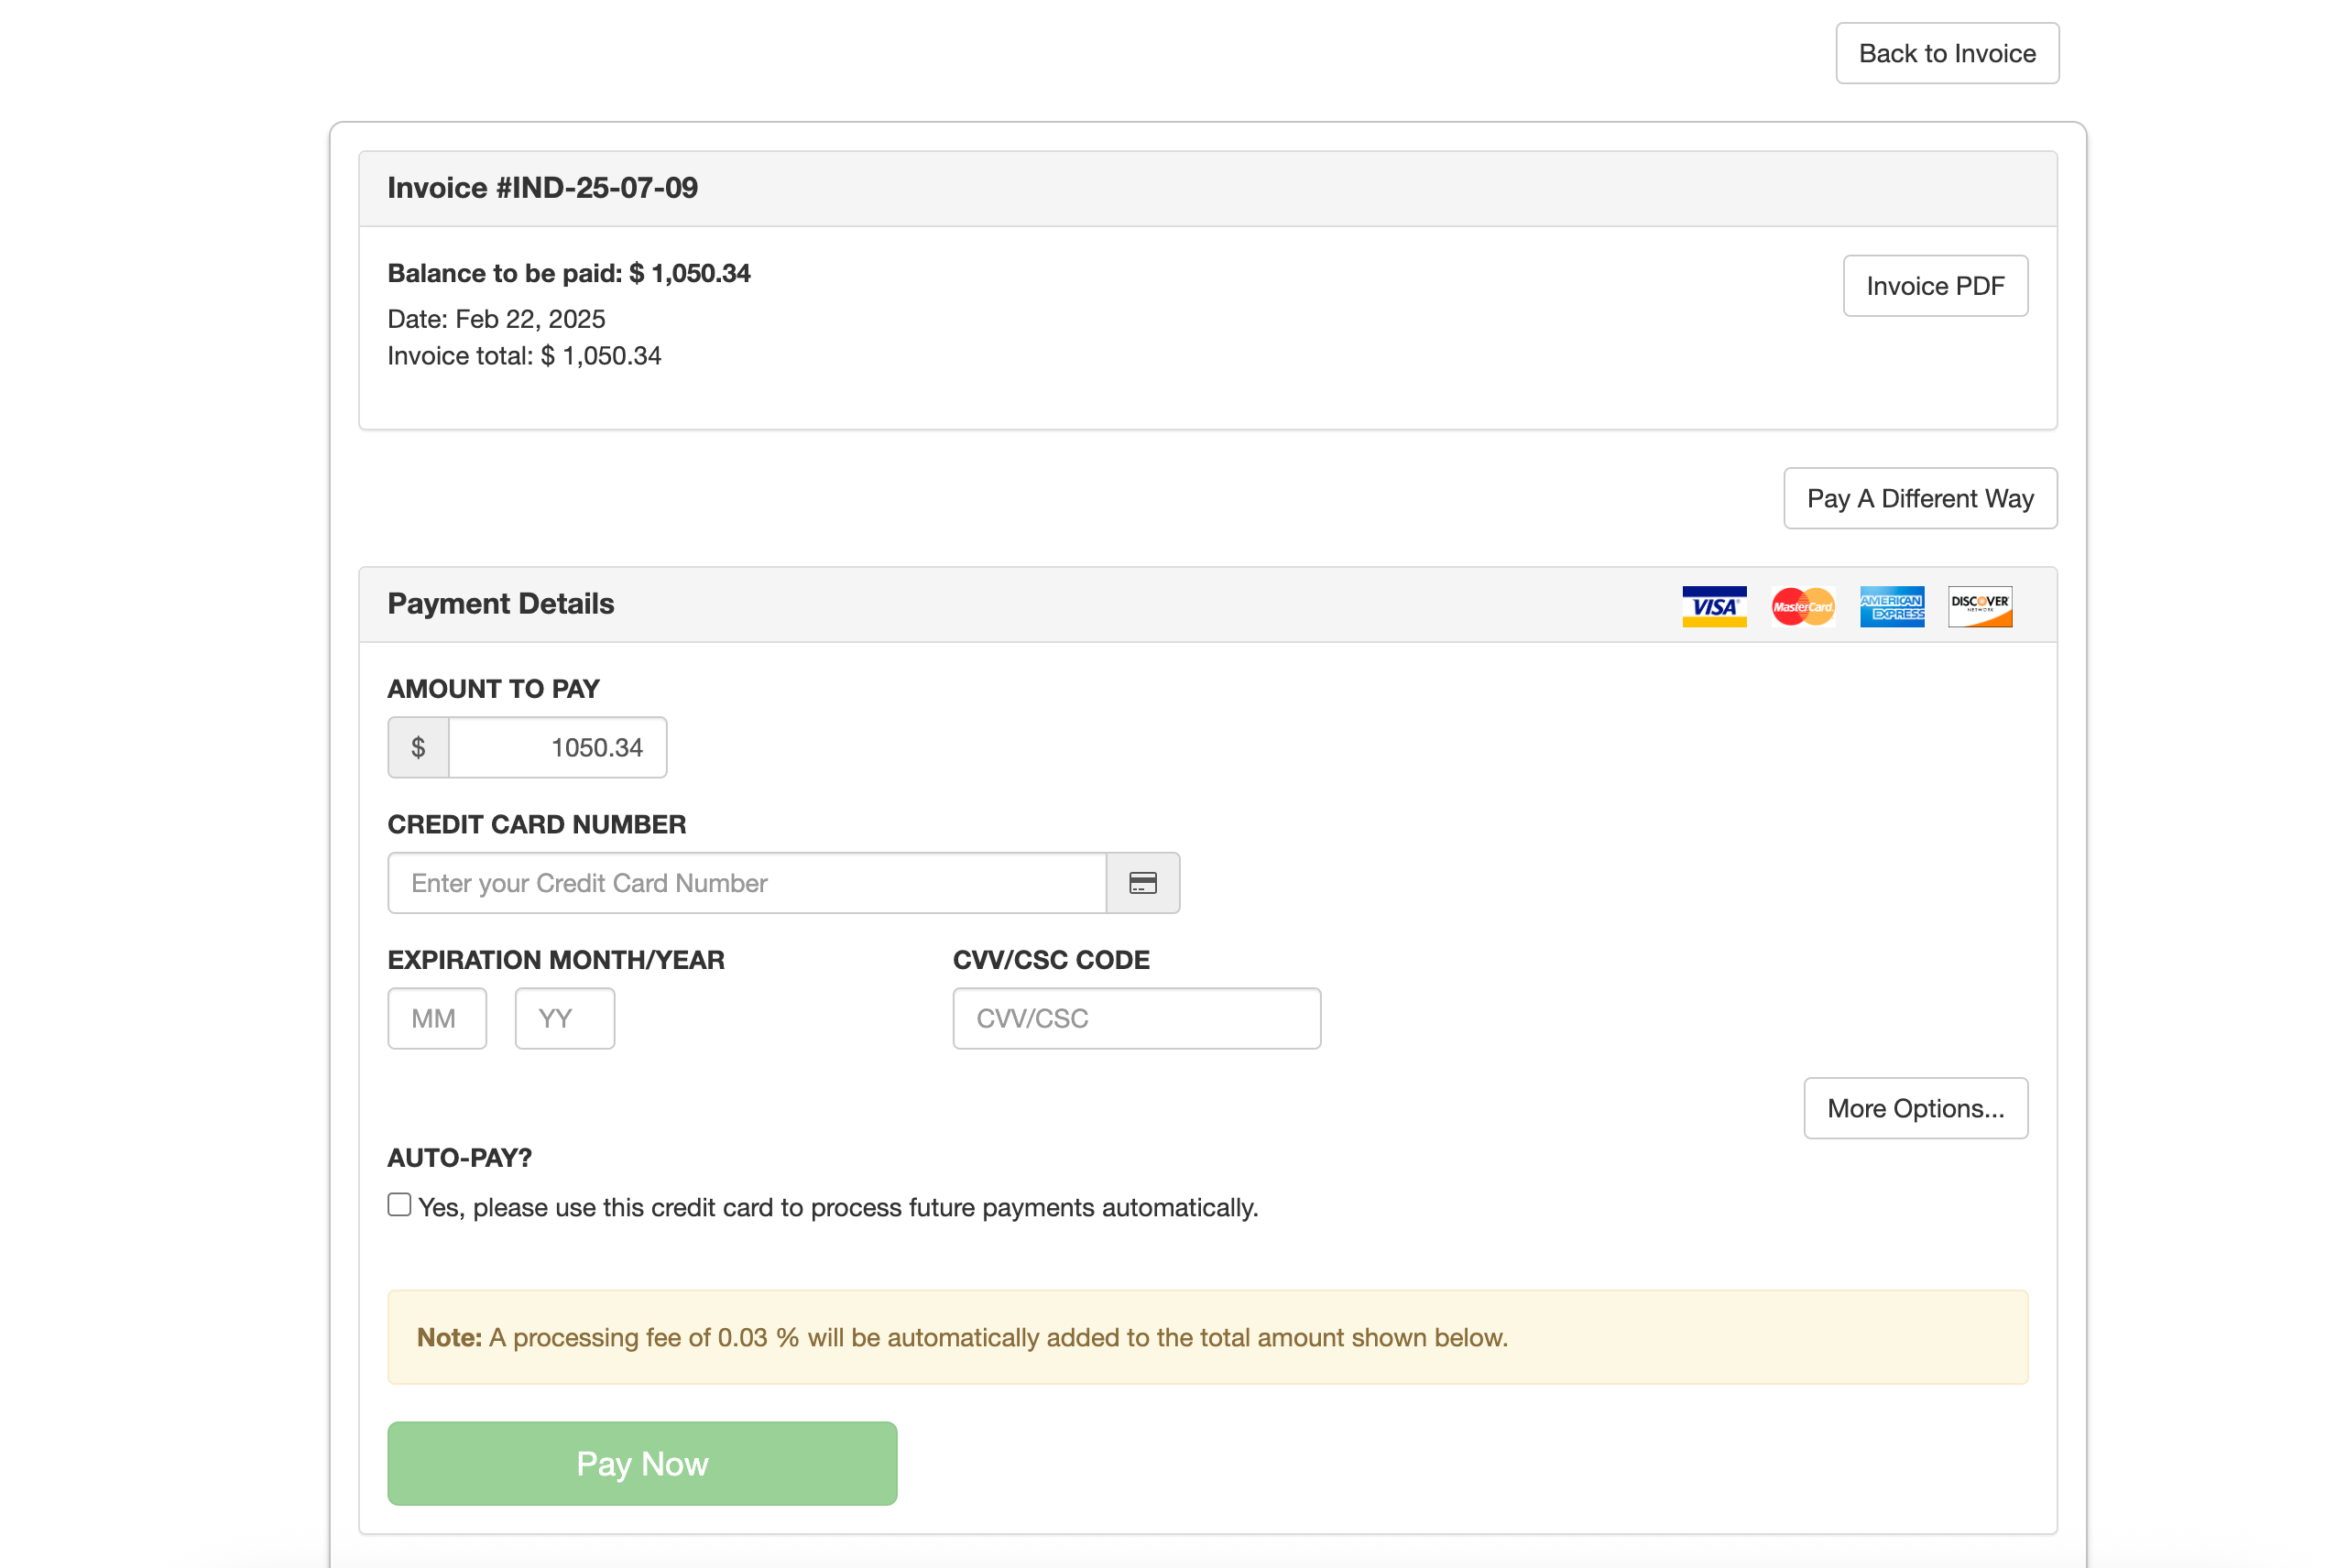
When processing fees are enabled a banner will automatically show up if you are using hosted sign up pages when a customer enters in a payment method that has a processing fee. A processing fee banner will also show up automatically on regular invoice pay links.
It will look something like this on a hosted sign up page:
It will look something like this on a pay link for an invoice:
Pre-authorizations, declines and hosted signup pages
By default, if someone signs up using a hosted signup form with a bad card, the subscription is still created.
The customer is then presented with an invoice to pay.
If this behavior is undesirable, you can turn on pre-authorizations on the payment gateway. This causes a $1.00 charge to happen to the card immediately, prior to the actual subscription being created. If the $1.00 charge is declined, then the subscription is never created.
This is not one hundred percent effective all the time. There can be cases where the $1.00 authentication succeeds, but after the subscription is created, the larger 100 dollar charge then declines.
Use sign-up pages for one-time purchases
Hosted sign-up pages can be used in different ways. If you don't want to use them to sign up customers for recurring subscriptions, you can use it for a one-time registration or purchase instead.
- Create a product that only has a Setup Fee. You will want to use the Flat Pricing option to do this
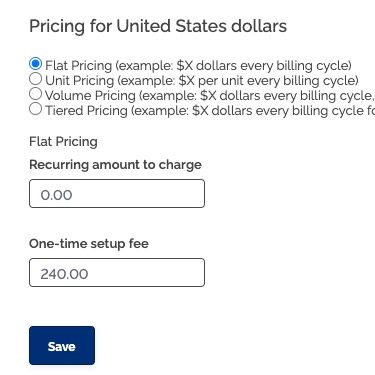
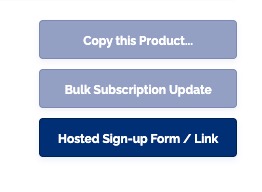
Save - Now that the product has been created, you can click Hosted Sign-Up Form/Link in the right corner of the screen
- Copy whichever link you want to use
- Now, when a customer uses the hosted sign-up page, a One-Time invoice will be created for that specific product
- You will be able to find the one-time invoice in your Invoices. It will look something like this
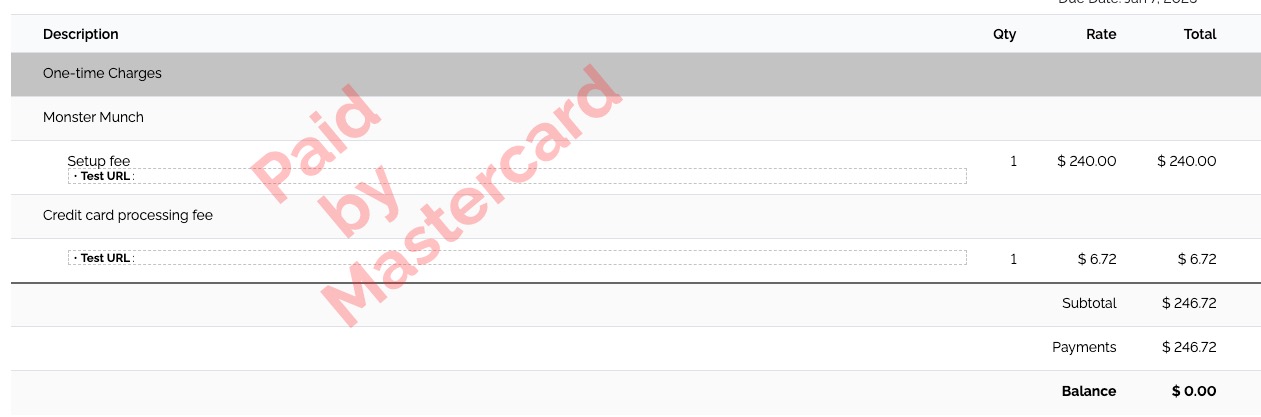
If you look at the line items, you can see the only charges are a one-time charge and a credit card processing fee.
There are no recurring charges because this product was purposefully not be set up as a subscription.
Sending email receipts
You can set up emails to be sent after a successful signup form submission.
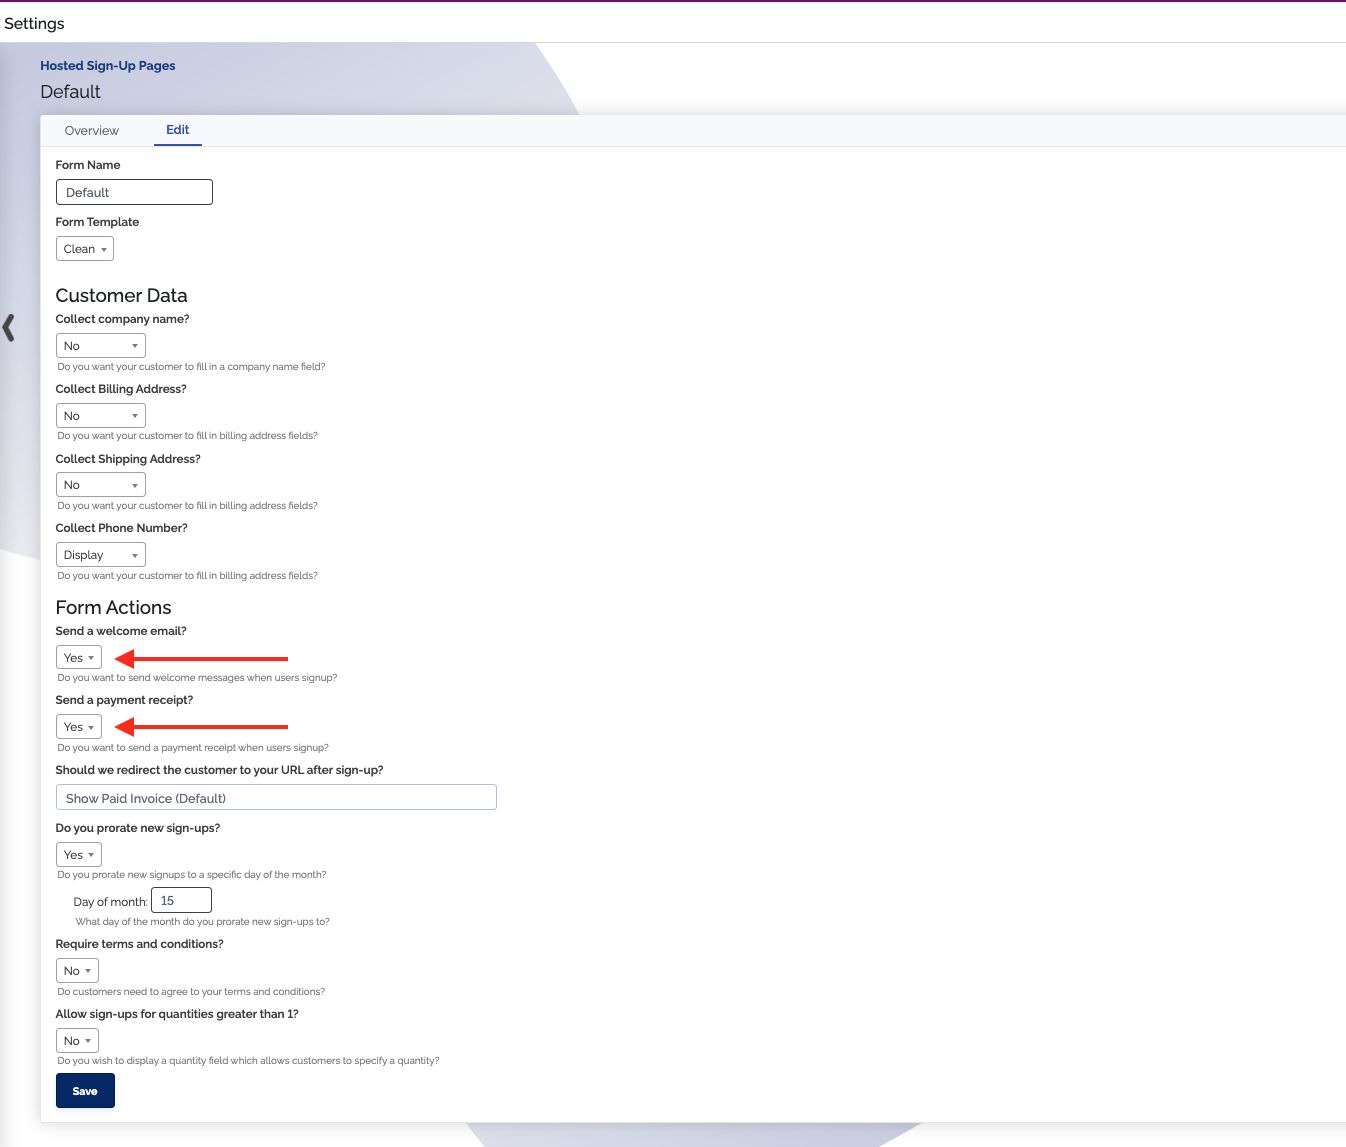
- Access the hosted sign up forms's settings by clicking on it's name
- Click on the
Edit tab - To send welcome emails after a successful form submission, enable "Send a welcome email?"
- To send payment receipts, enable "Send a payment receipt?"
- A payment success email will be sent if payment is successful
- A failed payment email will be sent if payment is declined
If you are just collecting a payment and the transaction is declined, no welcome email will be sent, even if it is enabled. If you are only collecting the customers payment method and information but not creating a subscription, no welcome email will be sent, even if it is enabled.
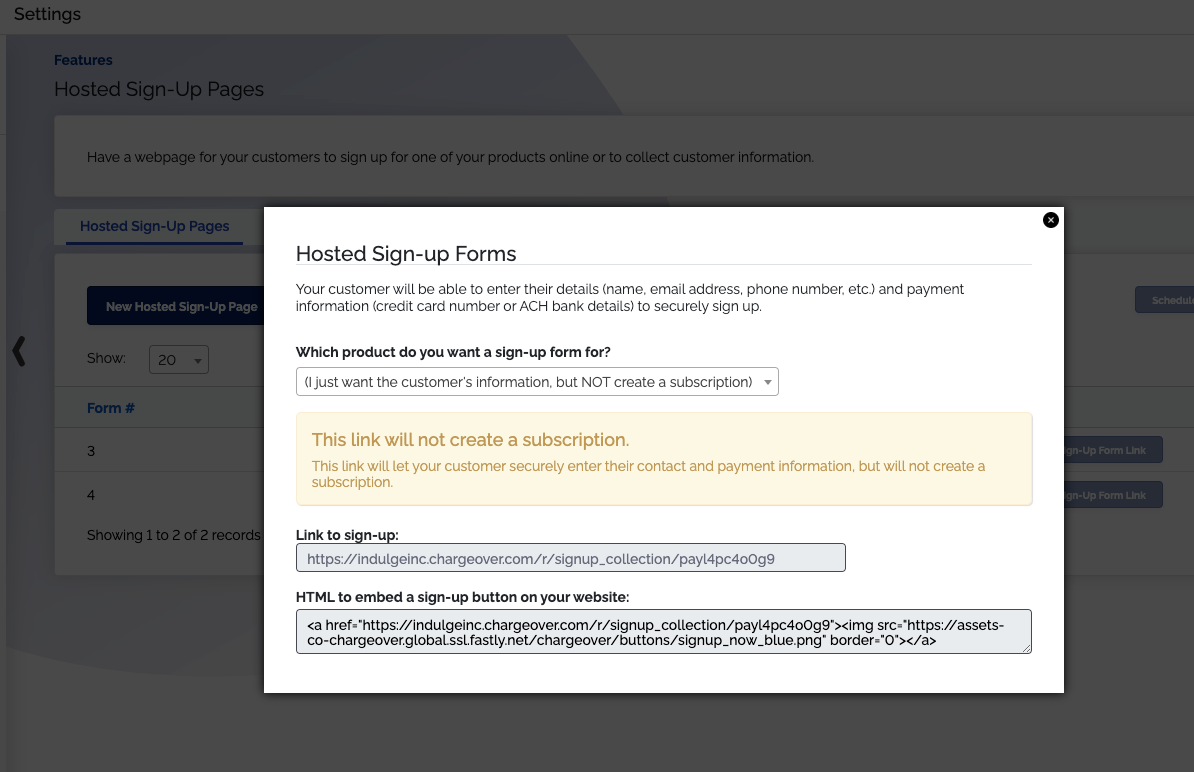
I only want to collect the customers information
Sometimes, you don't want to have an automatic subscription created for a custome. You only want to collect their information, so they are saved as a customer in ChargeOver. Later on, you will usually go and manually create a one-time invoice or subscription for the customer.
To do this, you can follow the steps below.
- Go to your settings and your
Features tab - Click
Hosted Sign-Up Pages - Click
Get sign-up form link= - Click the dropdown under the question 'Which product do you want a sign-up form for?' And scroll all the way down to the bottom of the prooducts listed
- Select the option 'I just want the customers information, NOT create a subscription'
- You will see a link you can copy for that hosted sign up page
For developers
Embedding hosted sign-up pages in an iframe
You can embed ChargeOver's hosted sign-up pages into your own site, via an <iframe>. You can find this by going into your hosted
sign-up pages settings and clicking on the tab
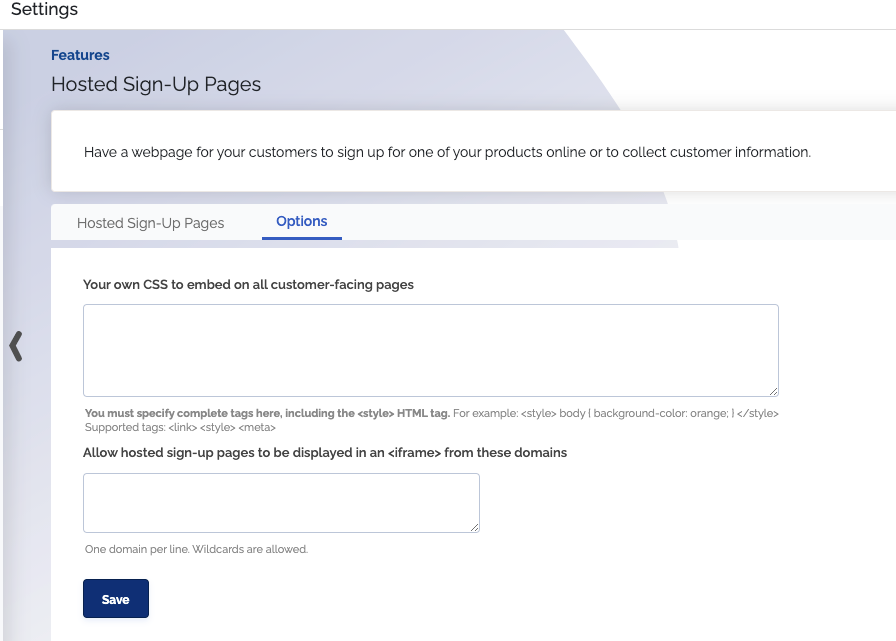
The HTML code looks like this:
<iframe width="100%" height="800" src="PUT THE HOSTED SIGN-UP PAGE URL HERE">
</iframe>
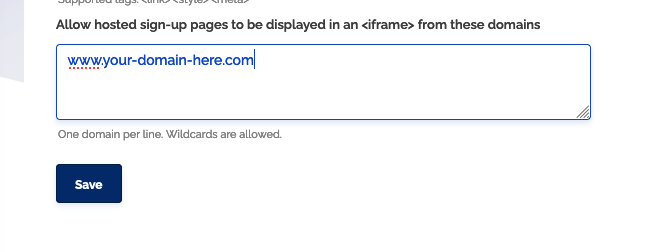
If you see a message indicating the page cannot be displayed (possibly due to security protections), make sure you
whitelist the domain name your <iframe> is hosted on.
URL parameters for pre-populating forms
ChargeOver supports a number of URL parameters you can add to the hosted sign-up page URL to pre-populate some of the fields on the hosted sign-up forms.
For example, if your hosted sign-up page URL is this:
https://example.chargeover.test/r/signup/etnx5zsg6ha9/3d80a13dd017
You can append ?email=jane@example.com&name=Jane Doe to pre-populate the Your Email and Your Name fields on the form:
https://example.chargeover.test/r/signup/etnx5zsg6ha9/3d80a13dd017?email=keith@uglyslug.com&name=Jane Doe
Available URL parameters
| URL Parameter | Description |
|---|---|
email= | The customer's email address |
company_name= | The customer's company name |
phone= | The customer's phone number |
name= | The customer's first and last name |
customer_external_key= | The customer external key value |
customer_custom_X= | Customer custom field value; Set X to the custom field number |
package_custom_X= | Subscription custom field value; Set X to the custom field number |
package_external_key= | The subscription external key value |
package_quantity= | The quantity to purchase |
package_holduntil_datetime= | Delay the date of first payment; use a date or an expression like "+7 days" |
currency= | A 3-characters currency ISO code to present pricing in (example: "USD" or "CAD") |
package_paycycle= | A subscriptions payment plan or cycle plan |
customer_admin_token= | Set the sales rep for the customer. You can get this admin token value via the REST API or a custom report |
Examples of URL parameters
package_holduntil_datetime= example: To hold payment until the first day of next month, the parem could look something like this: ?package_holduntil_datetime=first day of next month
Multiple products on a single sign-up page: Use the token assigned to each product and separate them with commas, so it can look something like this: e42adc765270,a28c11fab2bb
Multi-currency support on a hosted sign up page could look something like this: ?currency=(a 3-digit ISO currency code). So ?currency=EUR
ChargeOver.js
If you want to host forms on your own website, but still securely collect credit card information, you can use ChargeOver.js.
Using ChargeOver.js gives additional flexibility like being able to add your own fields and completely control look the look and feel of the forms.