Salesforce to ChargeOver
Connect to Salesforce
Salesforce Outbound Messages allows you to send your data from Salesforce into your ChargeOver account!
For example, with Salesforce Outbound Messages, you can have a new customer automatically created in ChargeOver every time you create an account in Salesforce, or have a subscription automatically created in ChargeOver everytime you win an opportunity in Salesforce.
So, how do you get ChargeOver connected to Salesforce Outbound Messages? First, you will need to retrieve your Salesforce Organization ID. You will also need your ChargeOver Endpoint URL.
Find Your ChargeOver Endpoint URL
- Go to your Settings and select
Integrations thenMore Integrations
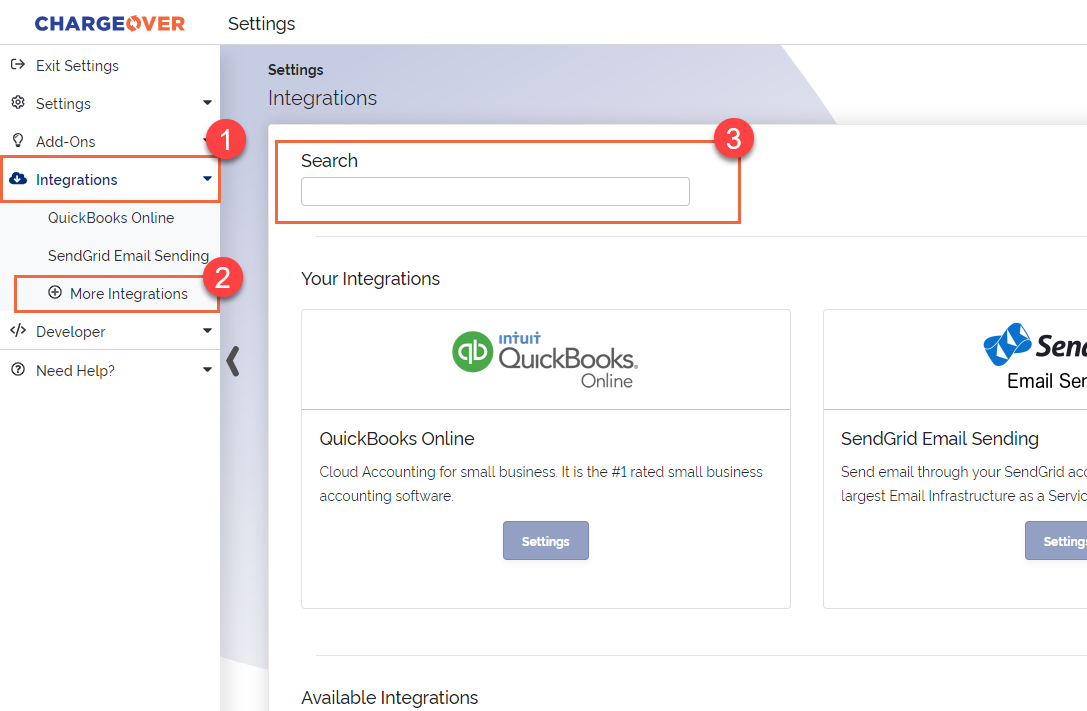
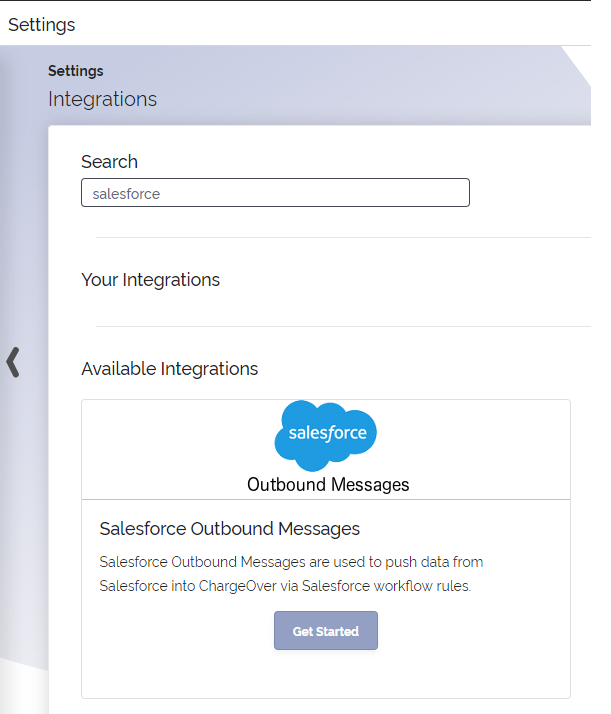
- Use the search bar at the top of the page and search "Salesforce" then select the Salesforce Outbound Messaging option
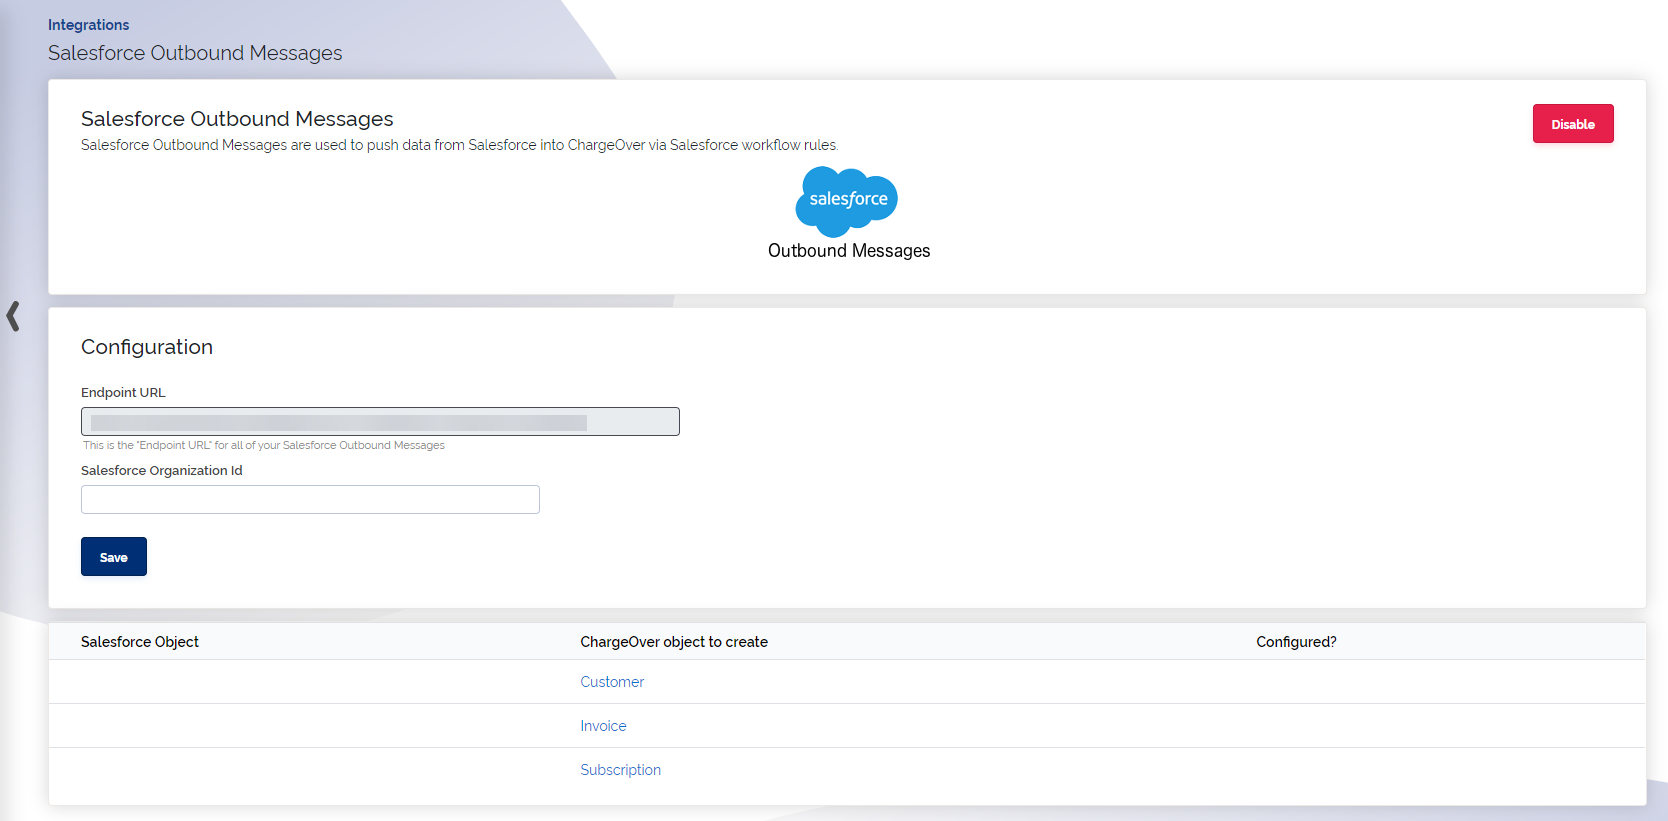
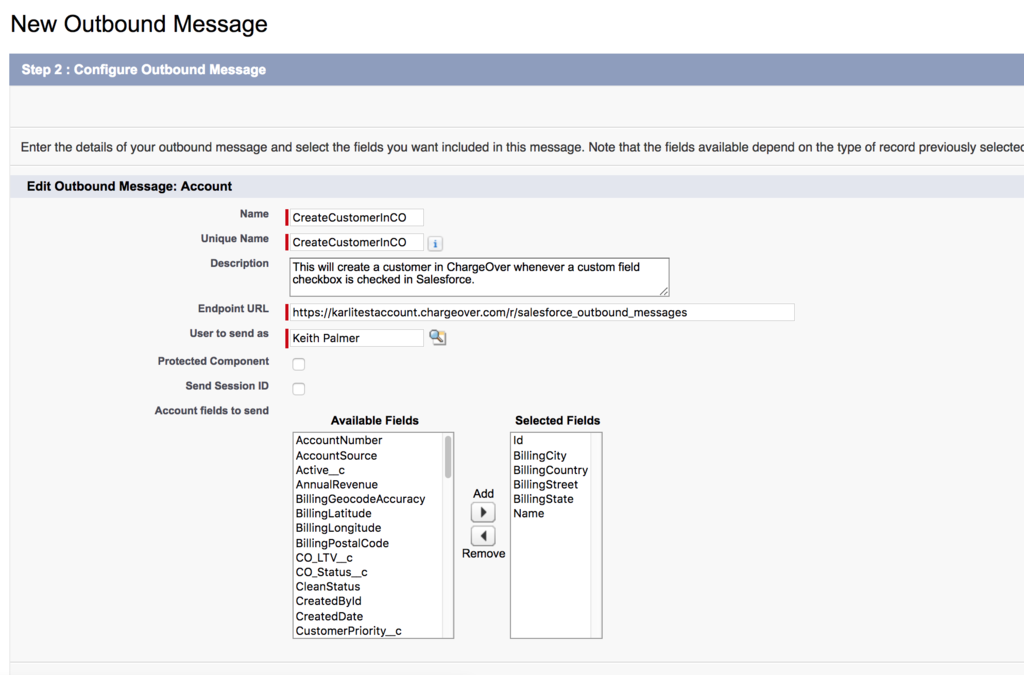
Enter your Salesforce Organization ID and choose how your fields in Salesforce will be mapped to fields in ChargeOver
Save Settings in ChargeOver
Now, copy the ChargeOver Endpoint URL in ChargeOver and login to your Salesforce account.
Paste the ChargeOver URL Endpoint into the Endpoint URL field of your Outbound Message in Salesforce.
- Save your Outbound Message in Salesforce that you entered the ChargeOver Endpoint URL in for
- Make sure that you specify a Workflow Rule in Salesforce that specifies when the Outbound Message should be sent to ChargeOver. Additionally, make sure that the workflow rule is active

Your ChargeOver account is now connected to Salesforce outbound messages!
Set up Workflow Rule in SalesForce
Setting up a workflow rule will allow the outbound messages to send where you want them to go.
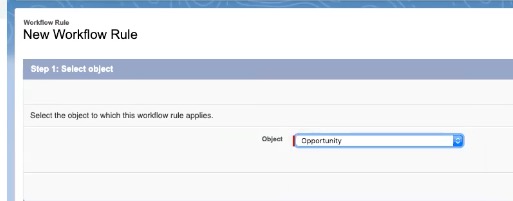
- Search for Workflow Rules in the search bar

Click
Continue . Then create aNew Rule Make sure to select
Opportunity from the dropdown menu. Then selectNext
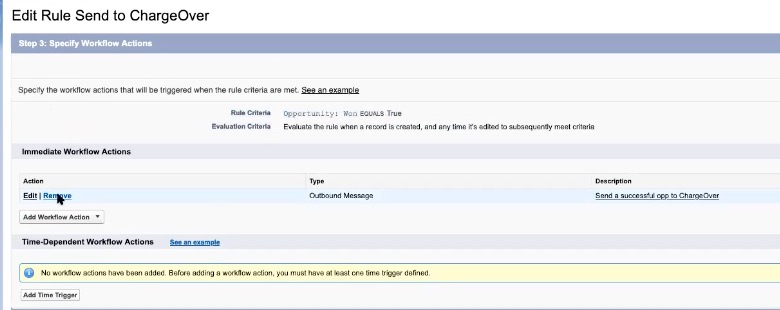
- After you select your Rule Criteria and Evaluation Criteria, you will have finished your rule.
The finished product should look something like this:
- Be default, this workflow rule is inactive. Make sure to click [Activate]

Once it is activated you will see a checkmark next to the label "Active"

You will now have successfully set up a workflow rule.
Mapping Fields in ChargeOver
Before mapping, you need to have created products in ChargeOver (CO)
- When you are creating products, it is super important to add an External Key
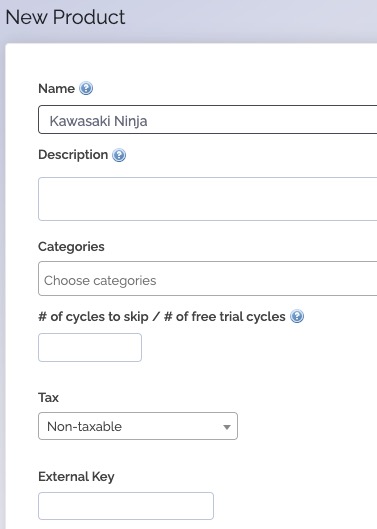
This will help you recognize and search for the product in SalesForce (SF).
External Key can be found by clicking "More Options" underneath the # of cycles to skip/Tax fields.
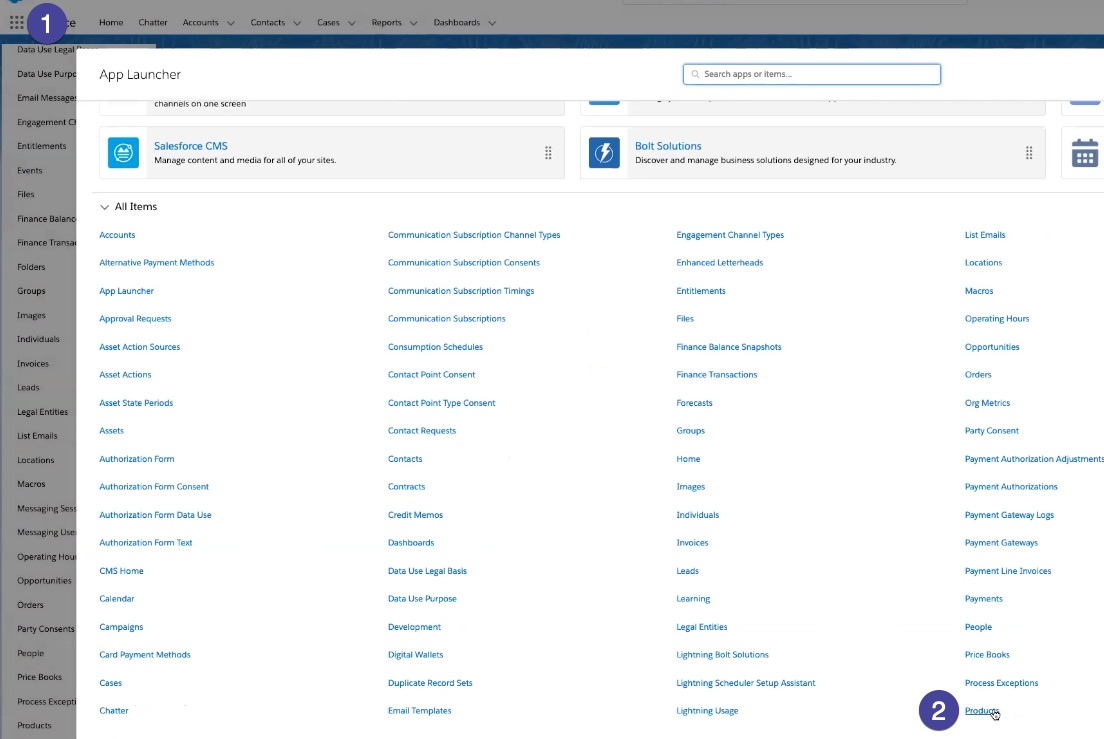
- After your products are created, go to SF and click the dotted square to the
left of the "Service" label. Click
View All Then selectProducts
You will then be able to create a product in SF. What matters here is that the Product Code should match the External Key in CO.

Now your products in CO and SF should be mapped to each other.