QuickBooks Desktop

Overview
Versions of QuickBooks for Windows We Support
- QuickBooks Pro 2015 and newer
- QuickBooks Premier 2015 and newer
- QuickBooks Enterprise 2015 and newer
- QuickBooks Pro Plus 2015 and newer
New Customer
When you get a new customer, their information is entered into ChargeOver directly or automatically through web forms or the API.
ChargeOver pushes the new customer’s information to QuickBooks automatically -- details include contact name, company, email address, phone number, address, etc.
Invoices
ChargeOver invoices or bills customers according to your instructions. Then we push the invoice (with detail) to QuickBooks.
Detail includes all fields, such as sales tax, line items, quantities, rates, and discounts, dates, and more.
If you void the invoice, we will sync the void to QuickBooks. We will NOT sync the invoice if it's unvoided. You will need to manually update the invoice in QuickBooks.
Payments
When your customer makes payments, ChargeOver notes the payment in ChargeOver as received.
Chargeover creates the payment in QuickBooks; details include transaction numbers, date, amount, payment method (Visa, Mastercard, etc.), memo, etc.
Then ChargeOver marks the invoice in QuickBooks as paid.
Transferring Data from ChargeOver to QuickBooks
The process to transfer data from ChargeOver to QuickBooks can be set up as either one of two things.
- Automatic - data transfer automatically, without any user interaction, from ChargeOver to QuickBooks every few minutes
- Manual - data transfers only when you click a button to tell it to transfer to QuickBooks
Get Connected
Connecting to QuickBooks for Windows enables automatic (or manual -- you can choose) syncing of data from ChargeOver to QuickBooks for Windows.
This is a one-time setup process. Get connected once, and then you never have to do this again.
If you use QuickBooks on multiple computers, do this on the computer that is in QuickBooks the MOST often.
Steps to Connect
-
Open QuickBooks
-
If you have multiple user accounts in QuickBooks, log in as the Admin user
-
Log in to ChargeOver from this same computer that's running QuickBooks
-
Go to your Settings and select
Integrations thenMore Integrations from the left side menu. -
Once you've located the QuickBooks Desktop option, select
Get Started -
Change the
Enabled choice to YES -
From the drop down, choose your Default Income Account (this is an Account from the Chart of Accounts in QuickBooks, and usually is set to Sales or Services)
Before you sync for the first time, your only option will be "Let ChargeOver Auto Detect This"
- Click the
Save Changes button
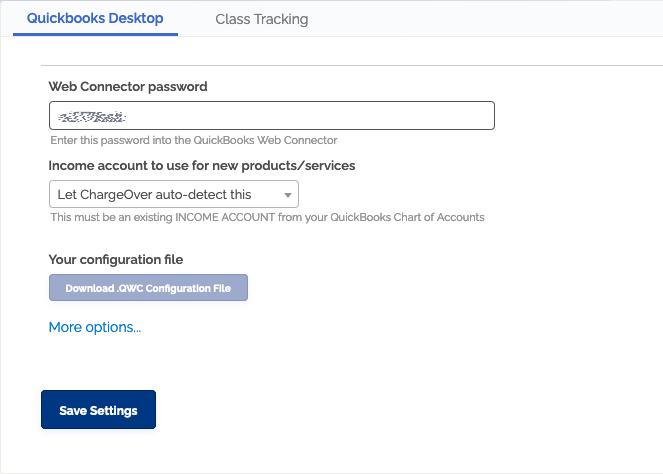
-
Copy the Web Connector Password
-
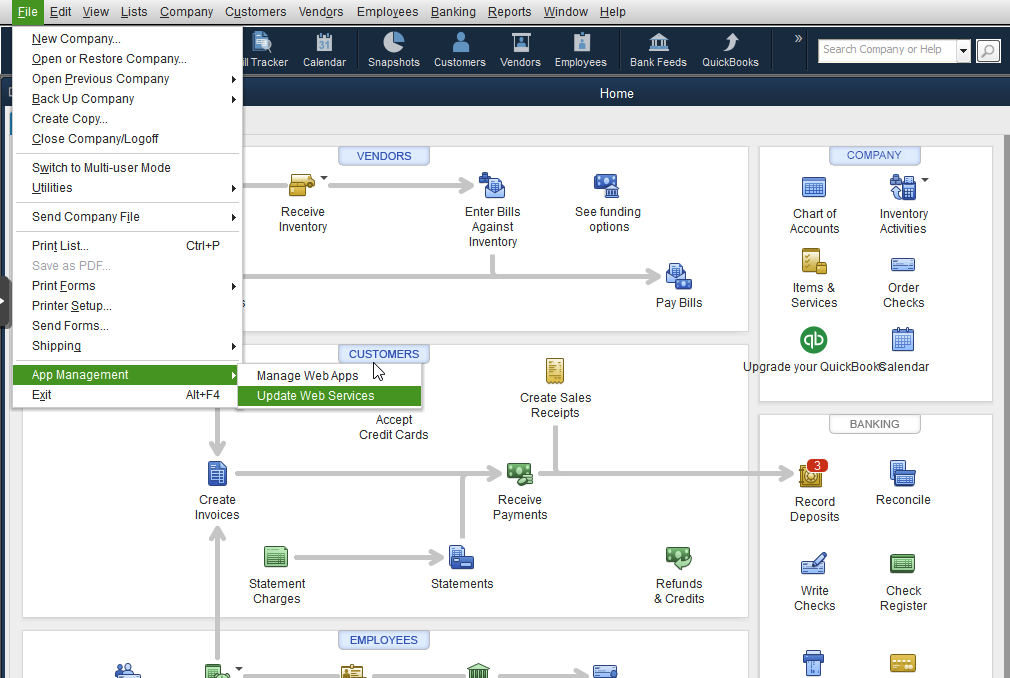
In QuickBooks, choose File > App Management > Update Web Service
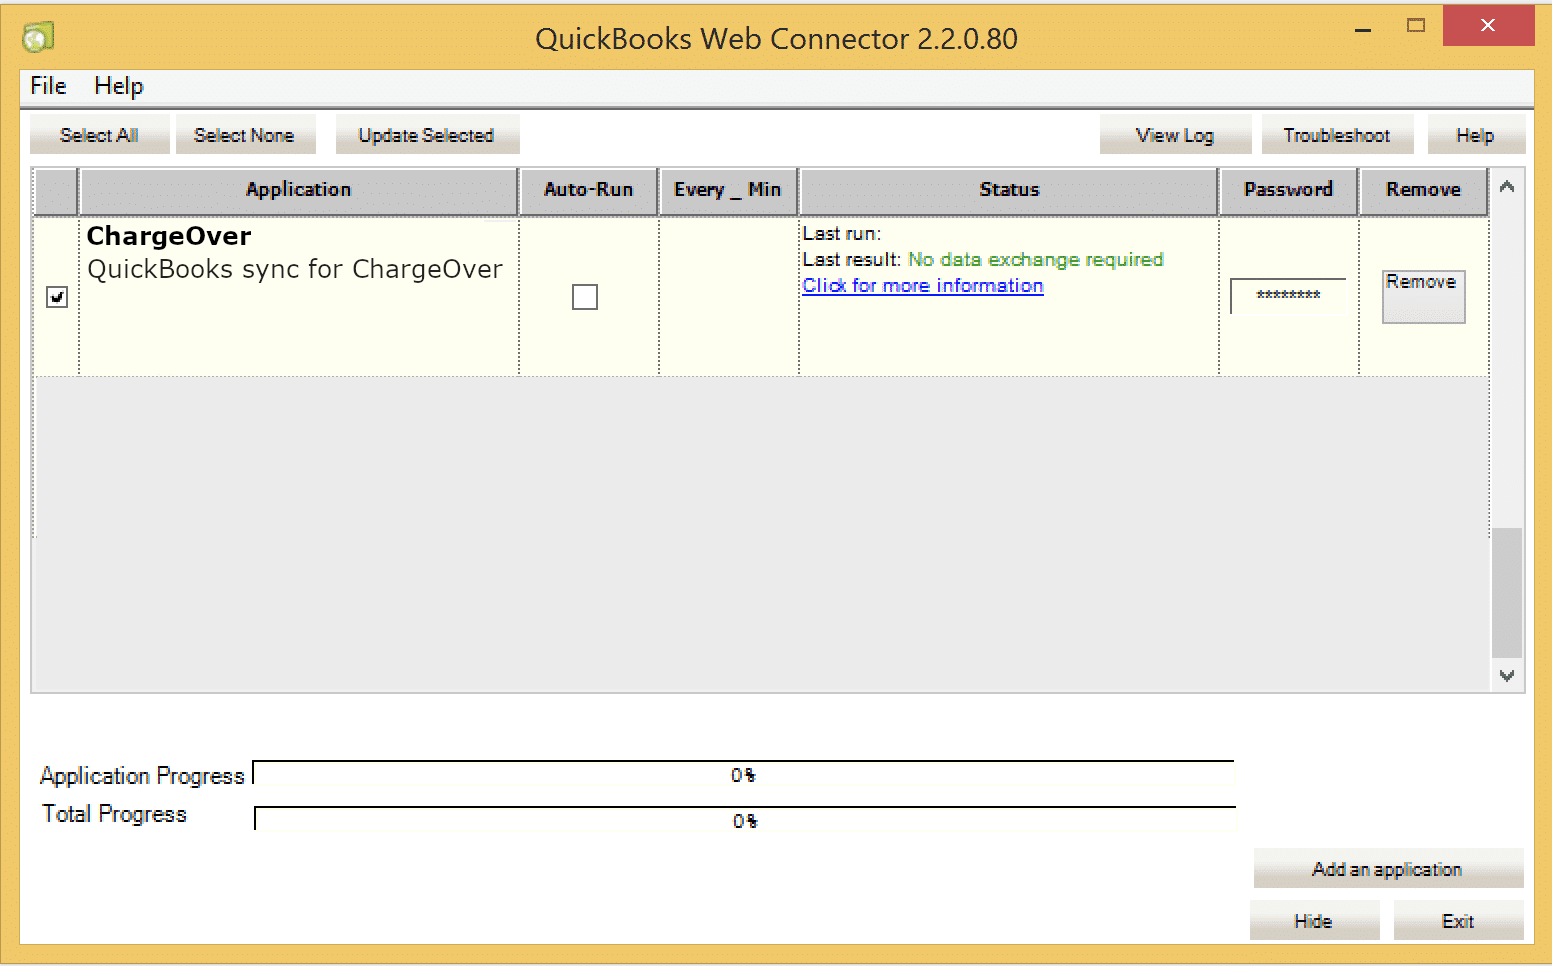
- The Web Connector app will open
- Click Add Application
- Choose the .QWC file you downloaded previously
- QuickBooks will prompt you to allow access to ChargeOver - allow it
- Paste the Web Connector Password into the QuickBooks Web Connector
That's it, you're done!
Keep in Mind
- By checking the
Auto Run checkbox in the Web Connector, ChargeOver will automatically sync with QuickBooks - If you do not want automatic syncing, uncheck it. ChargeOver highly recommends
setting this to
Auto Run - To sync manually or force a sync immediately, check off the left-most
checkbox, and click the
Update Selected button
Import Customers From QuickBooks Desktop into ChargeOver
- Go to your settings and select
Integrations then selectQuickBooks Desktop - Select "More options..." on the QuickBooks page then click the
Import customers from QuickBooks button
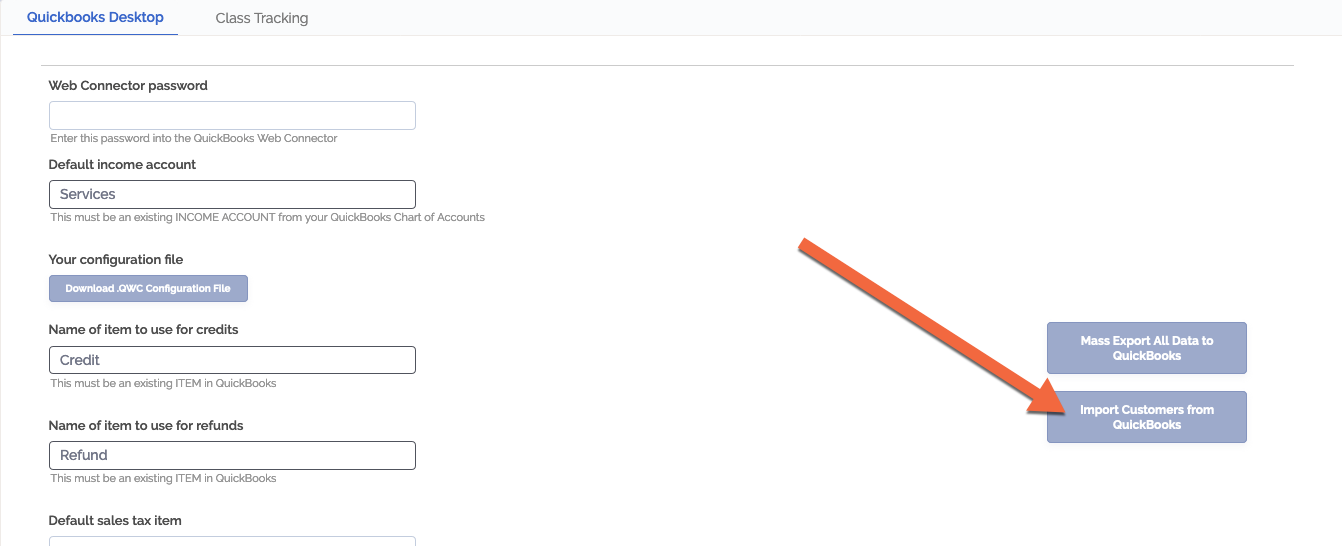
The customer import process will start on the next run of the web connector.
ChargeOver Certificate Permissions
You are trying to connect to QuickBooks Desktop and suddenly you get a form request that says something like this:
ChargeOver with the following certificate is requesting permission to access your QuickBooks company file [insert your company name here].
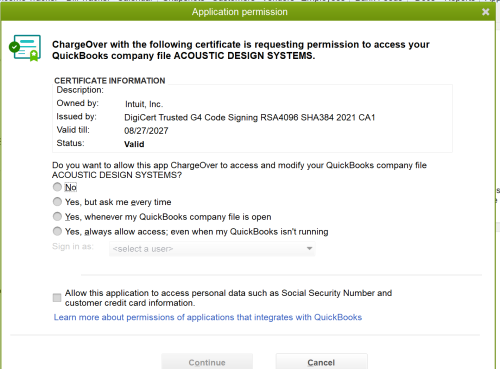
How should you answer these questions? Our suggestions our below.
You can choose any of the Yes options. It is entirely up to you to decide which option works best for you here. We would suggest you choose the 'Yes, always allow access; even if QuickBooks isn't running' option for the first question.
If you choose a user in the 'Sign in as:' section, you need to choose a user that has access and permissions to do the things in ChargeOver that you will also need to do in QuickBooks. For example, because ChargeOver needs to create customers, invoices, and payments in QuickBooks, the user you choose has to have access to create customers, invoices, and payments in QuickBooks.
ChargeOver does not auto-create any sort of accounts. You must choose an existing QuickBooks user if prompted.
ChargeOver does not sync personal data such as credit card information or social security numbers to QuickBooks, so the last question or checkbox is not necessary to select.
Class Tracking?
Many business owners have certain segments of their business that they want to track. By using the class tracking feature, you can define these segments and track their associated account balances on invoices, bills and other documents.
Why Use it?
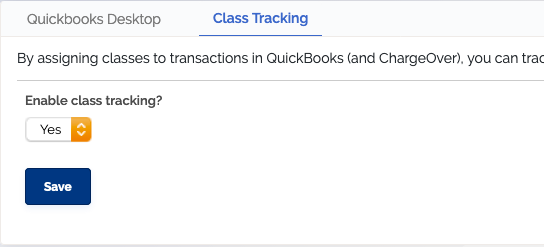
By assigning classes to transactions in QuickBooks (and ChargeOver) you can track account balances by department, business office or location, separate properties you own, or any other meaningful breakdown of your business.
Companies with different departments or locations can use classes to report account balances for each department.
For example, if you had a a company with three locations, you might create an Uptown, a Midtown and a Downtown class for tracking account balances by location.
A nursery might create a class for each enterprise – for example, Trees, Plants, and Accessories. At the end of an accounting period, the company could create separate reports for each location. Likewise, the nursery could create separate reports for each enterprise.
New classes that are added to QuickBooks can take up to an hour to sync over to ChargeOver.
Enable Class Tracking
- Go to your Settings and select
Integrations then [QuickBooks Desktop] from the left side menu - Find the Class Tracking tab and Set the "Enable this feature?" option to "Yes"
- Click
Save
Once you have enabled classes in your account and connected ChargeOver to QuickBooks Desktop, your classes in QuickBooks will automatically carry over to ChargeOver.
Adding or Updating Classes
Classes must be added or updated in QuickBooks. If you add or update classes in QuickBooks, the changes will sync to ChargeOver within 24 hours.
Mapping ChargeOver Products to QuickBooks
By default, ChargeOver maps products in ChargeOver to your item list in QuickBooks.
ChargeOver looks for a QuickBooks product/service with the same Name as the name listed in ChargeOver. If a product or service does not exist in QuickBooks, ChargeOver will create it automatically.
For example, this
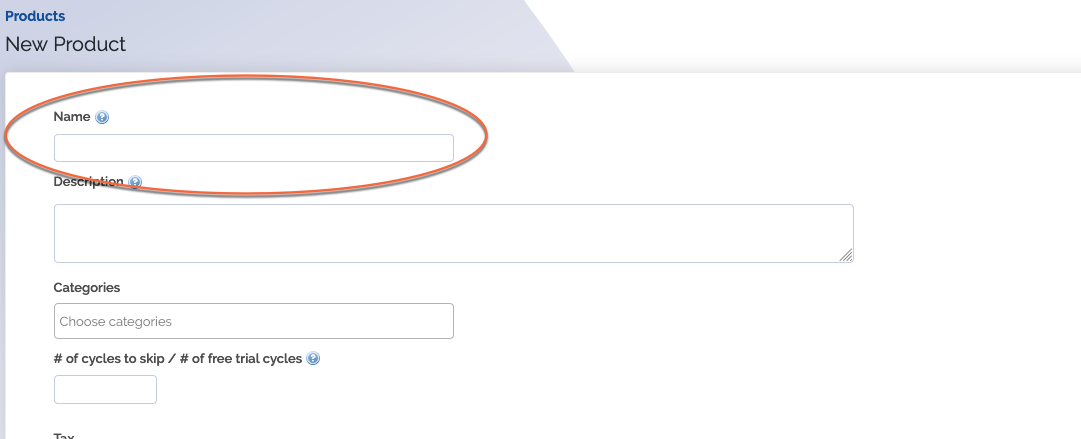
Should match this
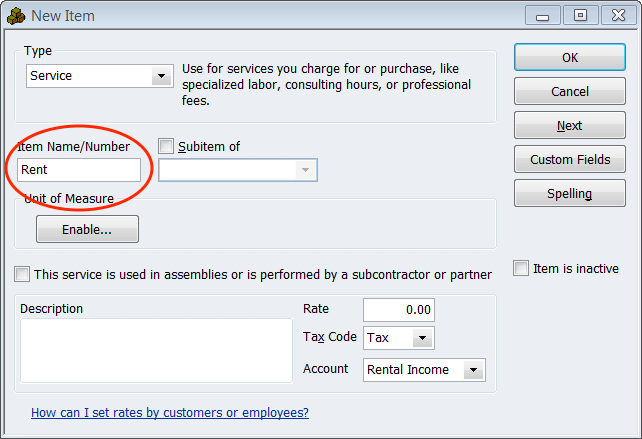
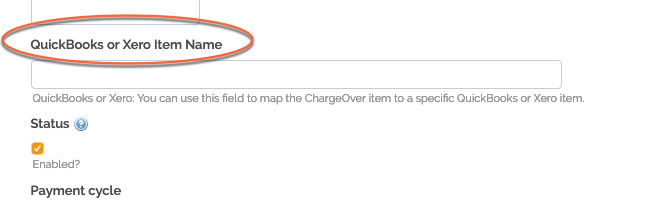
Occasionally, there is reason to have your product in ChargeOver named something different than what it's named in QuickBooks.
In that case, you can use the QuickBooks or Xero Item Name field in ChargeOver instead.
By entering the QuickBooks or Xero Item Name field in ChargeOver, ChargeOver will then ignore the product name in ChargeOver, and instead look in QuickBooks for something matching the QuickBooks or Xero Item Name.
If you have products or services in QuickBooks that are in an hierarchy / category, you must prefix them with the parent product/category.
For example, this
Clothes > Shirts > Red T-Shirt
Should be represented as
Clothes:Shirts:Red T-Shirt
Open QuickBooks Web Connector and Restart QuickBooks
When syncing ChargeOver with QuickBooks Desktop for Windows, there's a helper program called the QuickBooks Web Connector that runs alongside QuickBooks to make the data transfer happen.
By default, the QuickBooks Web Connector will start automatically when QuickBooks starts, and sync data automatically from ChargeOver.
If you find that ChargeOver and QuickBooks are not syncing (no data is being exchanged at all), you may be asked to make sure the QuickBooks Web Connector is running.
Steps to Check the Web Connector
-
Start QuickBooks
-
From within QuickBooks, select File, then App Management, then Update Web Services