Usage Based Billing
Overview
SaaS businesses and utility companies are typical users of metered billing. Metered billing has significant advantages for businesses and their customers.
Customers can economize by paying only for what they need. At the same time, SaaS and other businesses can compete in crowded marketplaces with flexible offerings that are lower in cost and pay-as-you-go.
If you need an automated way to charge per gigabyte, per minute, per user, or per hour, this article is for you.
The external application could be your website or application. It will send metered data to ChargeOver via the ChargeOver REST API. You can also send metered data to ChargeOver through usage URLs and even spreadsheets.
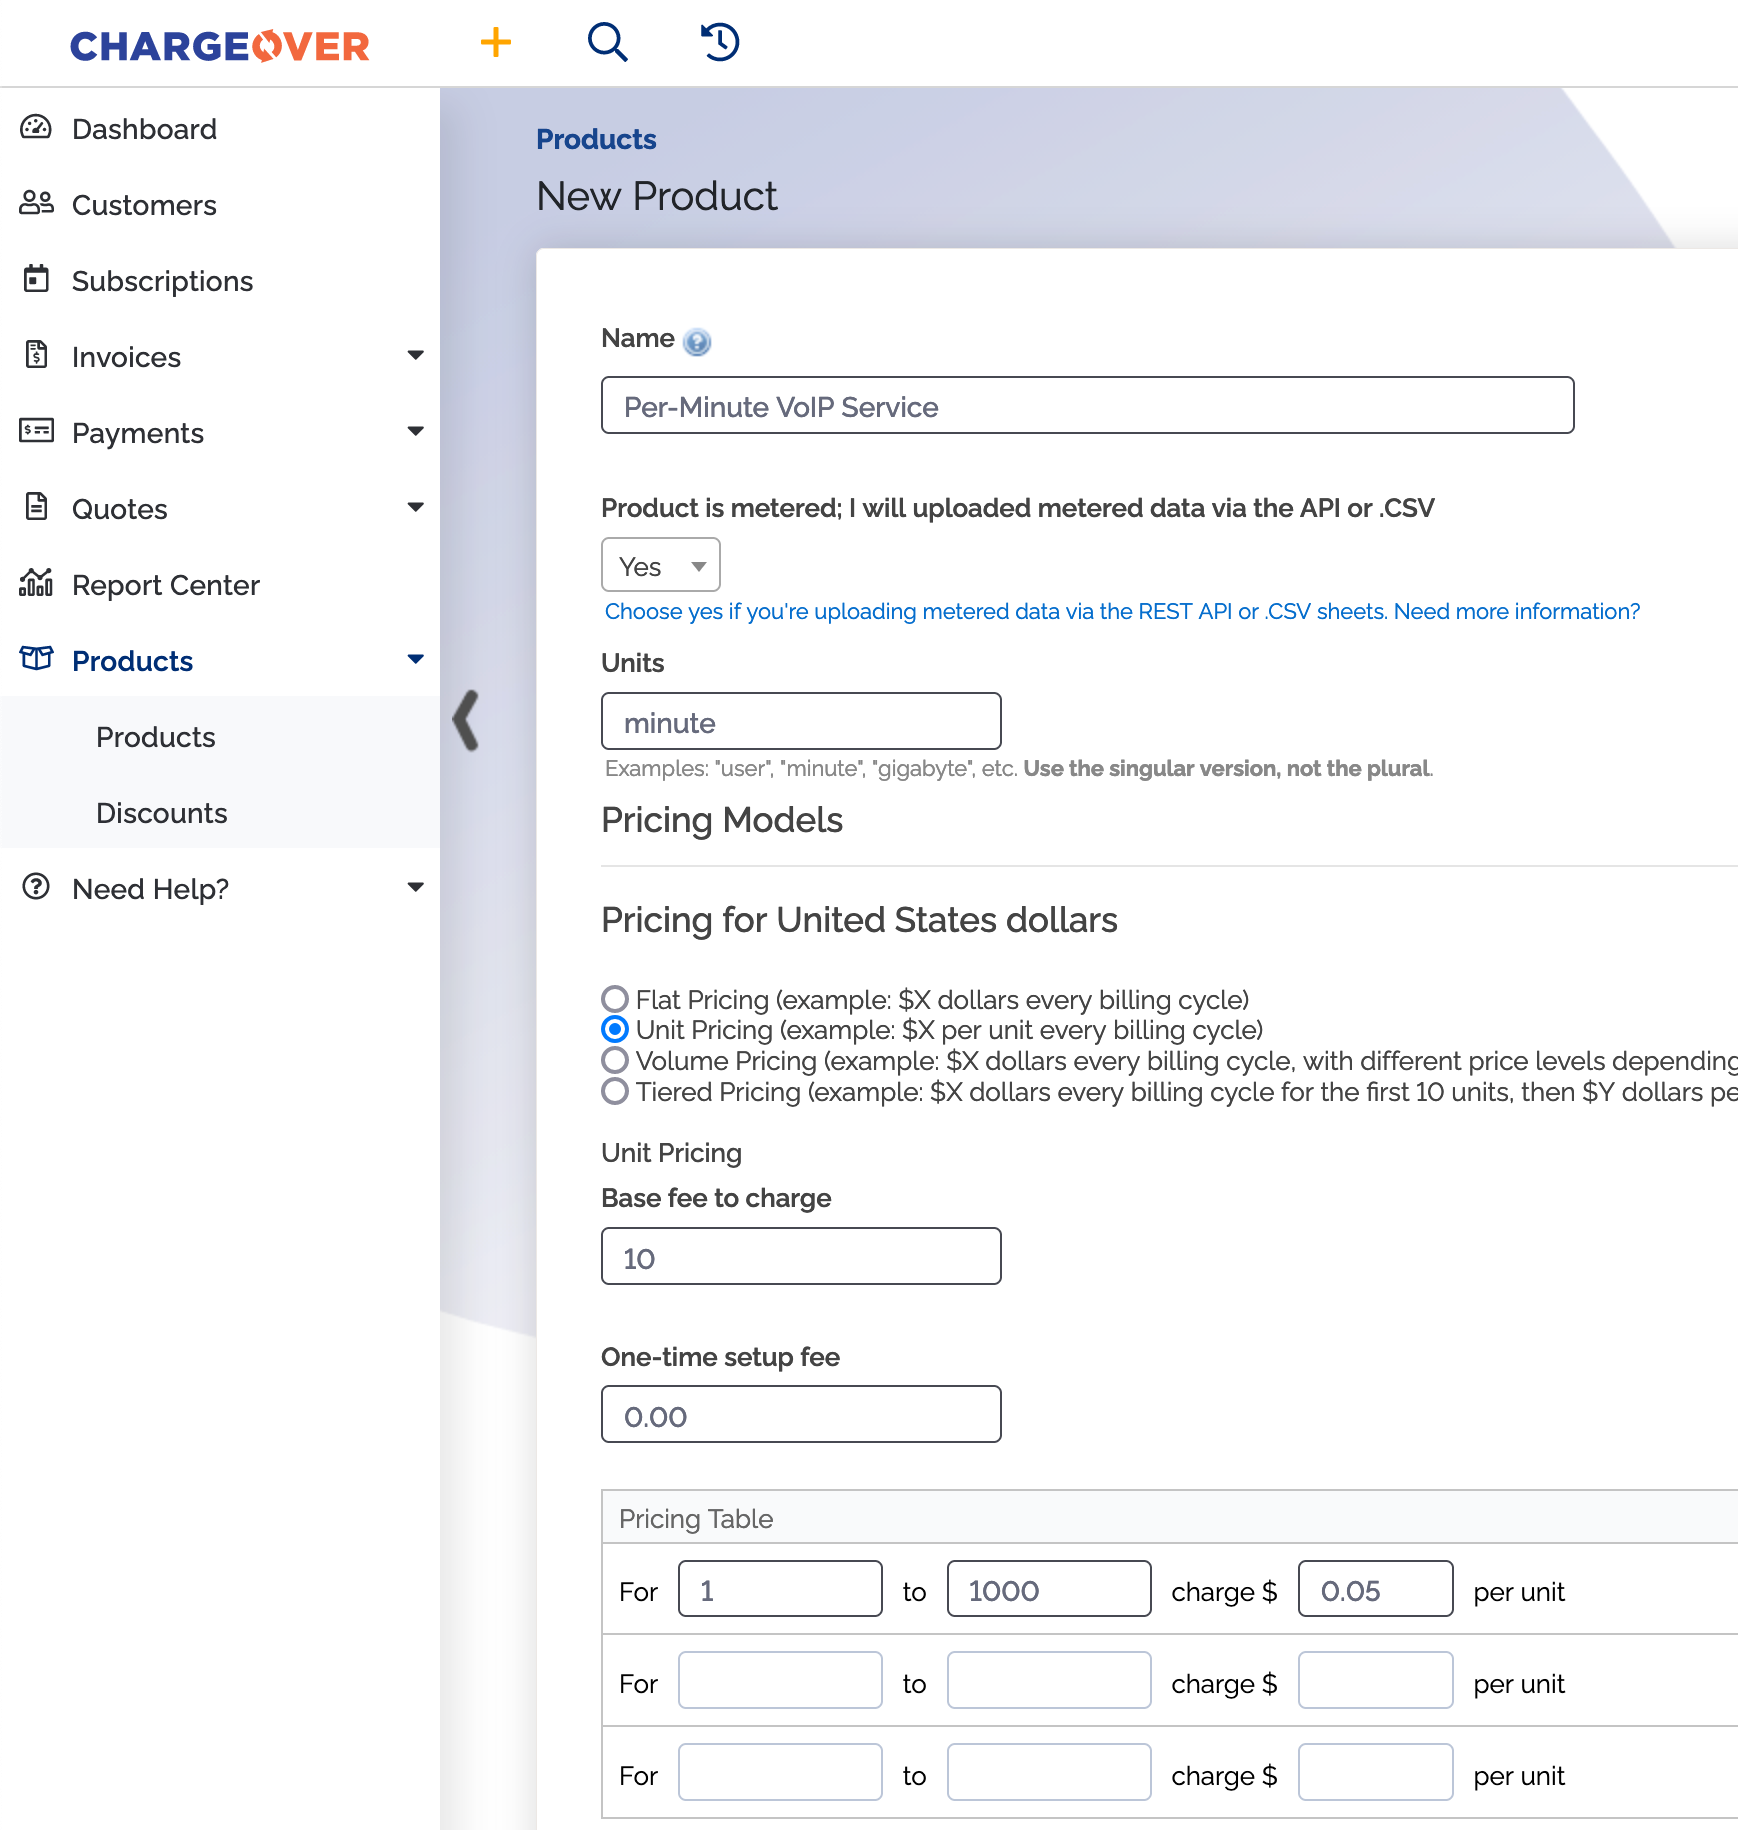
Set up VoIP service
- Select
Products - Then
New Product - Fill out the required fields
- Select "Yes" for the "Product is metered; I will uploaded metered data via the API or .CSV" option
- Select a pricing model for the product
Save your changes
Let’s set up the customer and the subscription next!
- Select Subscriptions, then click
New Subscription
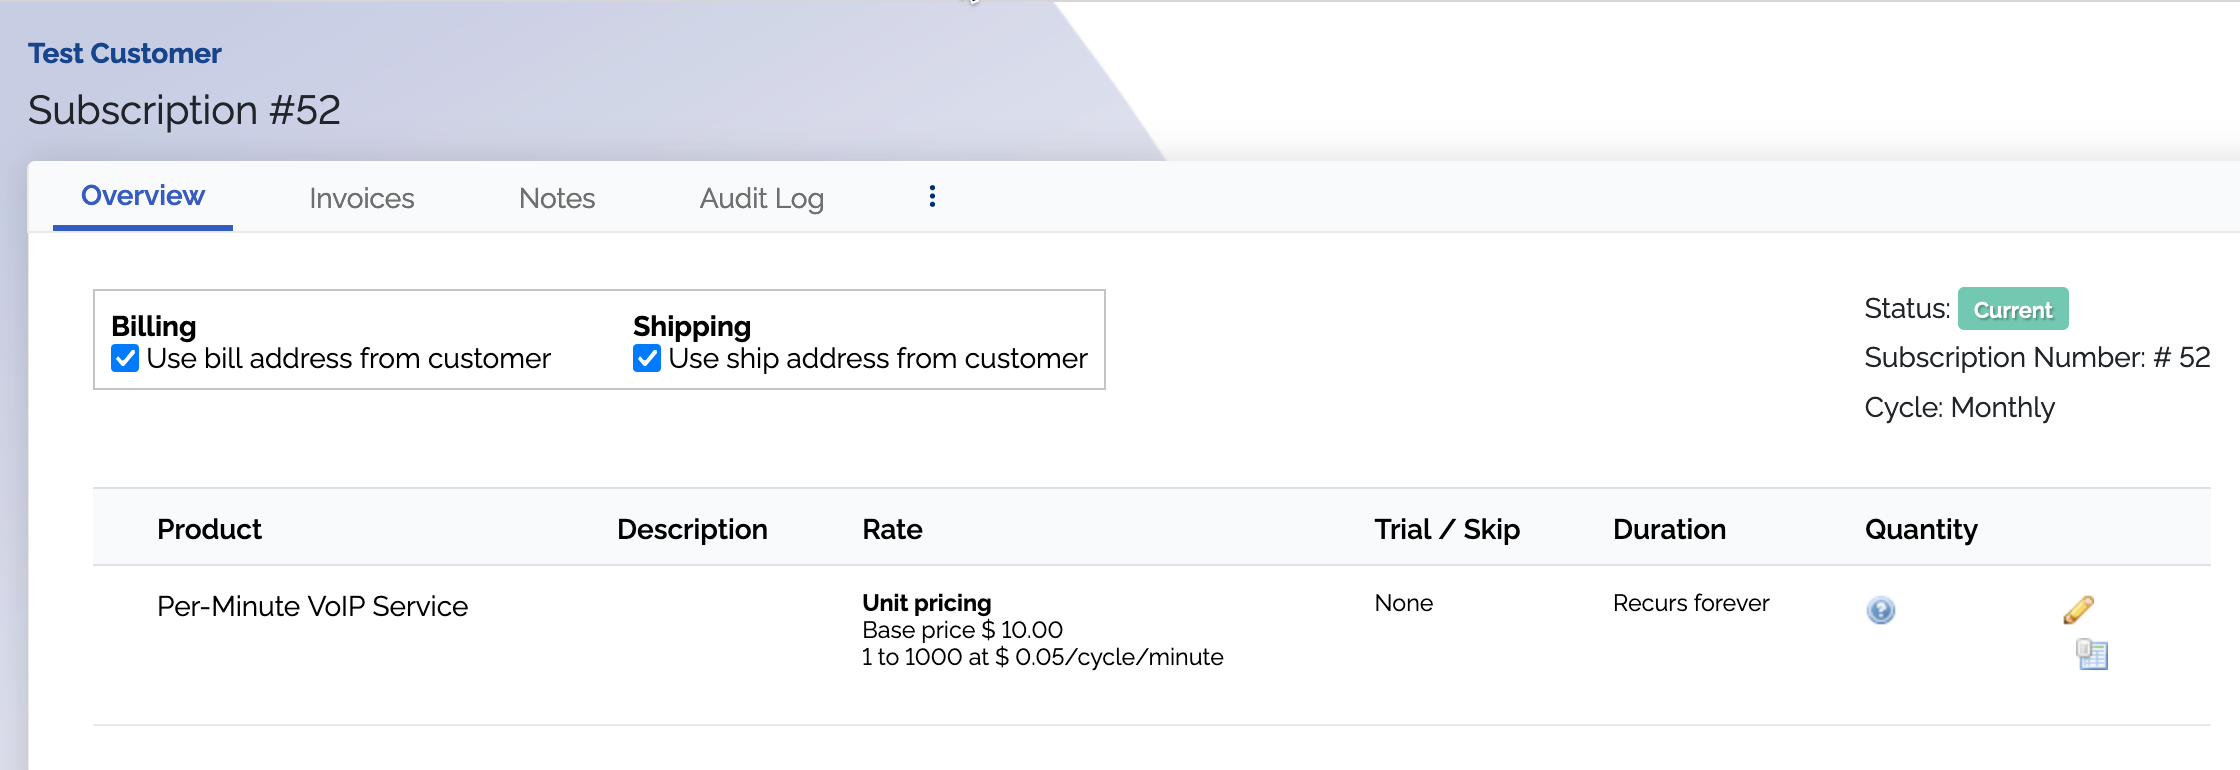
-
Select the new VoIP service you created as a Product
-
Save changes
Next you will need to find your REST API credentials from ChargeOver.
Get your REST API credentials
- Go to your Settings, then select
Developer andREST API
Now you can configure your REST API access
Our open-source code libs on GitHub make it easy to get started with the API.
- The endpoint you should Get should look something like this
GET /api/v3/package/713
- The JSON document you Get will looks something like this
{
   "code": 200,
   "status": "OK",
   "message": "",
   "response":
   {
     "package_id": 713,
     ...
     "line_items": [
        {
           "line_item_id": 854,
           ...
        }
     ]
   }
}
- The key element here is the line_item_id value, which in this example, is 854
- This is a globally unique identifier for the particular line on the package/subscription. This is what we’re going to send our metered data to
- Let’s send some metered data to ChargeOver. Our customer used 22 minutes on September 15
POST /api/v3/usage

{
   "line_item_id": 854,
   "usage_value": 22,
   "from": "2015-09-15 00:00:00",
   "to": "2015-09-15 23:59:59"
}
You’ll send the line_item_id we got from the package, a usage_value (the number of minutes used) and a date range (for our example, we’re going to send the total minutes for a full day’s worth of usage).

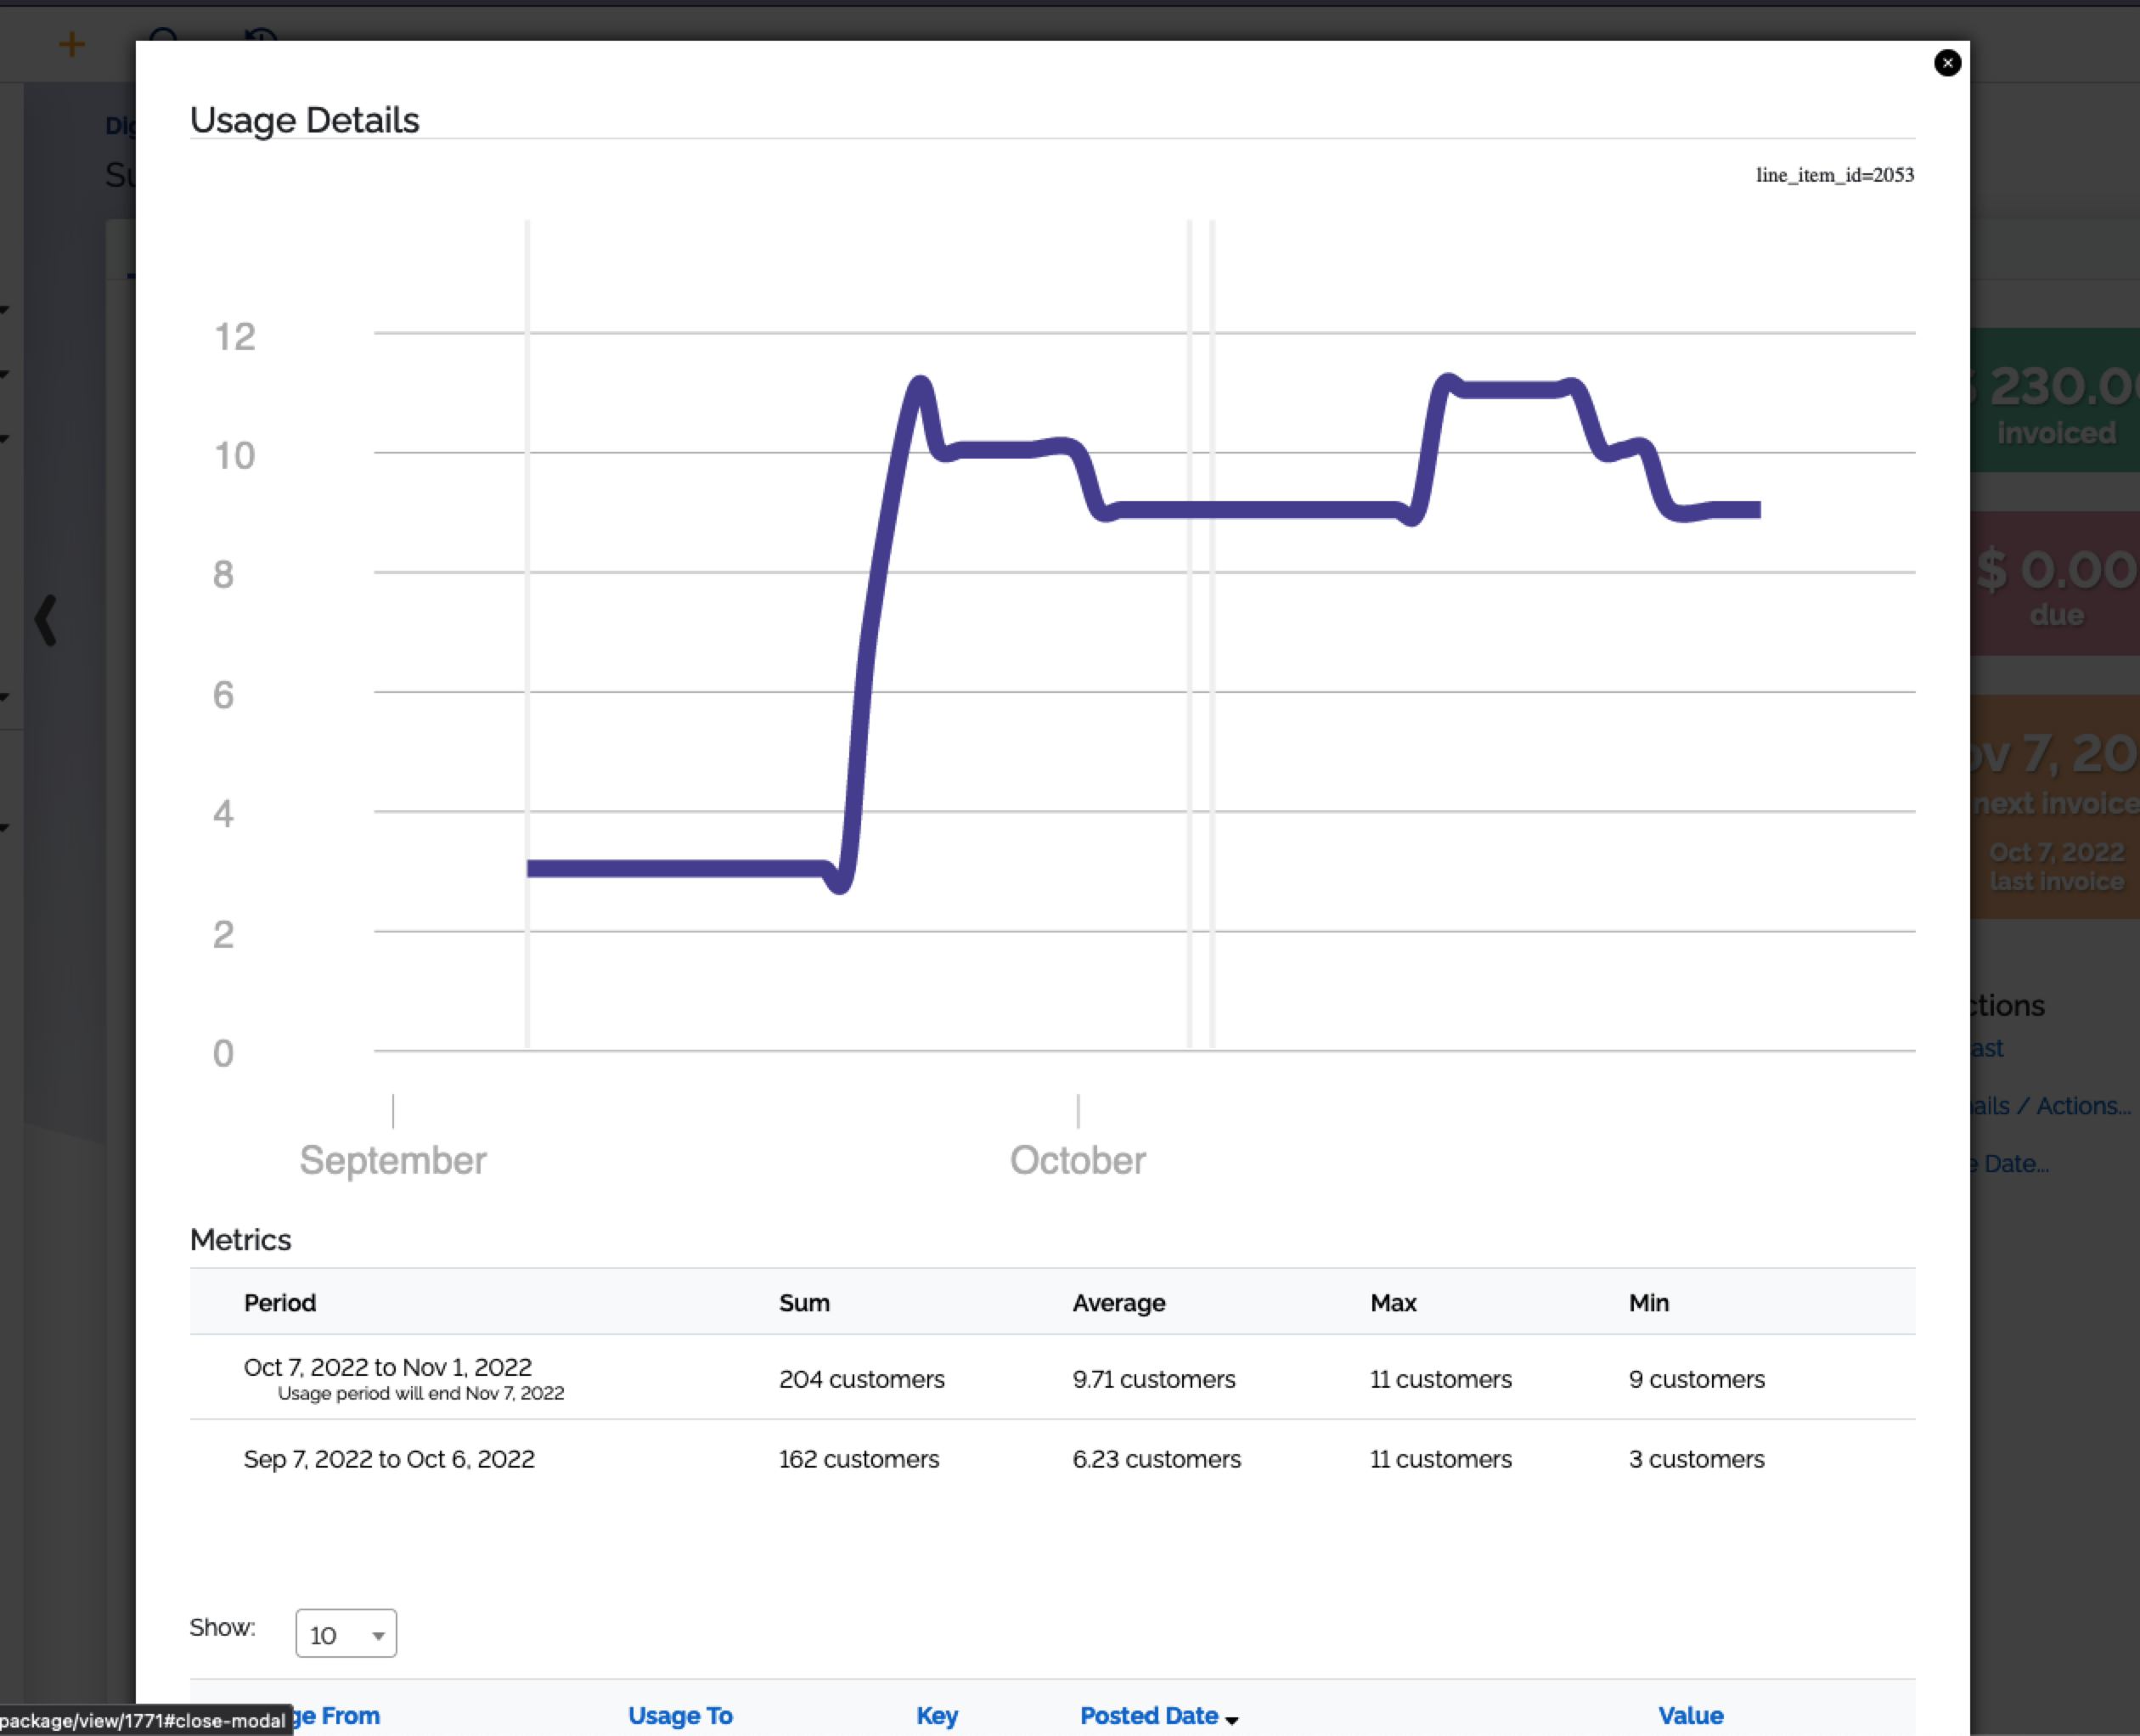
- If you go back to ChargeOver, and click the little chart/graph icon on the package line, you’ll get a graph showing you the data that was submitted to ChargeOver
- The example image below shows a few days worth of data
At this point, you’ve successfully sent usage/metered data to ChargeOver, and ChargeOver is going to use that metered data to create an invoice automatically the next time an invoice is due for this customer.
The customer will get a nicely formatted email invoice, and a copy of the invoice in PDF format, that will indicate the minutes they were billed for based on the unit pricing tiers you set up.
What an invoice could look like
Here’s an example of what the invoice is going to look like.
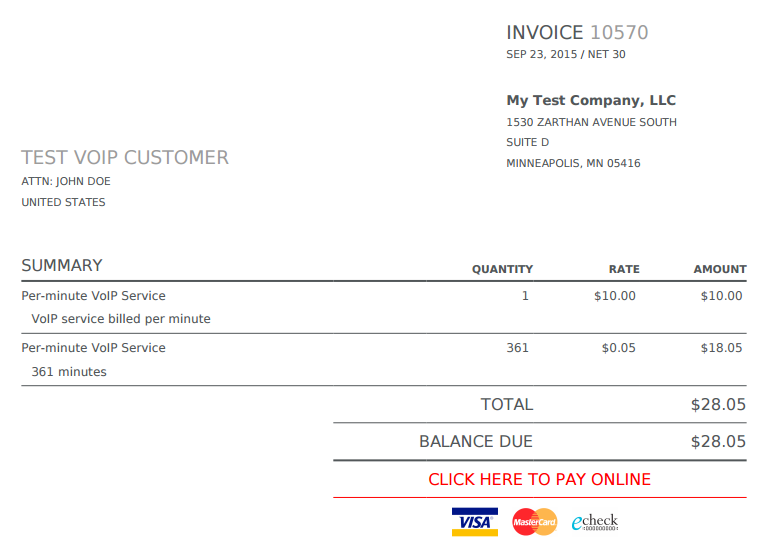
Notice the flat fee ($10) that we’re charging, and then the second line item for the $0.05 per minute charge (361 minutes).
From a technical perspective, you can submit usage to ChargeOver as often or seldom as you want. Send it once per day, or many times a day, it’s up to you. ChargeOver will automatically charge for the correct usage based on the invoice date and period for which the customer is being billed.
To get started with our REST API, click here.
Of course, you can also customize how your PDF invoices look in ChargeOver, how often invoices are generated. For example, you can bill monthly, quarterly, weekly and much, much more.