Customers
Overview
Your business can't run without customers. Read more about how to create, edit and even delete customers in your ChargeOver account.
Create a new customer
Steps
- Click the
Customers menu option on the left dashboard - Click the
New Customer button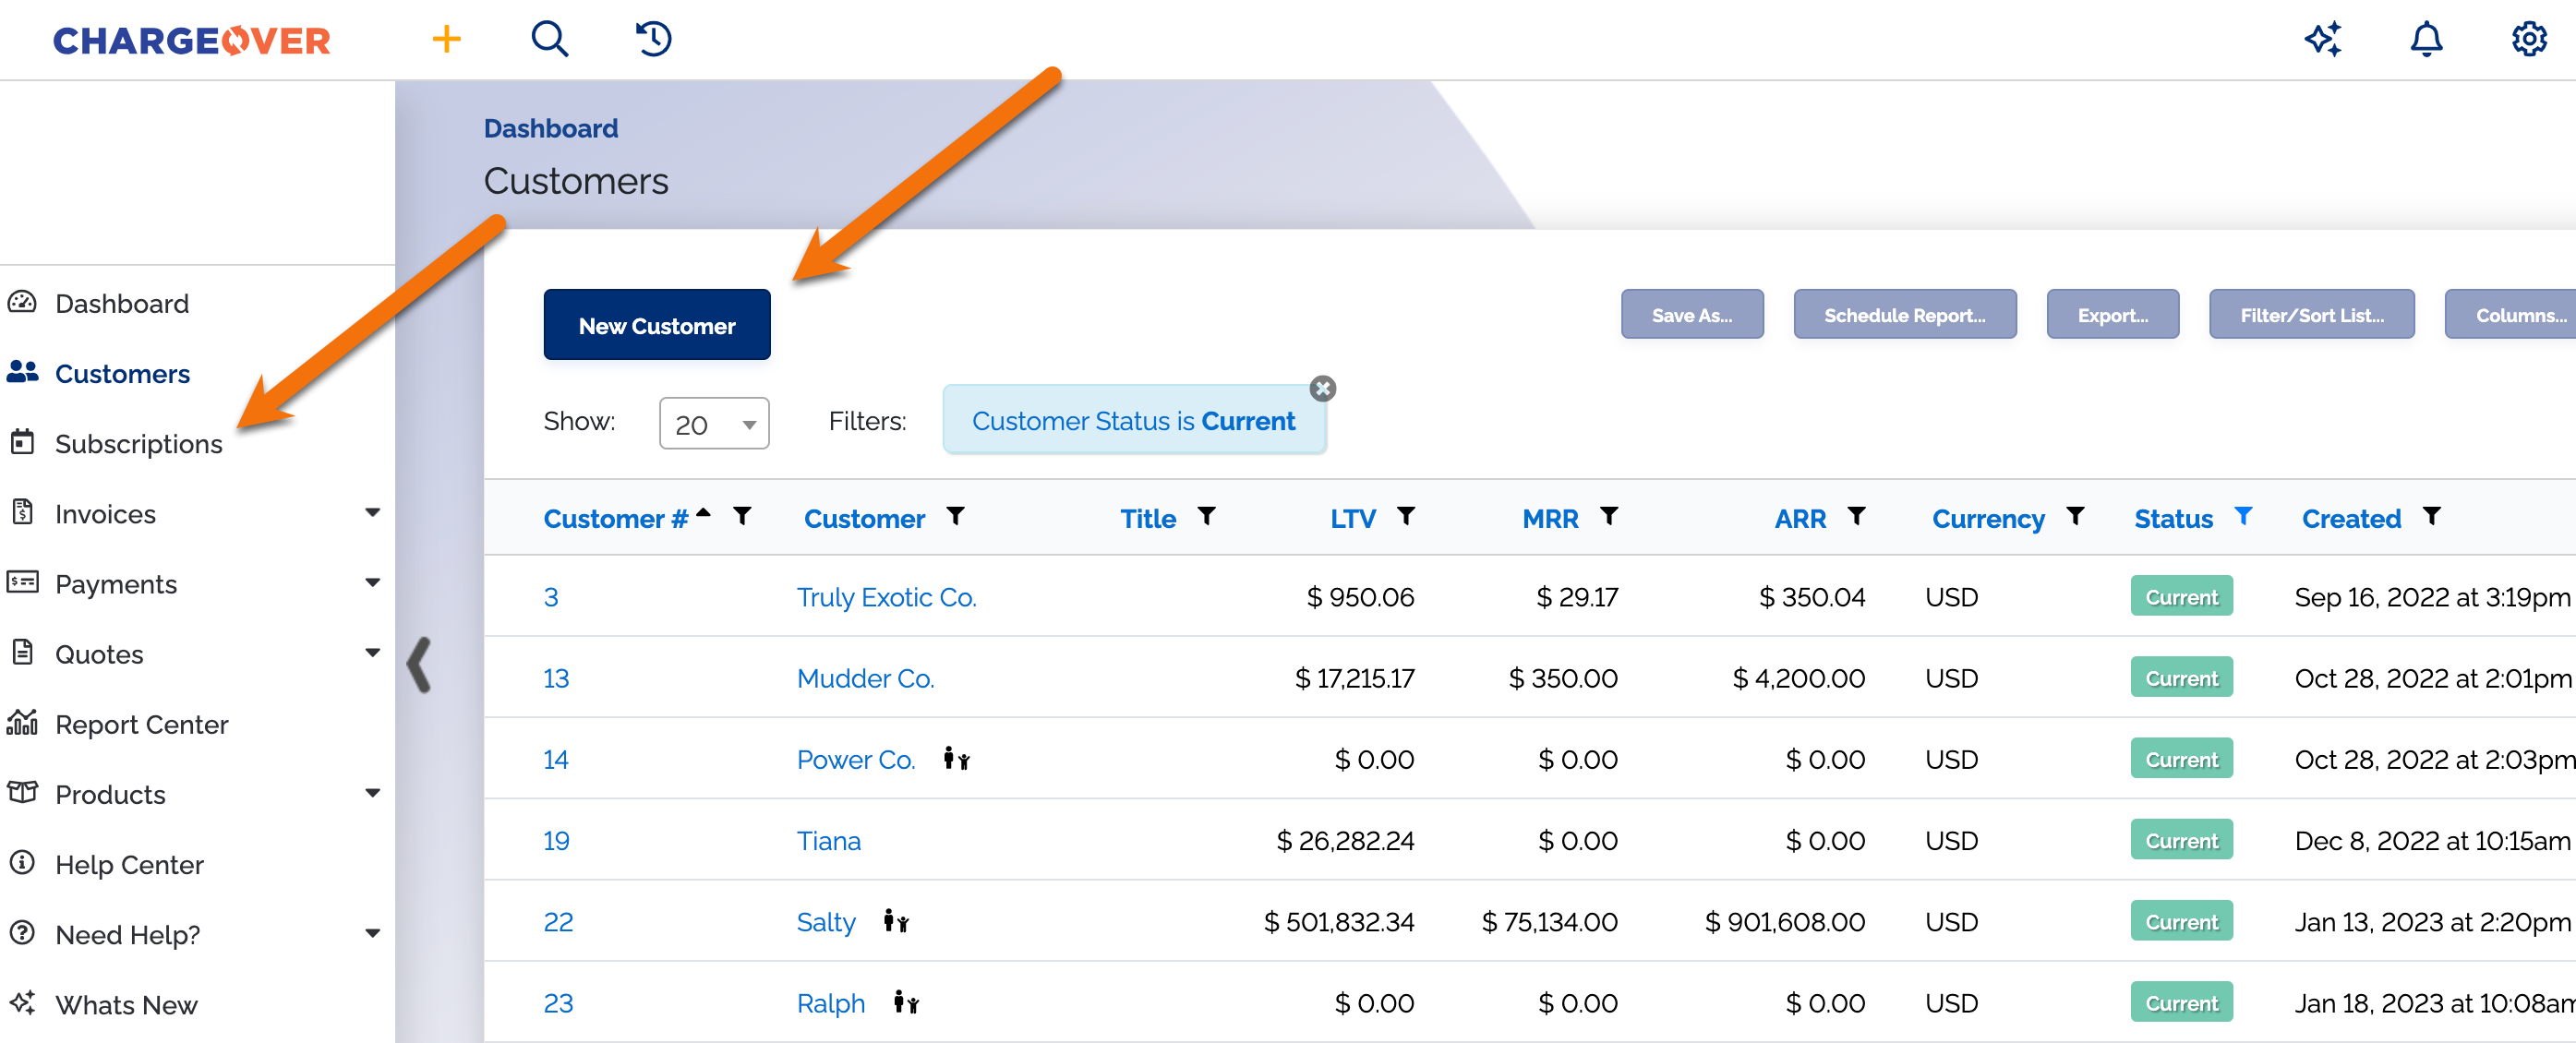
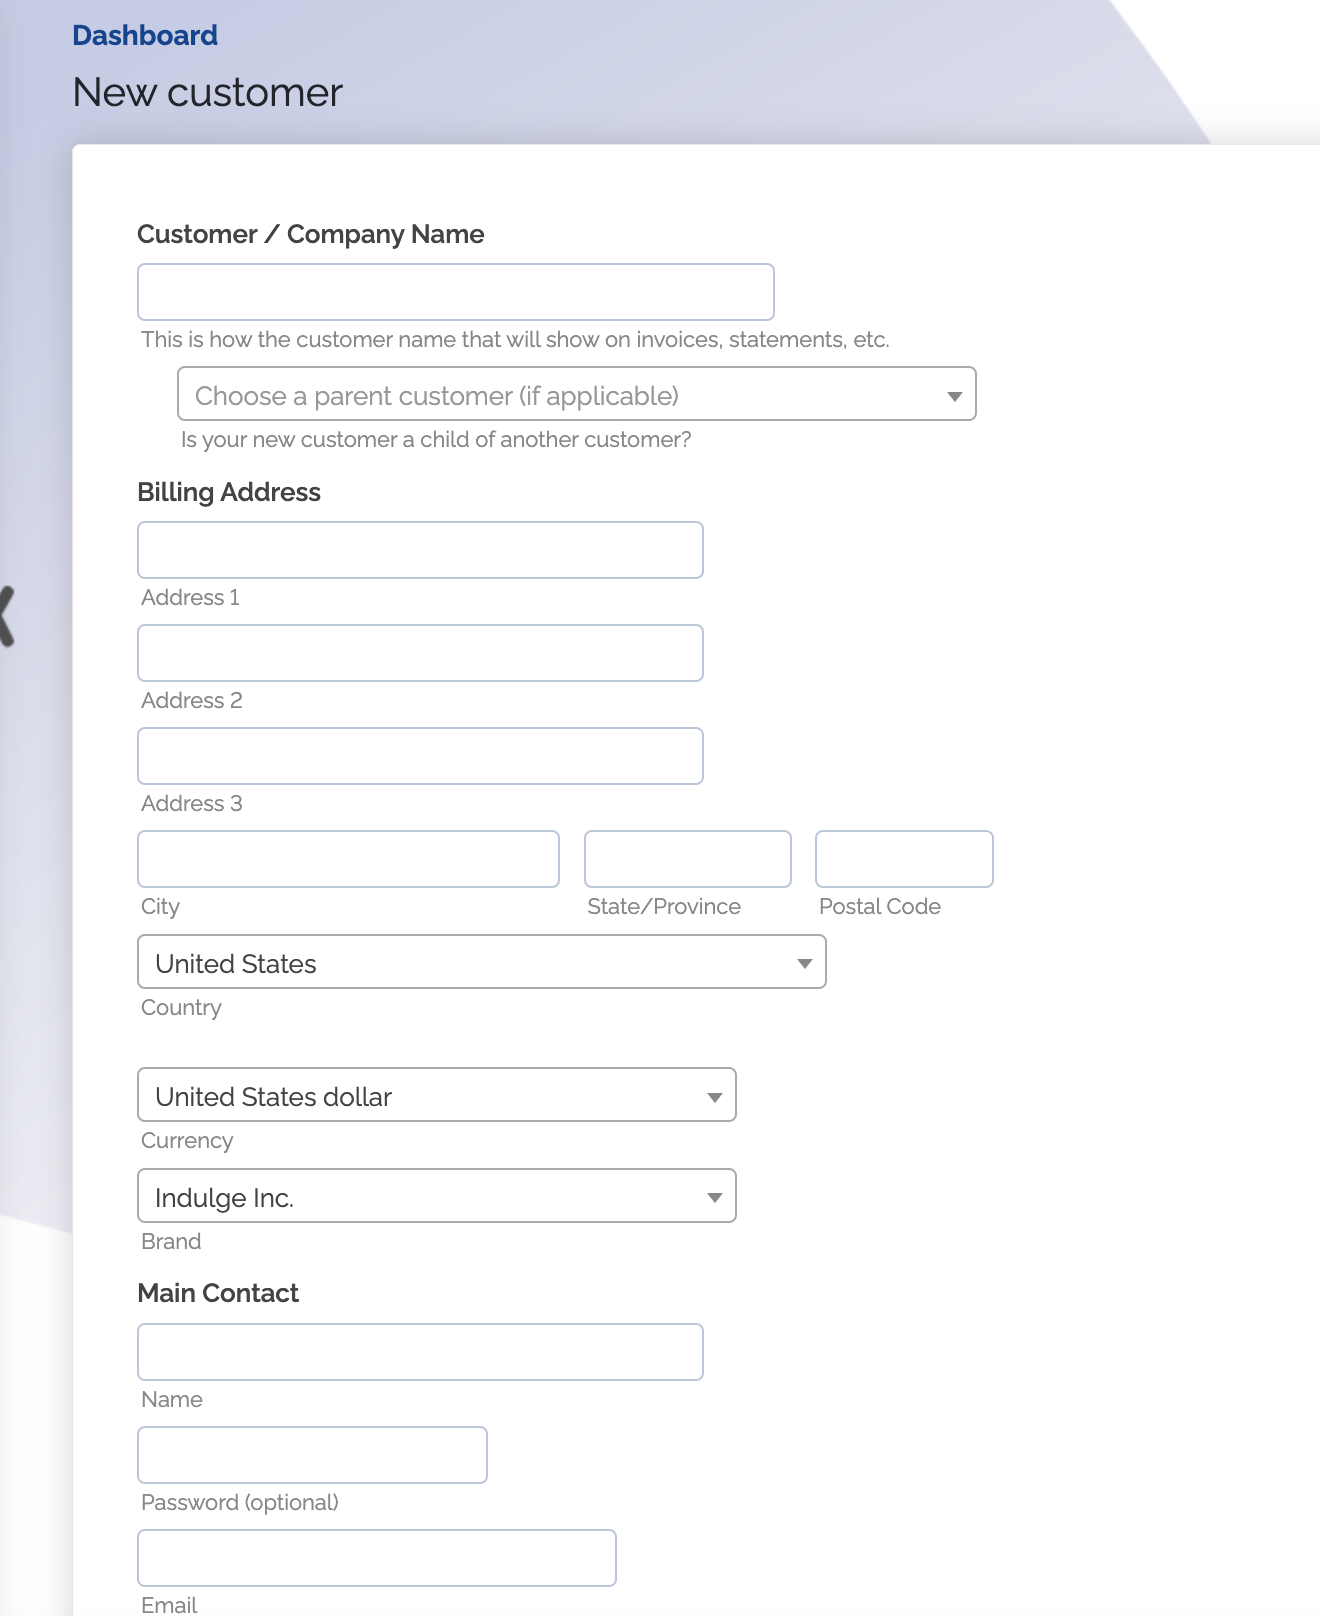
- From there, you'll be able to fill out the customers information and set their billing address, contact information and currency
- Once you're finished, click
Save
Add a new payment method for a customer
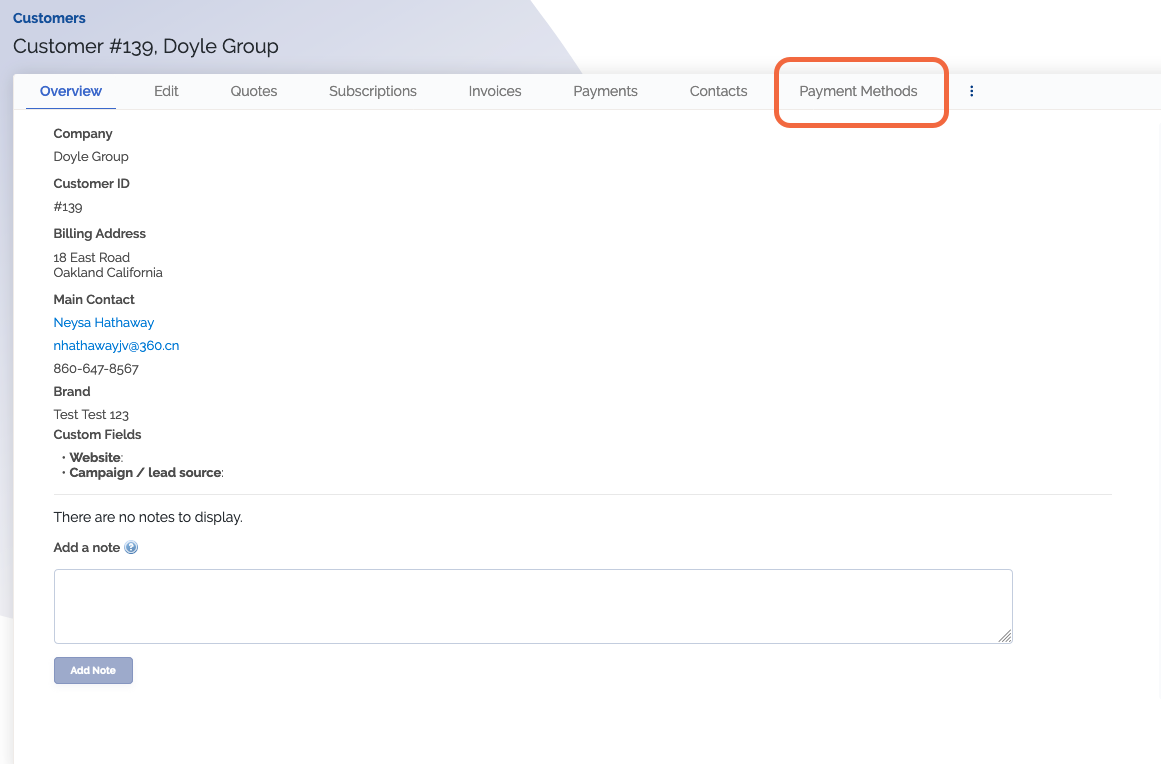
- Go to the customer and click their "Payment Methods" tab
- Click
Add for whichever payment method the customer is going to be paying with

- Type in the payment method information and click
Save Changes
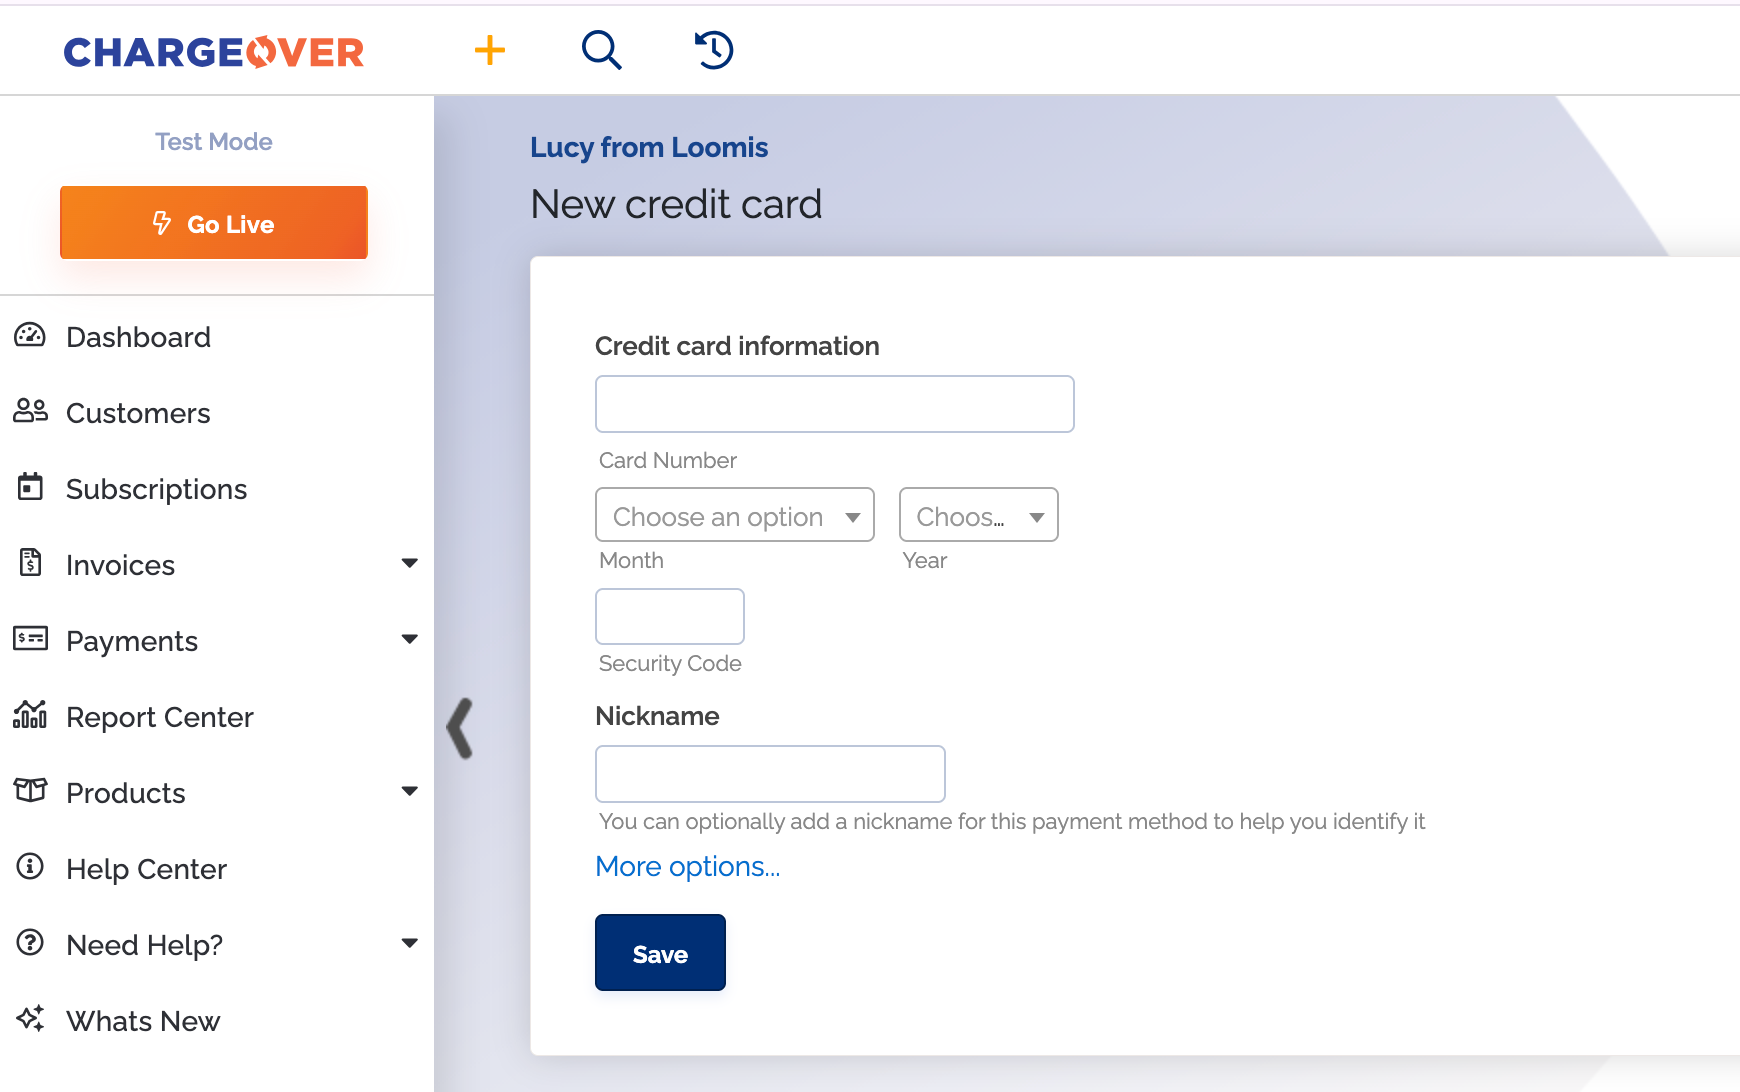
Make sure that when you are entering in a payment method for an ACH account, you avoid putting in any letters in the account number slot. US accounts do not allow for letters to be entered.
Save a payment method on an active subscription
Once you have added a new payment method for the customer, if they already has an active subscription a message will pop up asking if you would like to use the new payment method for any active subscriptions the customer has.

Click
Click
This payment method will then show up in the customer's payment methods tab.

Allow your customer to update their payment method
There are a number of ways to let your customers securely and easily update their payment information.
- If you are using the Customer Portal, customers can log in and use the Update Payment Info option on their list of tabs
- You can use ChargeOver's default "Update your payment method" email template to send an email with the secure payment method update link to the customer
- You can personalize any email ChargeOver sends and include the {{customer.url_paymethodlink}} merge field to include a secure payment method update link in the email
- You can manually retrieve and send a secure link to send to a customer which allows them to update their payment method
Update within the customer portal
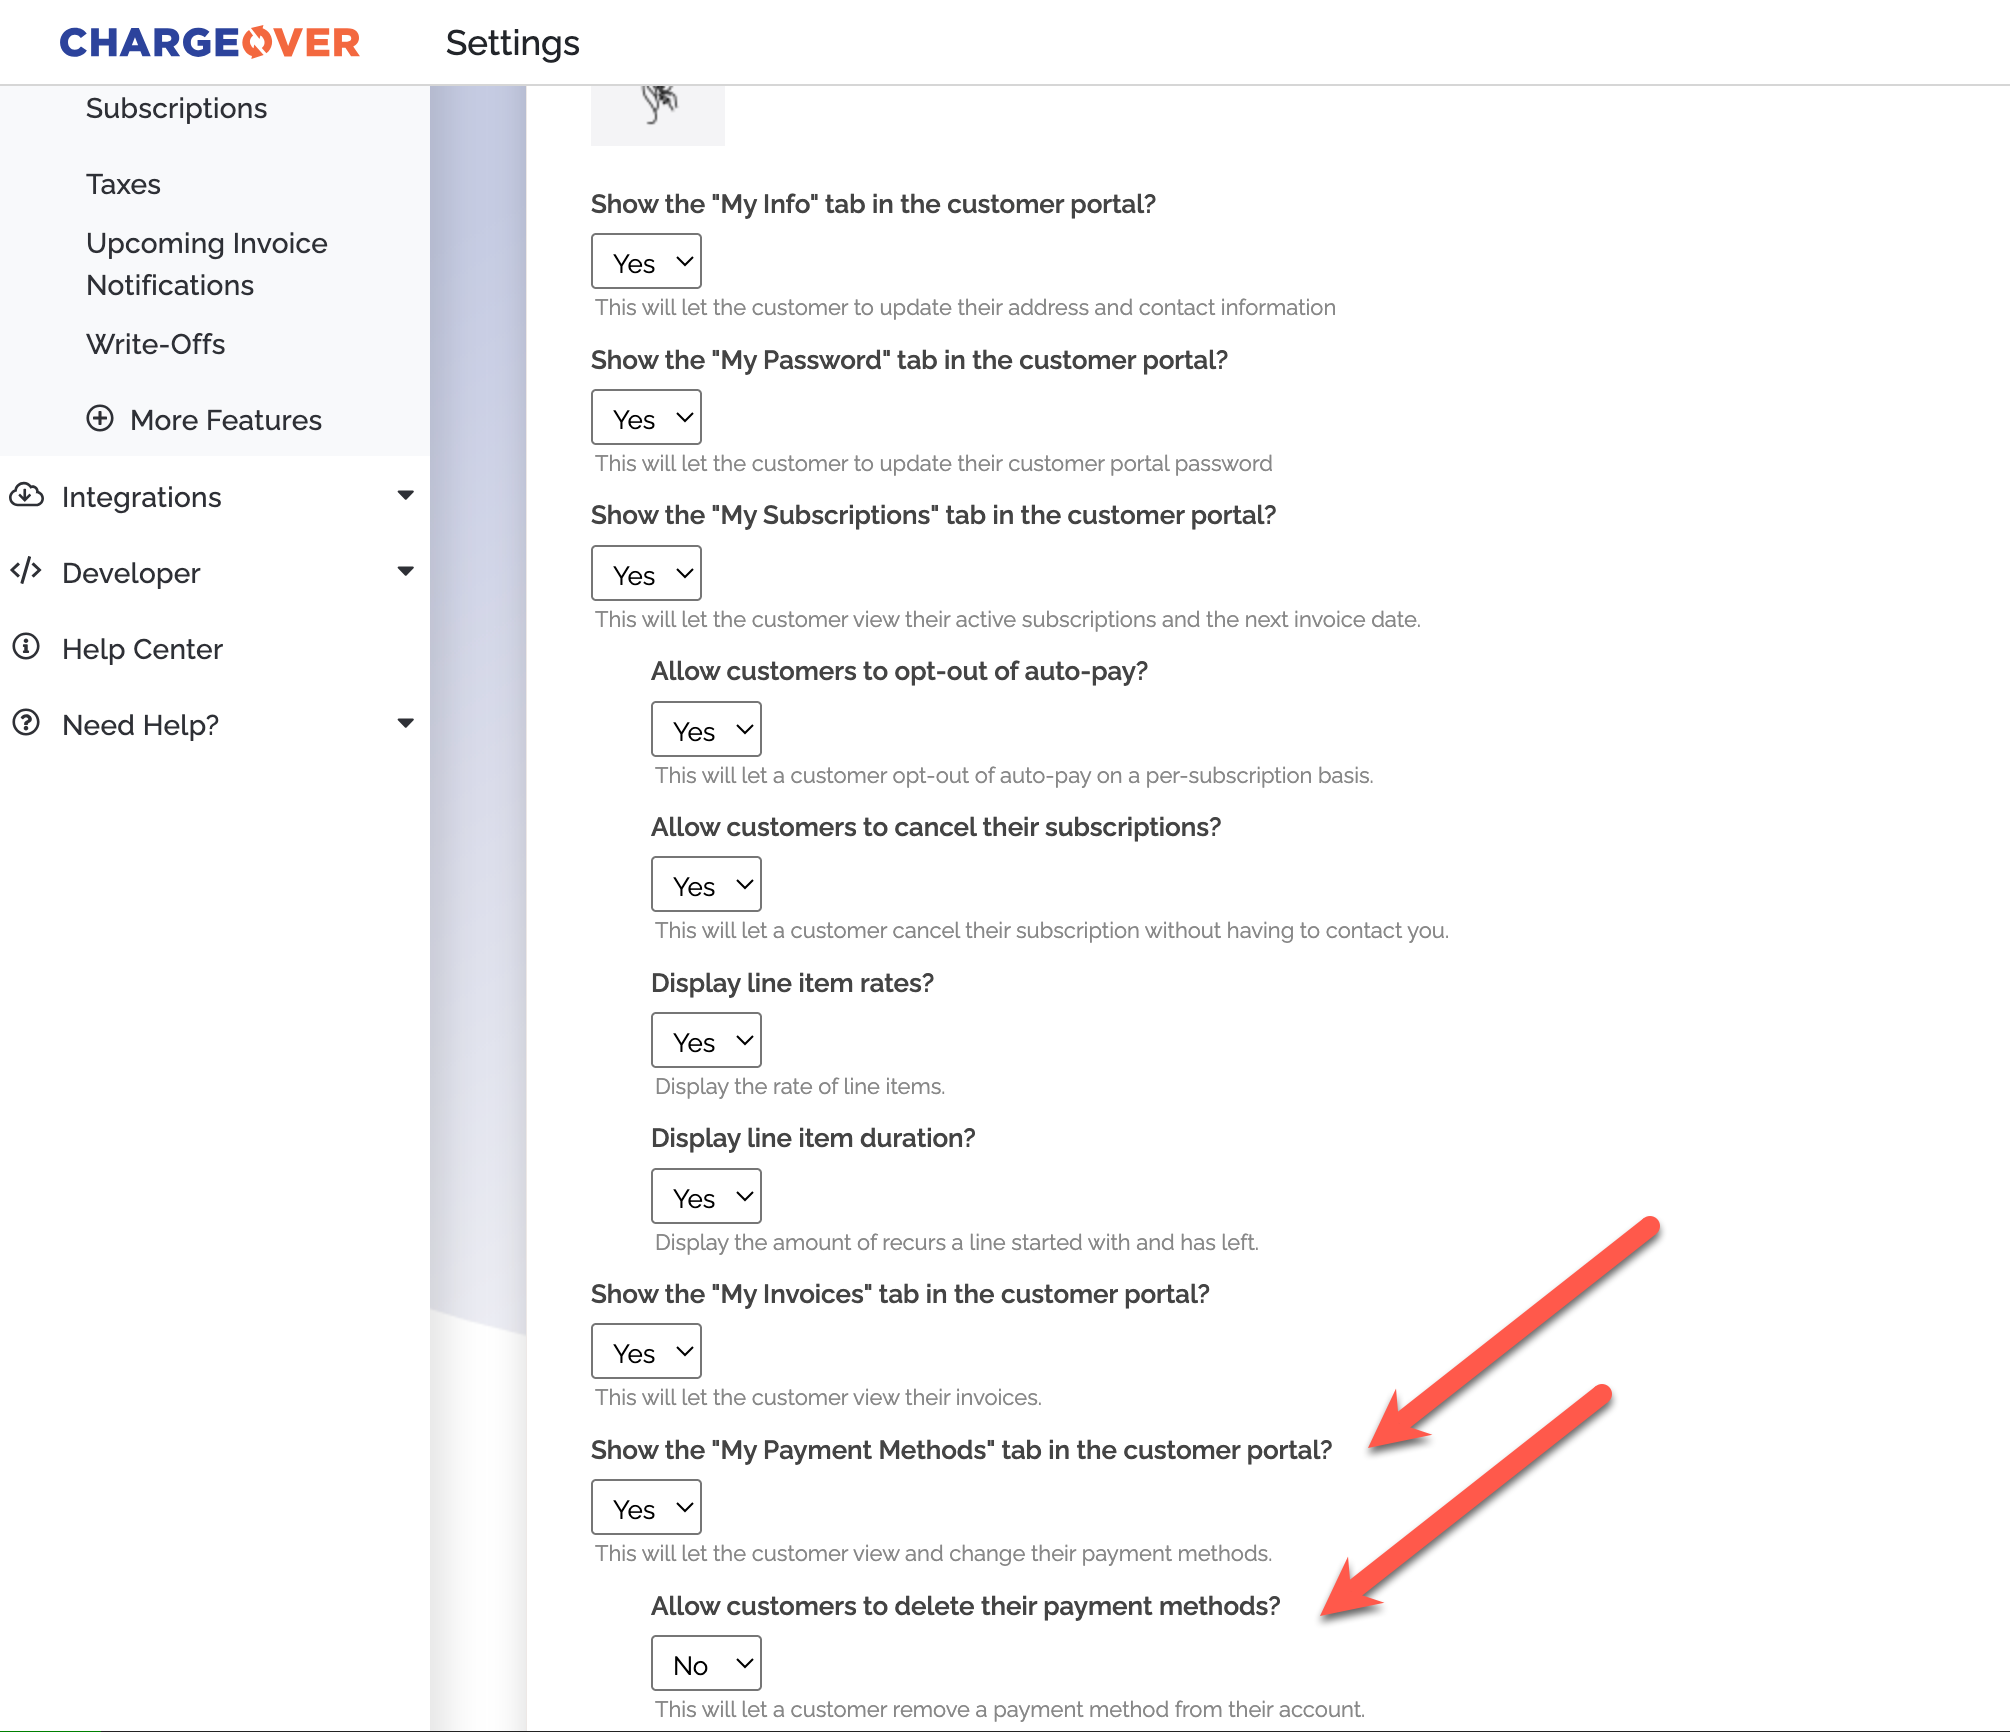
If you have the customer portal enabled, you can allow for your customer's to update their payment methods through their account and even delete their payment methods.
This is what it looks like if the customer has the option to update their payment method in your customer portal:
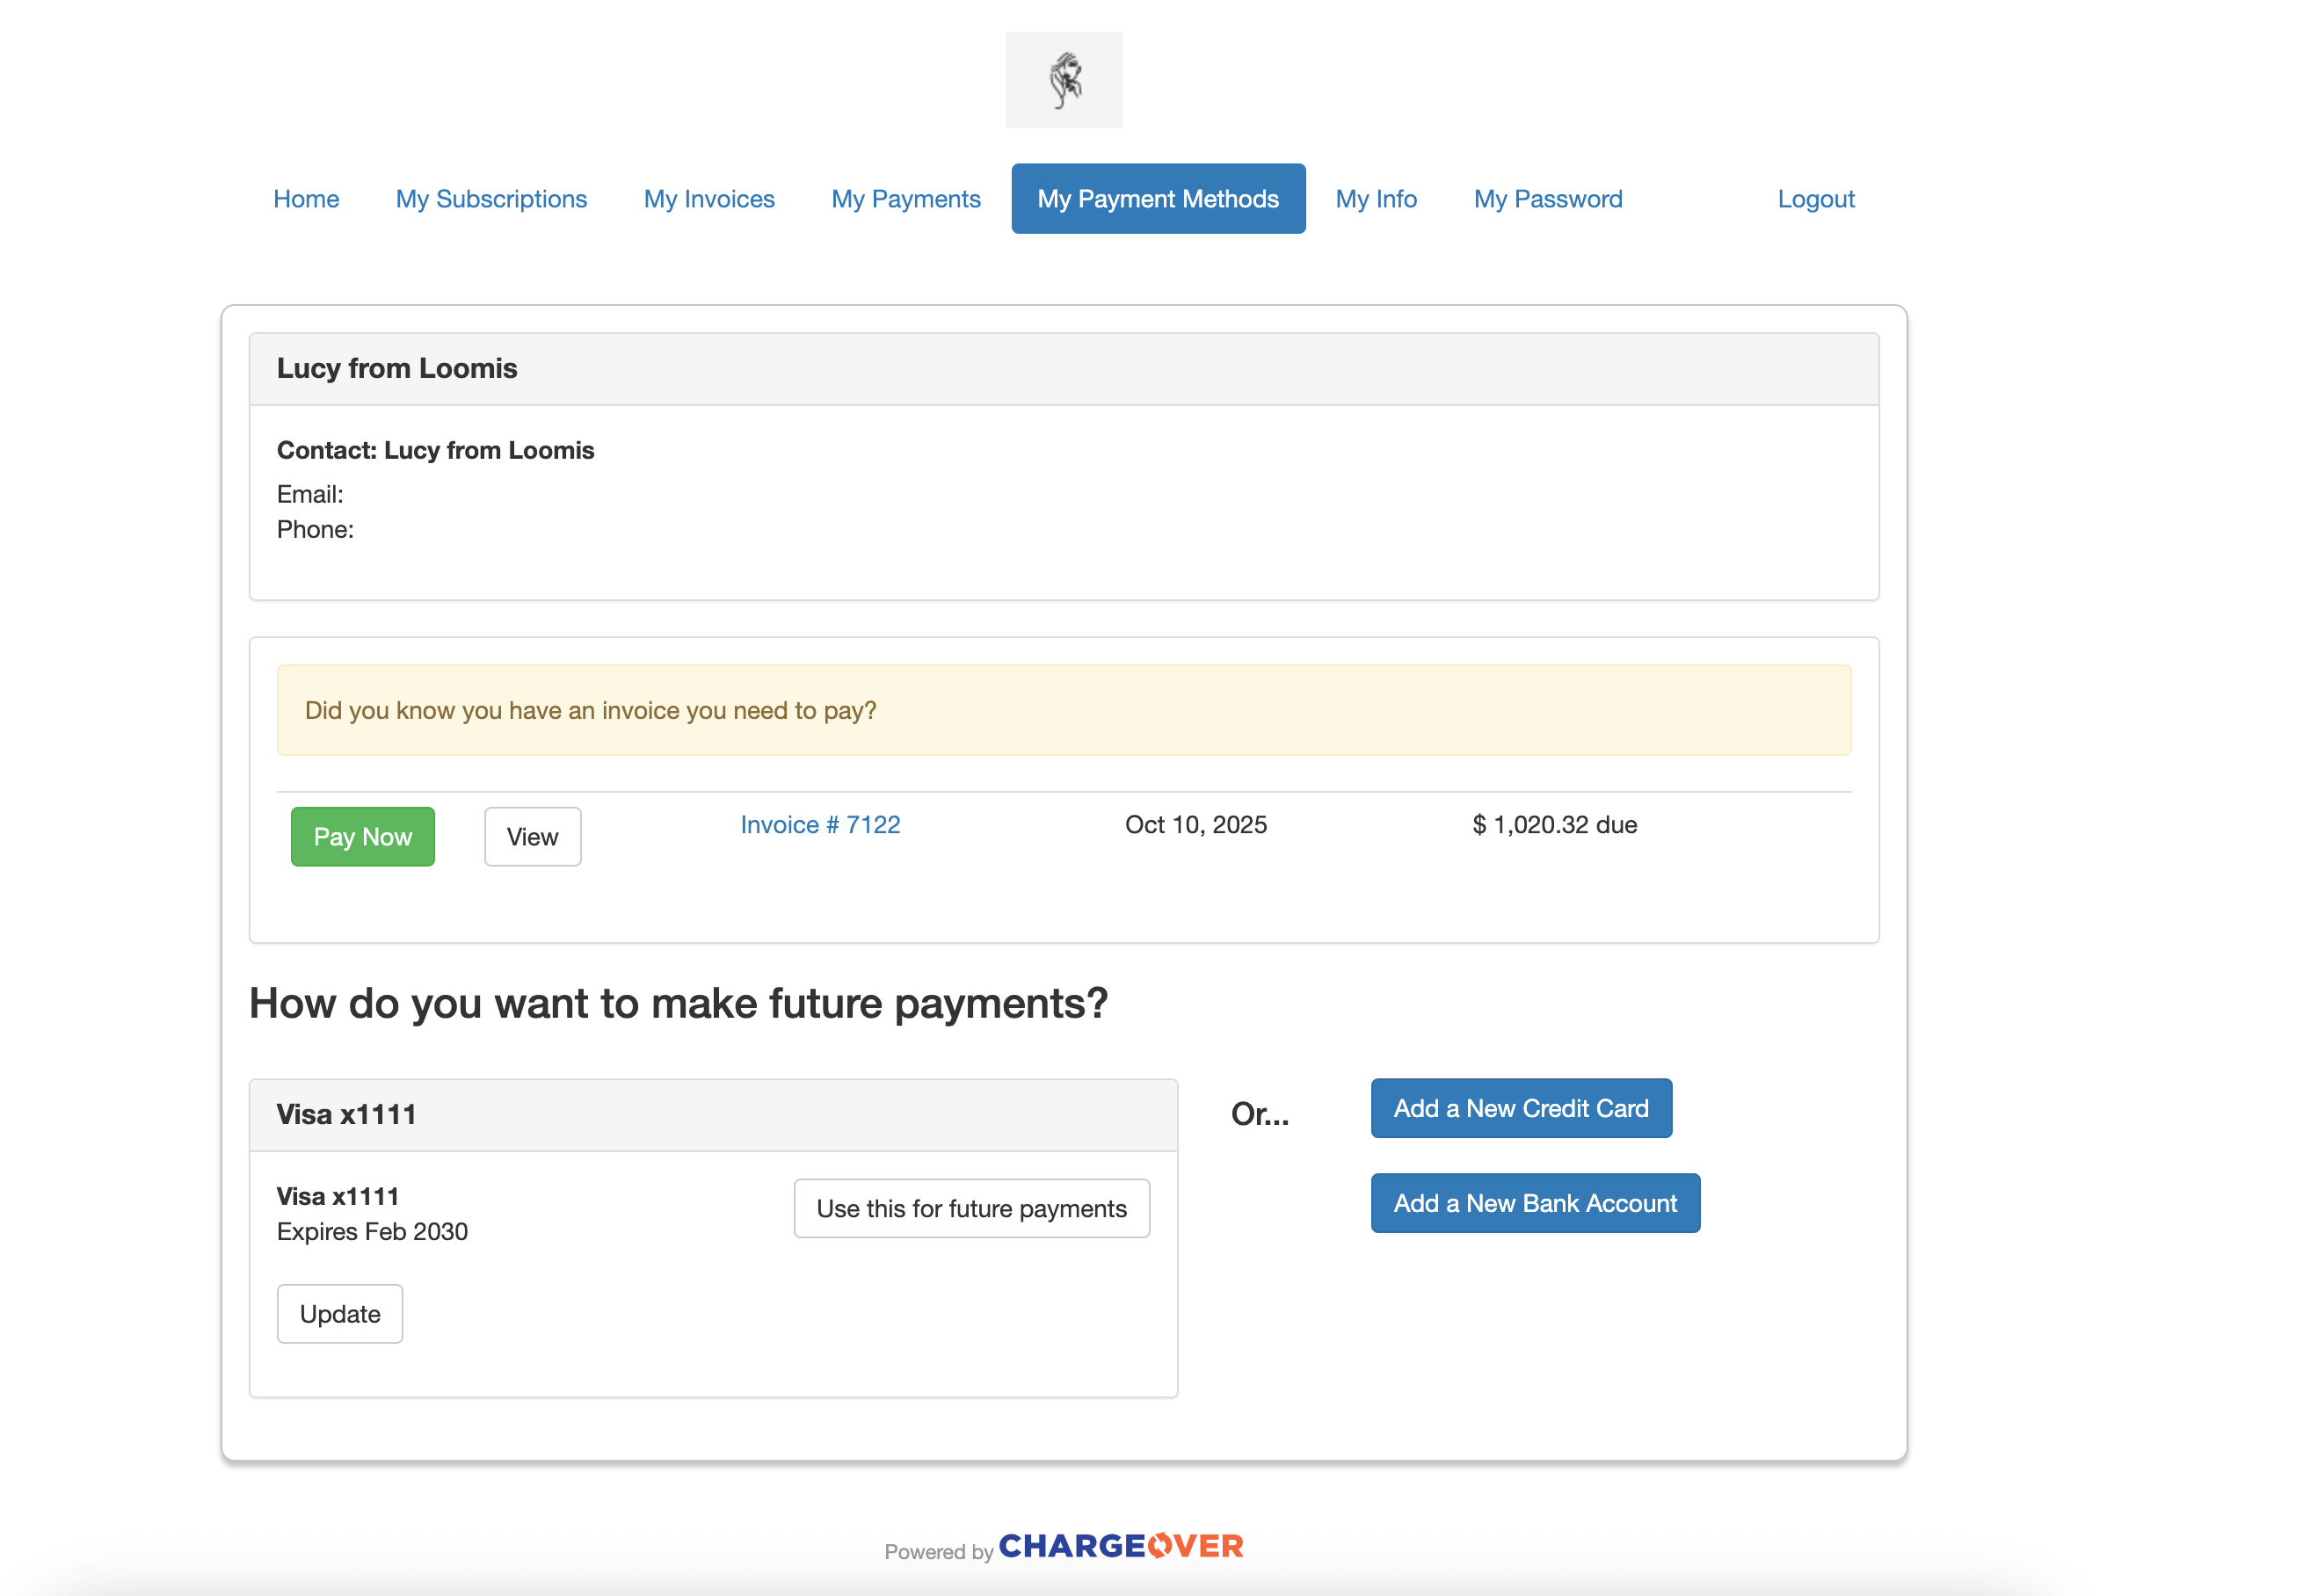
Update with the update your payment method email
You can have your customers update their payment method with an update your payment method email. Follow the steps below so you can send this email to your customers when needed.
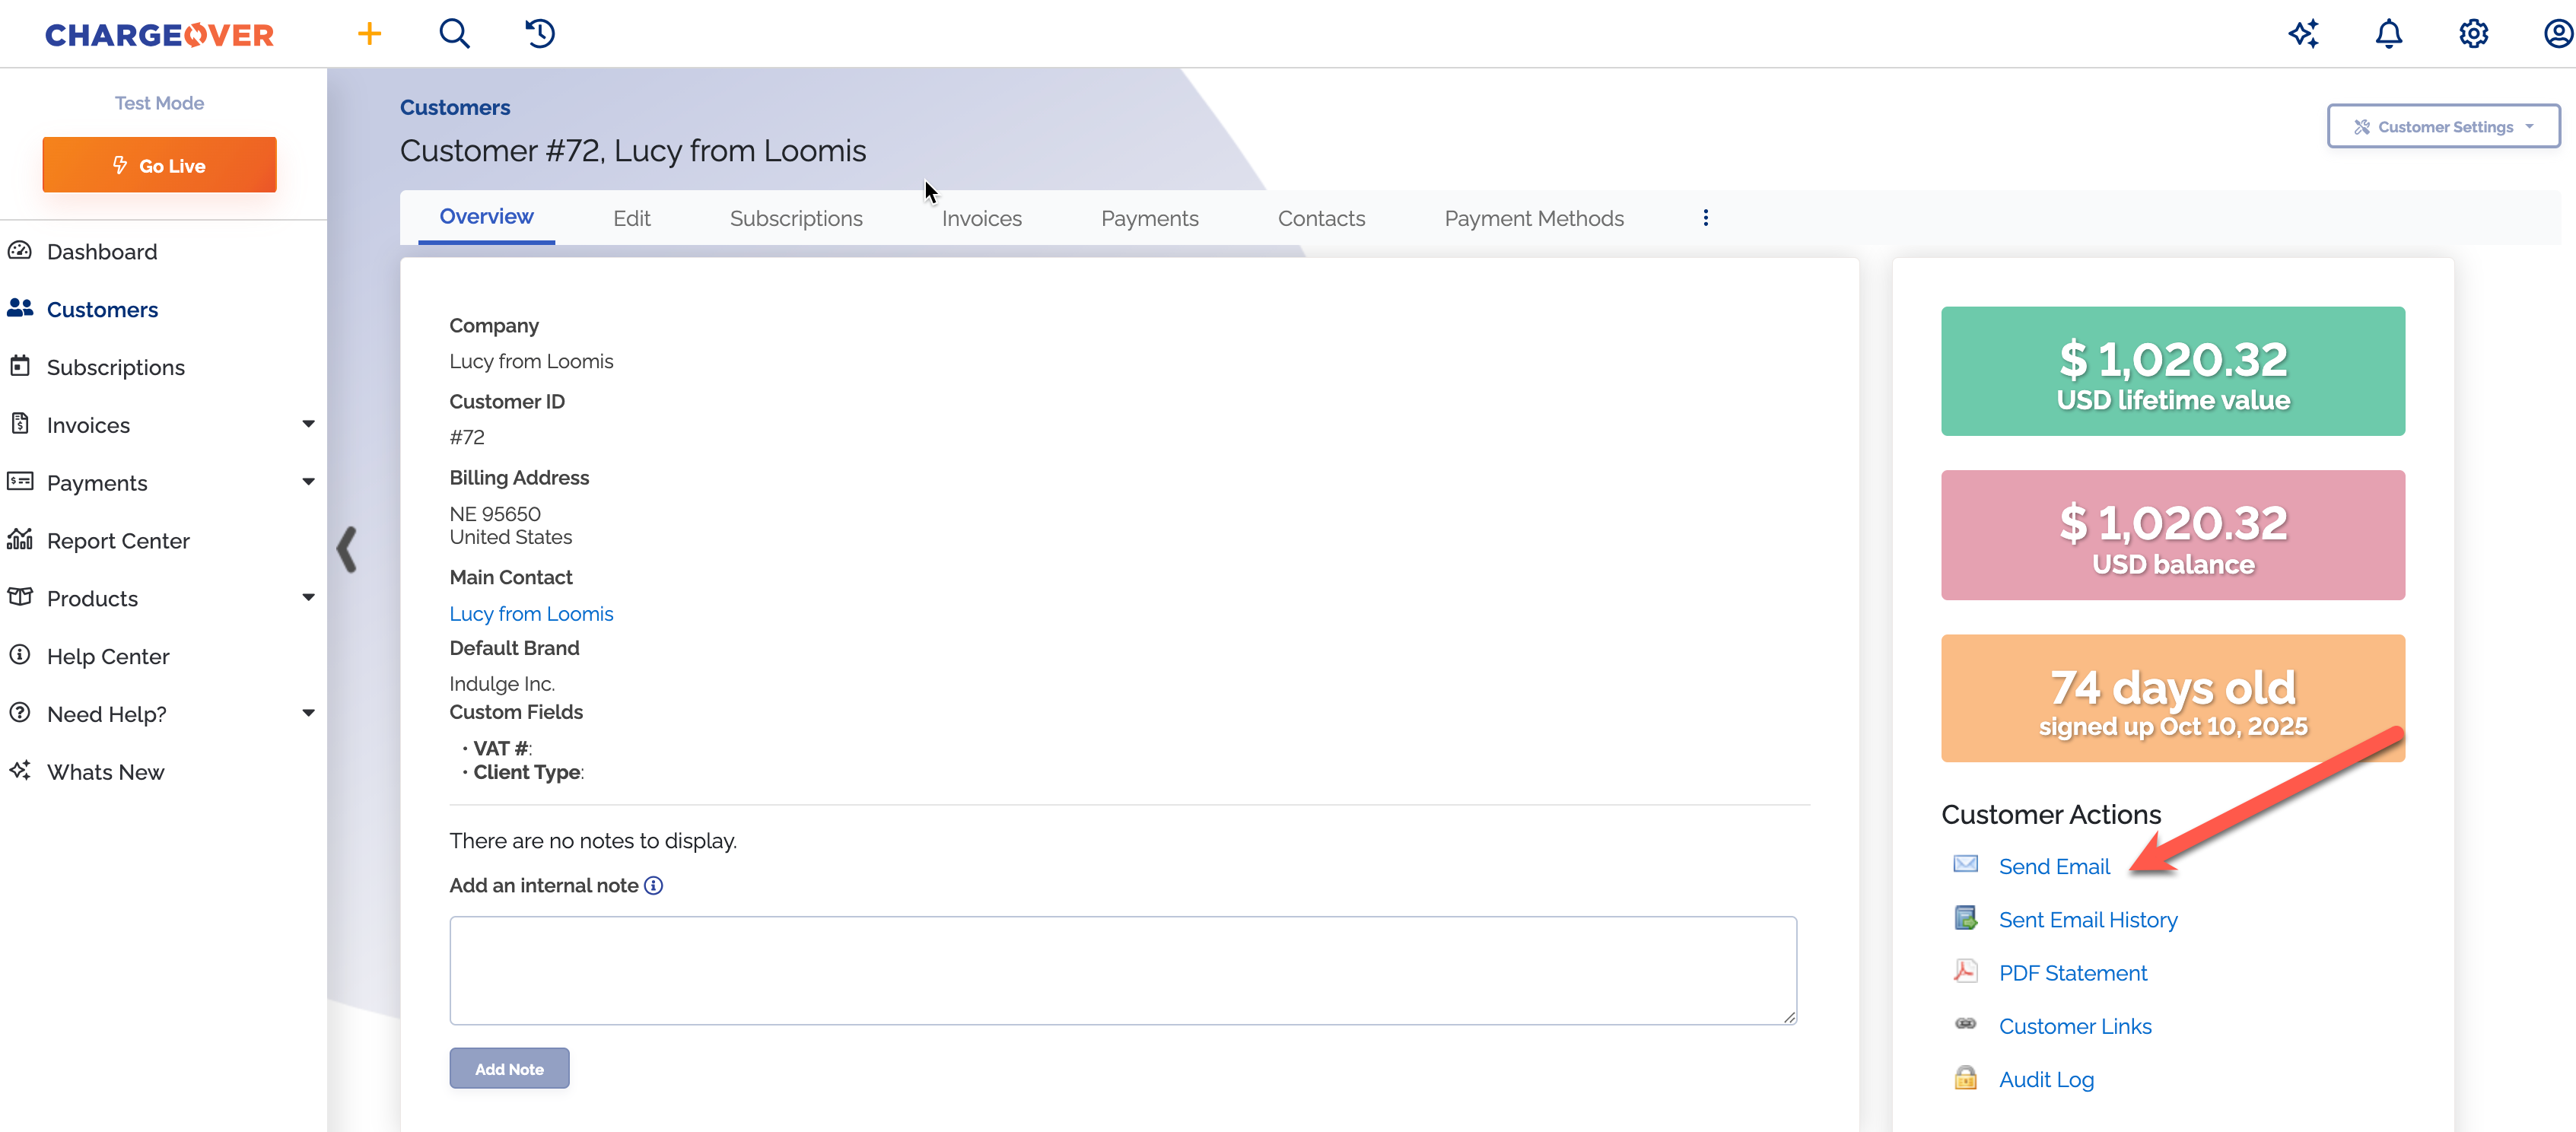
Find the customer in ChargeOver
Click the
Send Email option under the header customer actions on the right side of your screen
- Click
Choose a template and select the "update your payment method" template from the drop-down menu
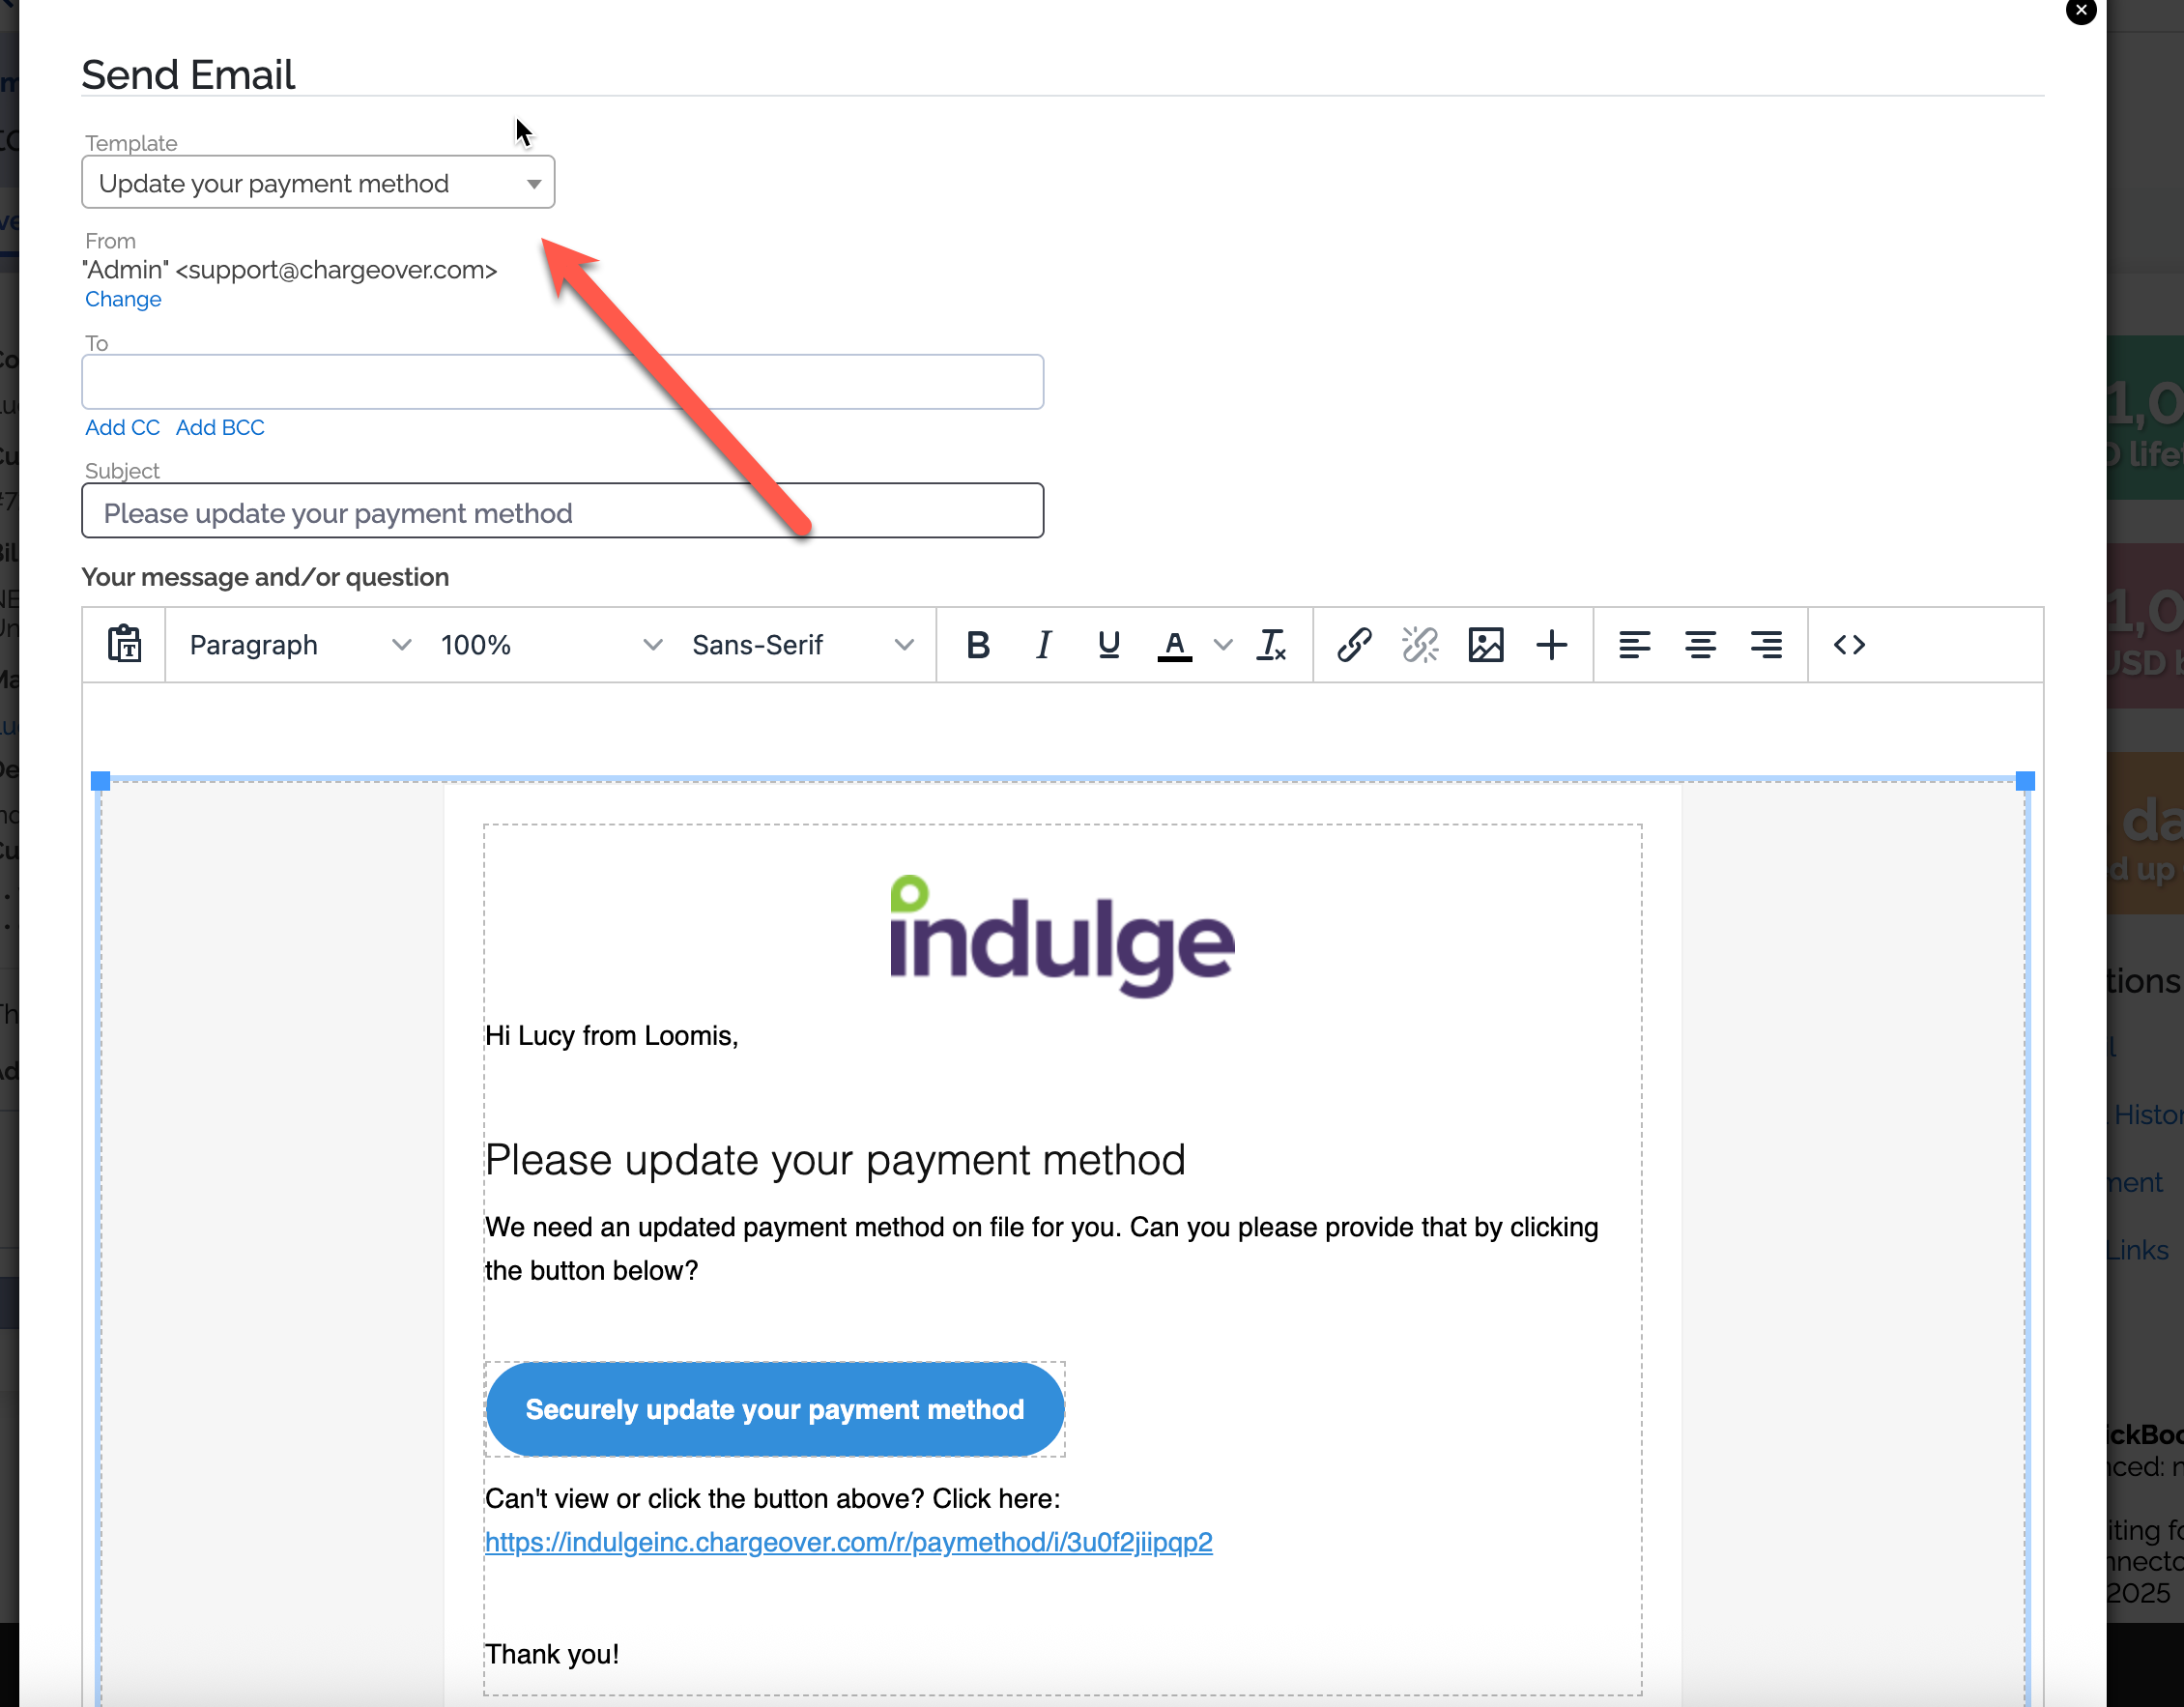
- Once you have chosen the right template, scroll down and click
Send
Update with a link
Another way to ask a customer to update their payment method is to manually send them a secure link. Below are the steps on how to do this.
Find the customer in ChargeOver
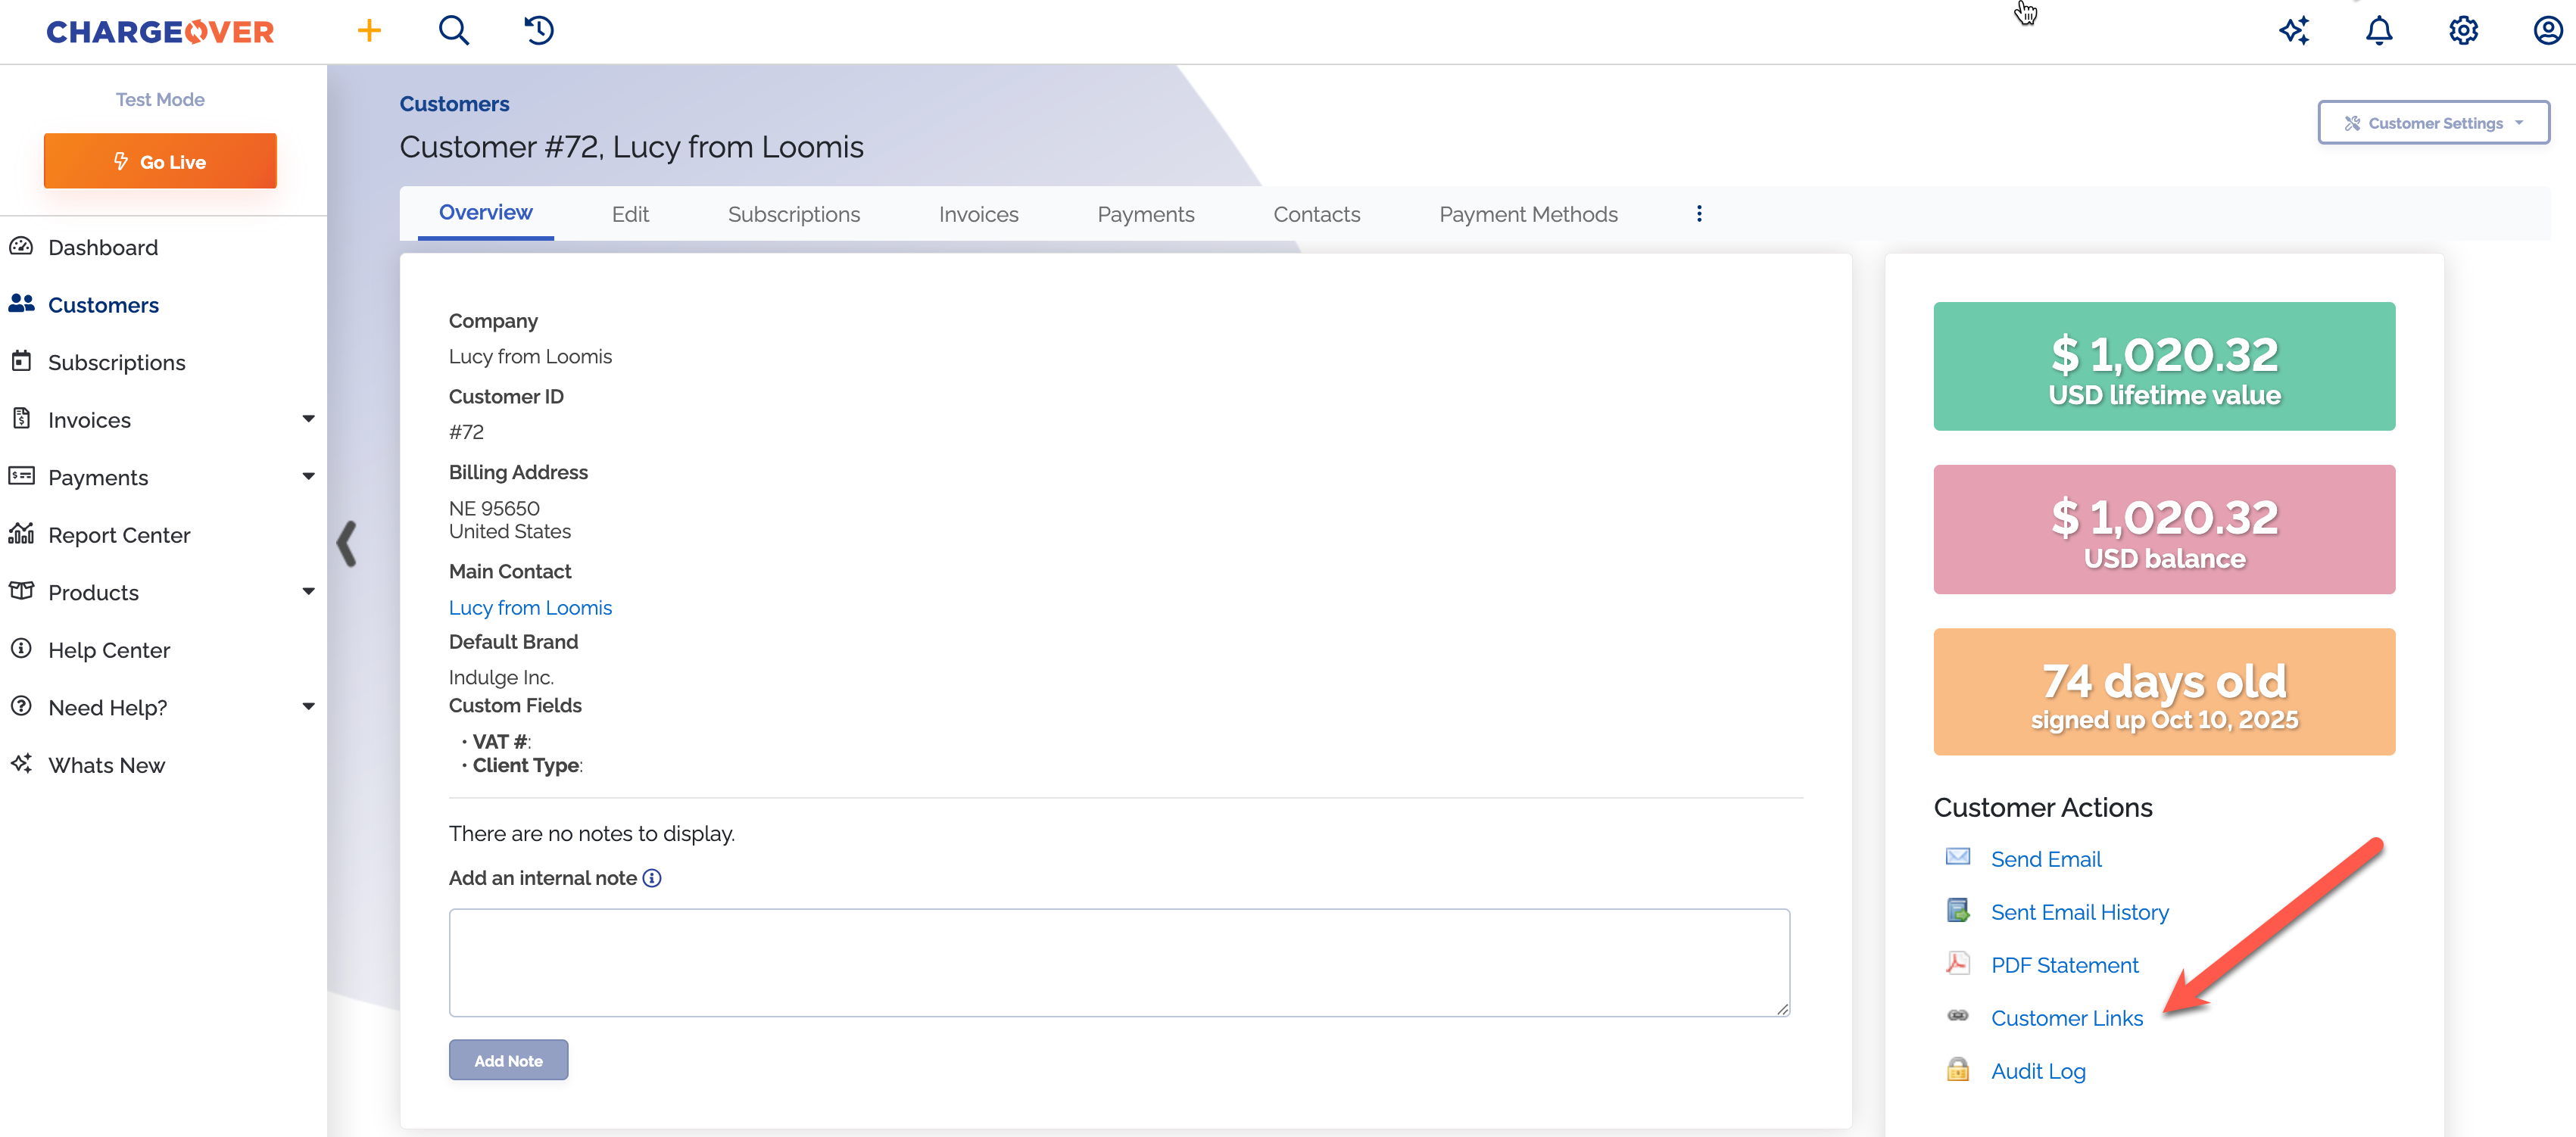
Click the
Customer Links option on the right side of the page
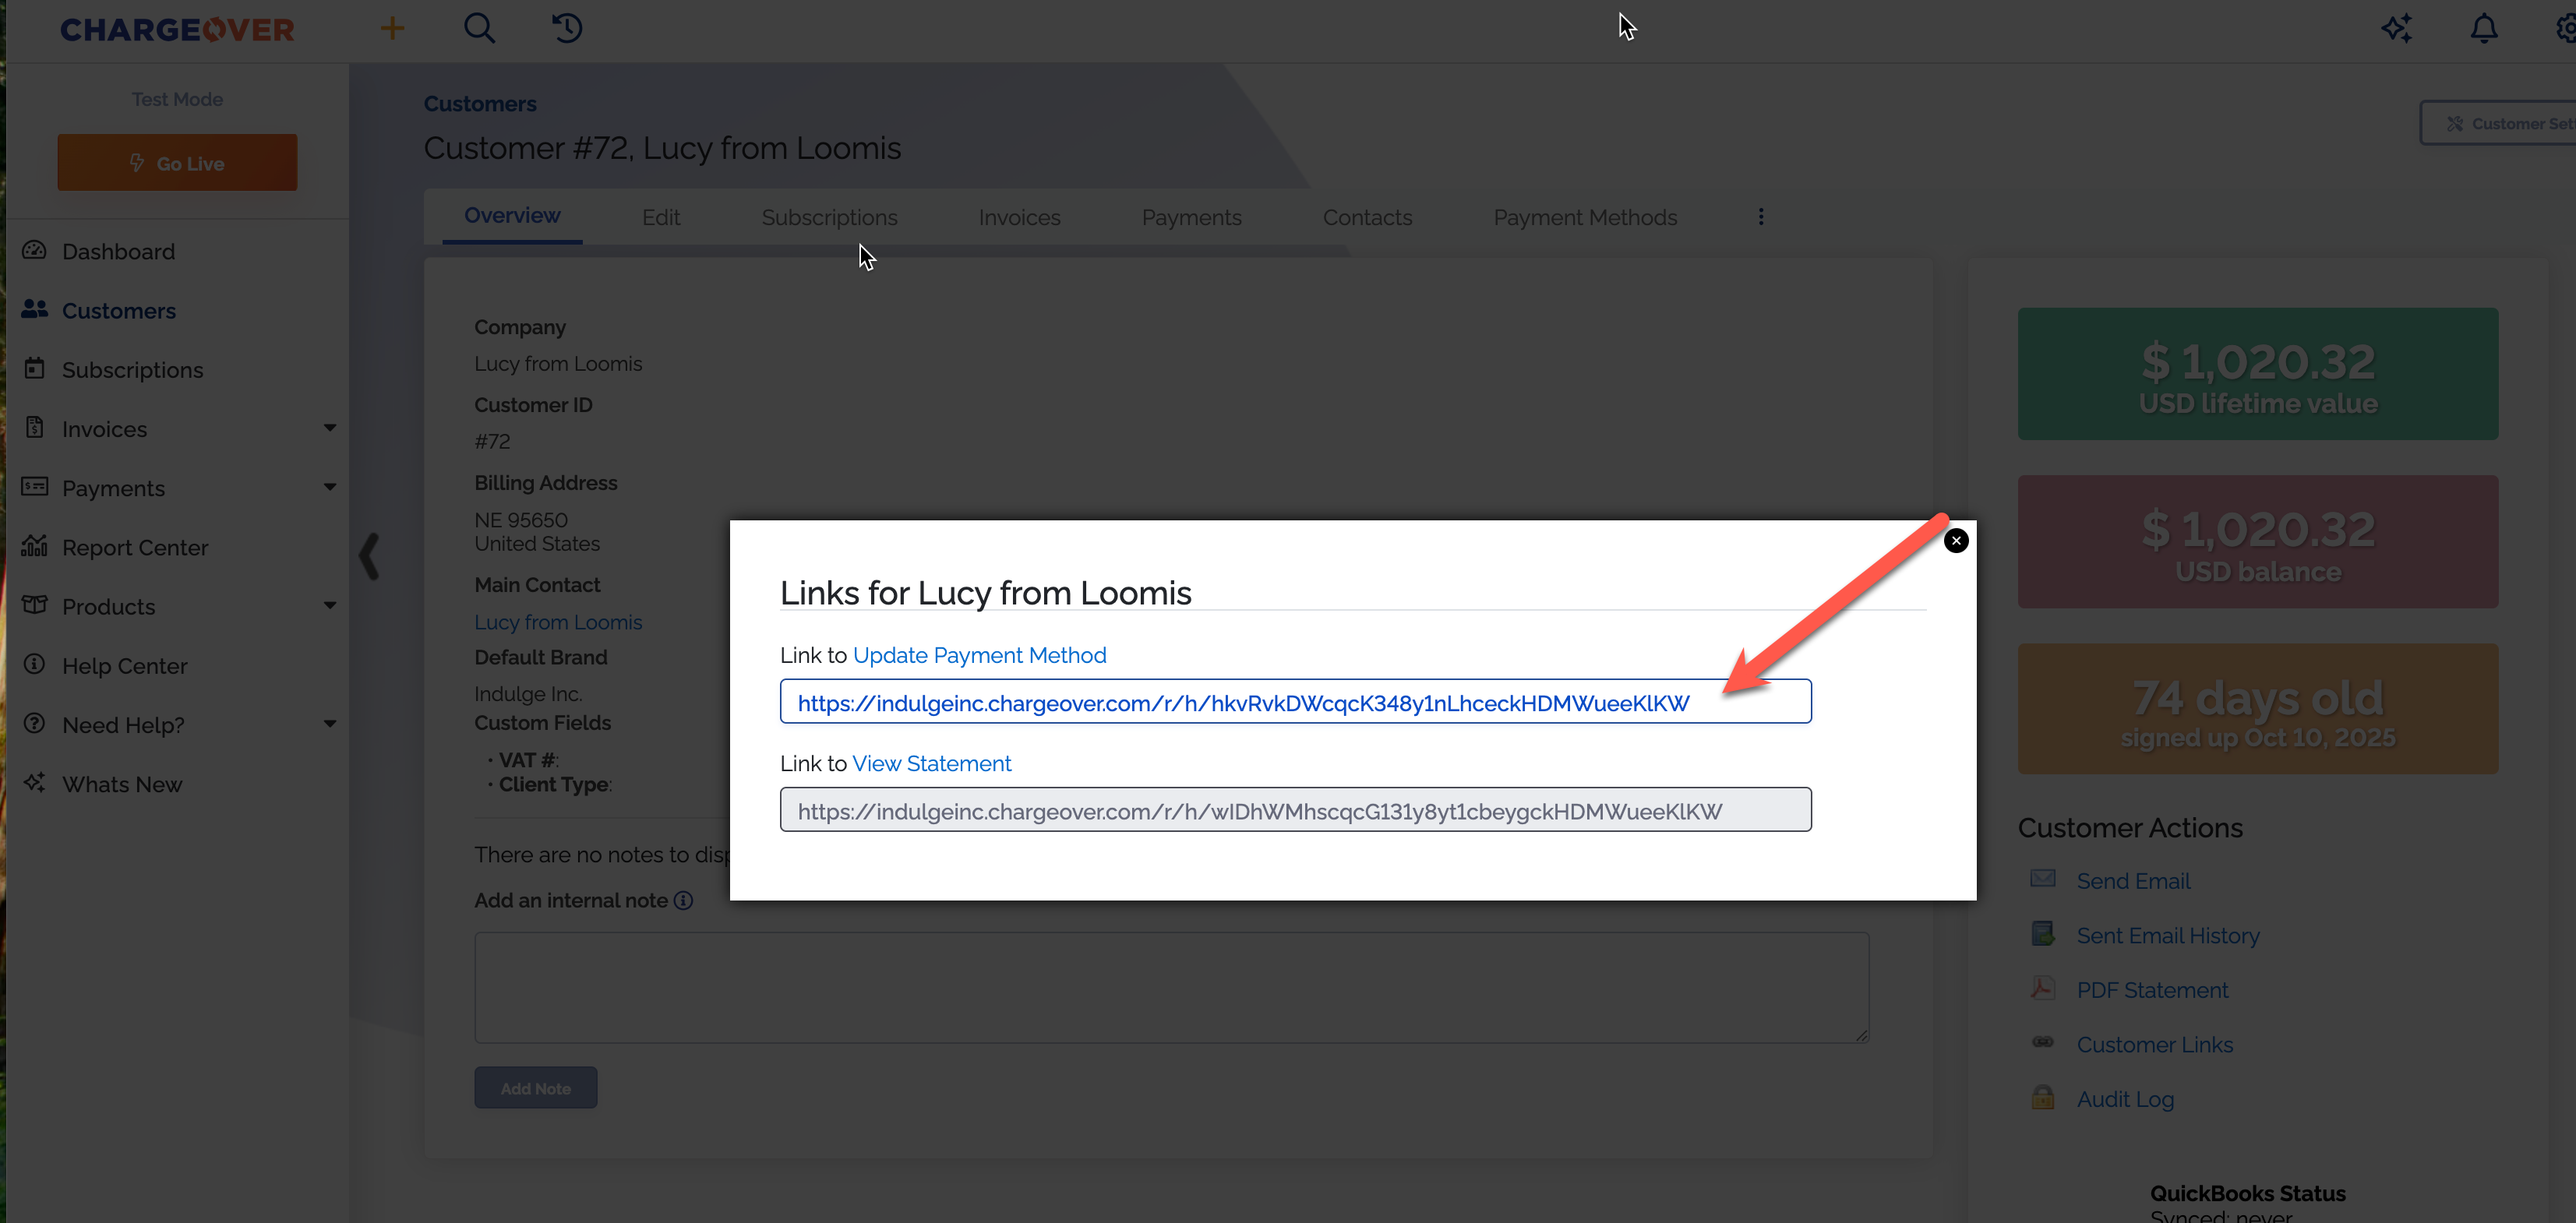
- Copy the link in the pop up window and send that to your customer
Delete a customer's payment method
If you have a customer that has a new payment method or maybe they would like to remove their current payment method, ChargeOver makes it easy to safely and securely do so. When a payment method is deleted, it will be permanently removed from ChargeOver.
Steps
- Go to the customer's overview page and select the "Payment Methods" tab

Click into the payment method you need to remove
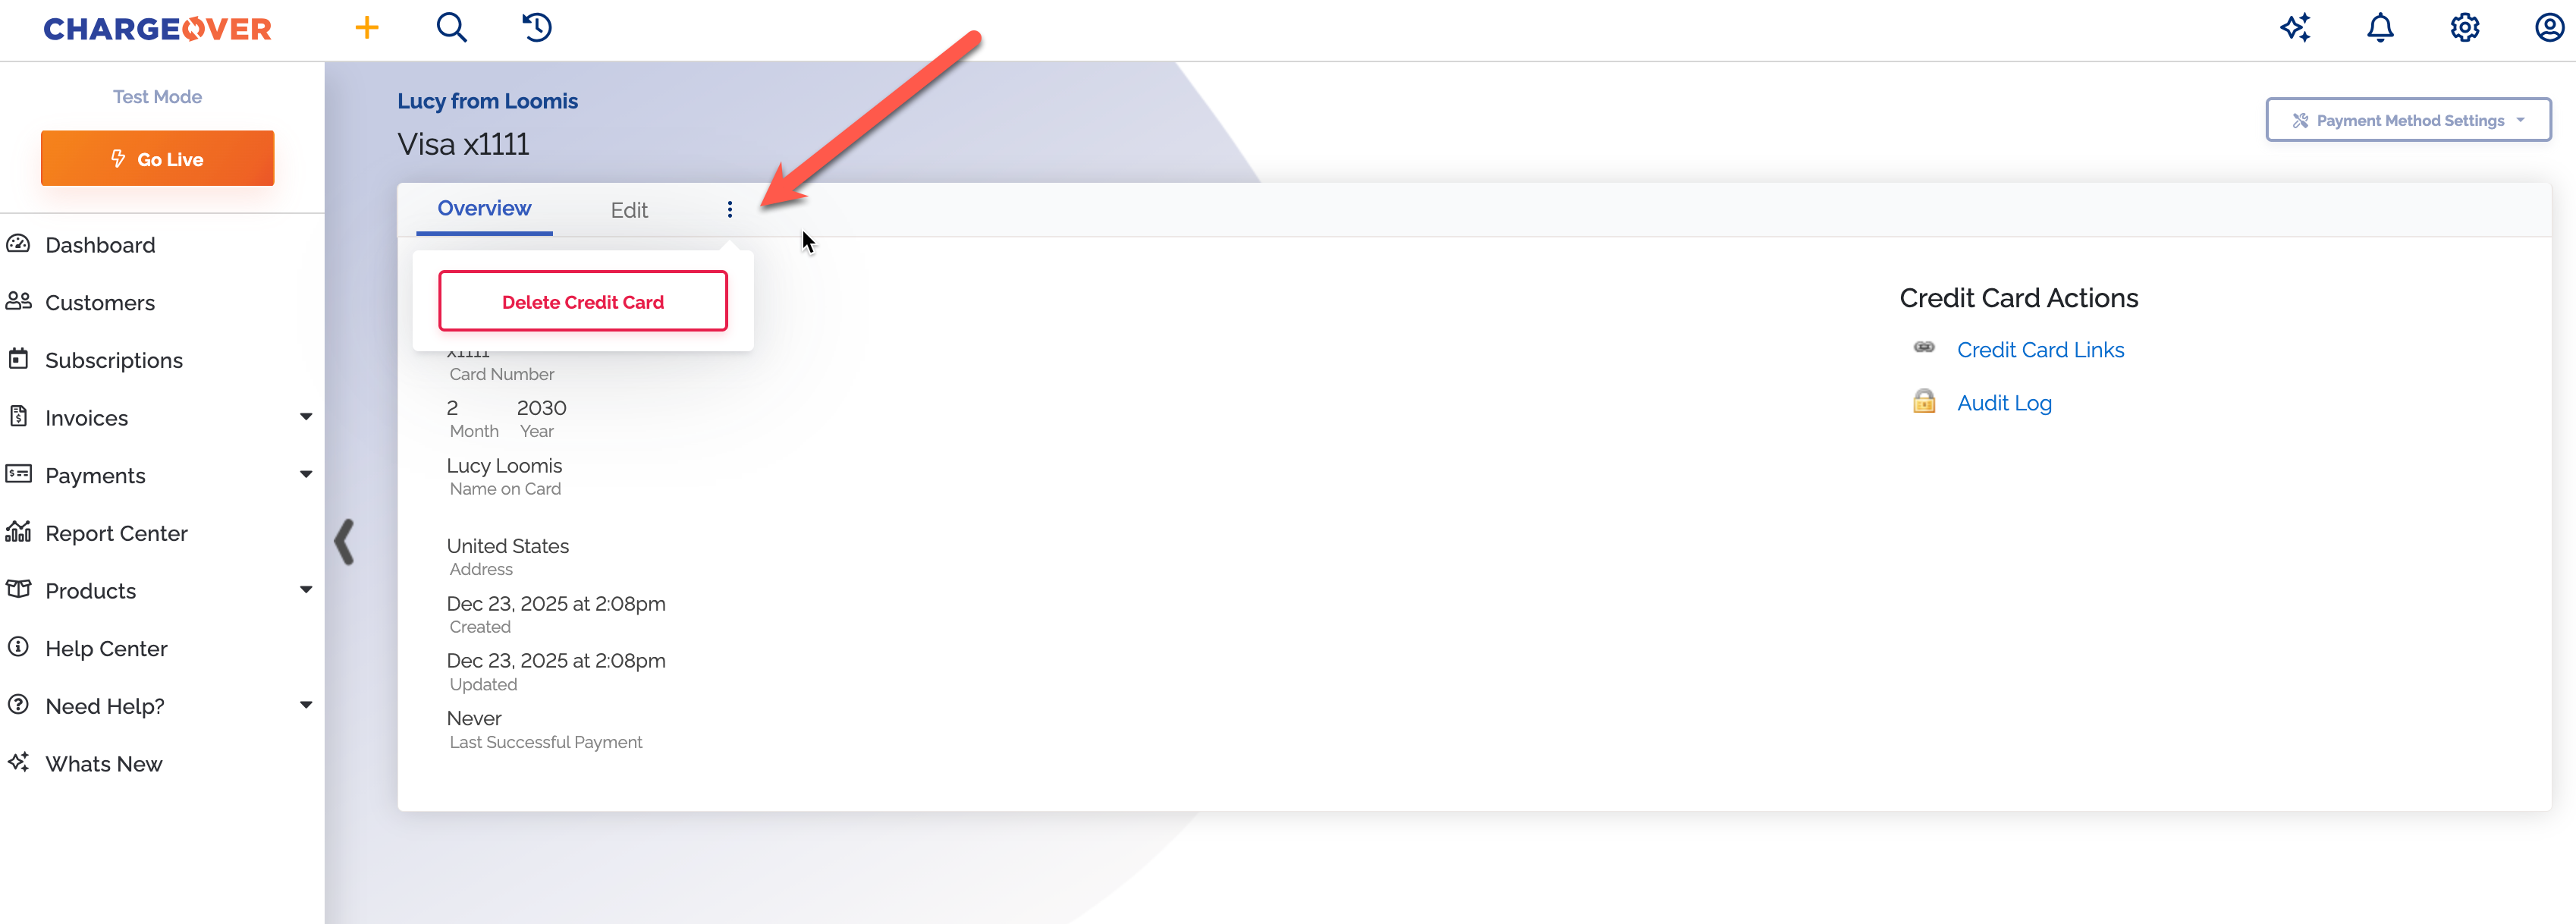
Select the 3 vertical dots and then click "Delete Credit Card" or "Delete ACH"
Once you've deleted the payment method, the information is removed safely and securely!
Email a customer's statement
By default, ChargeOver automatically sends new invoices and payment receipts to customers whenever a new invoice is due or a payment is made.
Occasionally, you may need to send a customer a summary of all invoices or payments made.
ChargeOver allows you to create and send a customer statement which provides a lifetime summary in a PDF format.
Steps
- Navigate to the customer in ChargeOver
- Under customer actions, select "Send Email"
- To email the statement, choose the Customer Statement email template from the dropdown menu
- You can change who the statement gets emailed to, along with the subject and message if you want
- Click the
Send button to send the email
Set customer's currency
If you have customers from many places around the world, there's a good chance that you're invoicing in multiple currencies.
In ChargeOver, you want to make sure that your invoices generate in the currency that the customer is actually paying in. ChargeOver allows you to specify what currency to generate invoices in for each customer.
Steps
- If you are planning on billing some customers in one currency and others in a different currency, you will need to enable the additional currencies
- Once you have your currencies set up, when you create a customer you will see a drop-down menu of the currencies you can bill them in
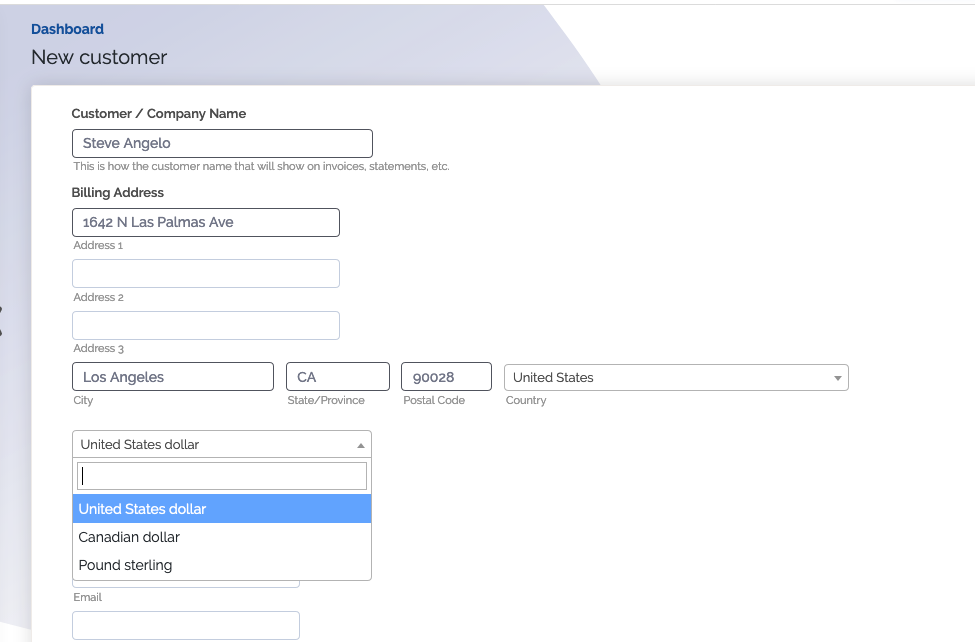
- Select the currency that the customer will be paying in
If you do not specify which currency, the customer will be set to the default currency that is set in your Settings under Invoicing. ChargeOver does not automatically identify currency from the customers location.
- Click
Save
Now invoices for this customer will automatically generate in the currency that you selected!
Change a customer’s currency
Although ChargeOver supports multiple currencies, once you set the currency for a customer there is no way to change what currency the customer is using.
Customer has paid invoices
Create a new customer with the correct currency, and make the old customer inactive or delete them.
Customer has not paid any invoices
Contact us to change the currency for you.
If the customer has not paid any invoices yet, we can change the customers currency.
Merge customers
You've run into a scenario where you have two customers that need to be combined into one. You need everything, all of their invoices, payment history, subscriptions and more, to be moved to this different customer.
How merging works
The best way to imagine how merging works is Customer A merges into Customer B. All of the data from Customer A is moved to Customer B. Customer A is deleted and Customer B remains.


What gets moved?
- All invoices, including voided invoices
- All quotes, including lost quotes
- All subscriptions, including cancelled and suspended subscriptions
- All payments, including declined, failed, and voided payments
- All contacts
- All payment methods
Restrictions
Before you start, you should be aware of some catches you might run into, before merging your customers.
- Both customers must have the same currency

- Neither customer can be a parent or child customer of any other customer
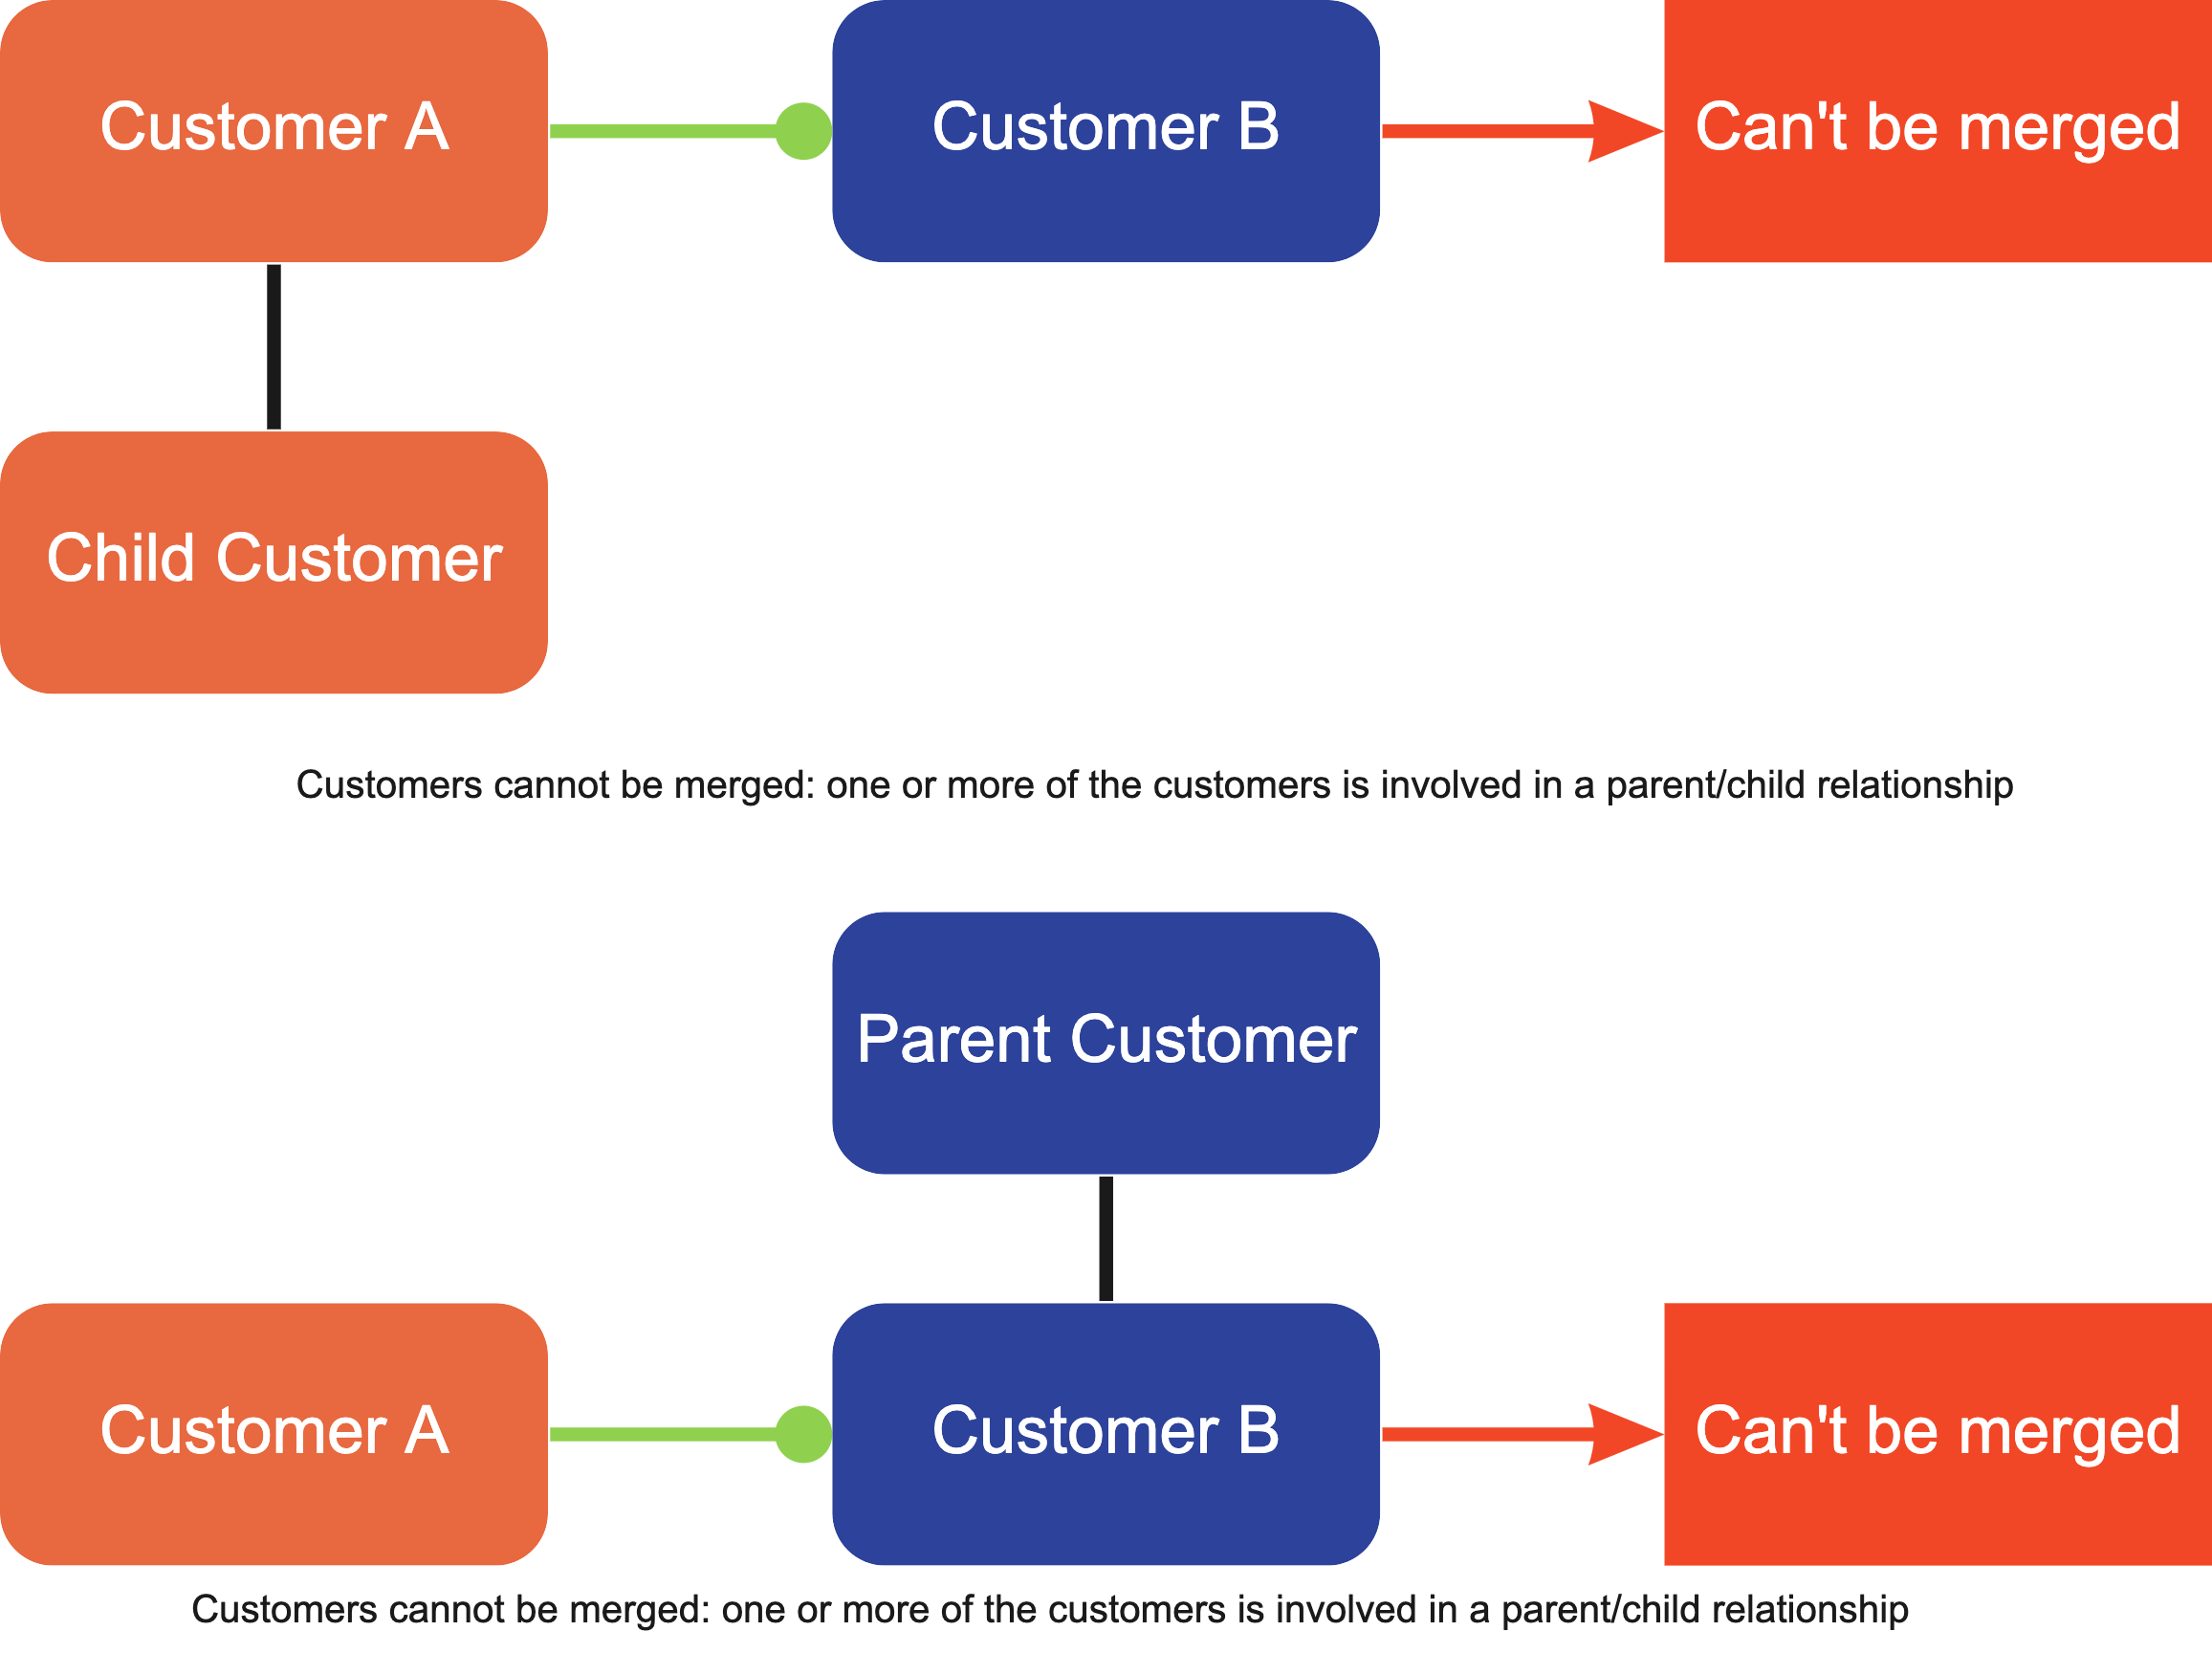
- The destination customer must be active, they cannot be marked as inactive
This cannot be undone. Please take your time with merging customers, once the customer has been merged, it will be deleted permanently and we cannot undo the merge. It is also notable that if you do merge customers, it may result in objects related to those customers to not be synced in the future to some integrations. If you suspect this is happening to you, reach out to us for more information.
Steps to merge customers
First, we'll want to make sure your settings are enabled.
- Head to your Settings and select
Invoicing from the left menu. - Find the Can customers be merged? setting and set it to Yes. Don't
forget to hit save
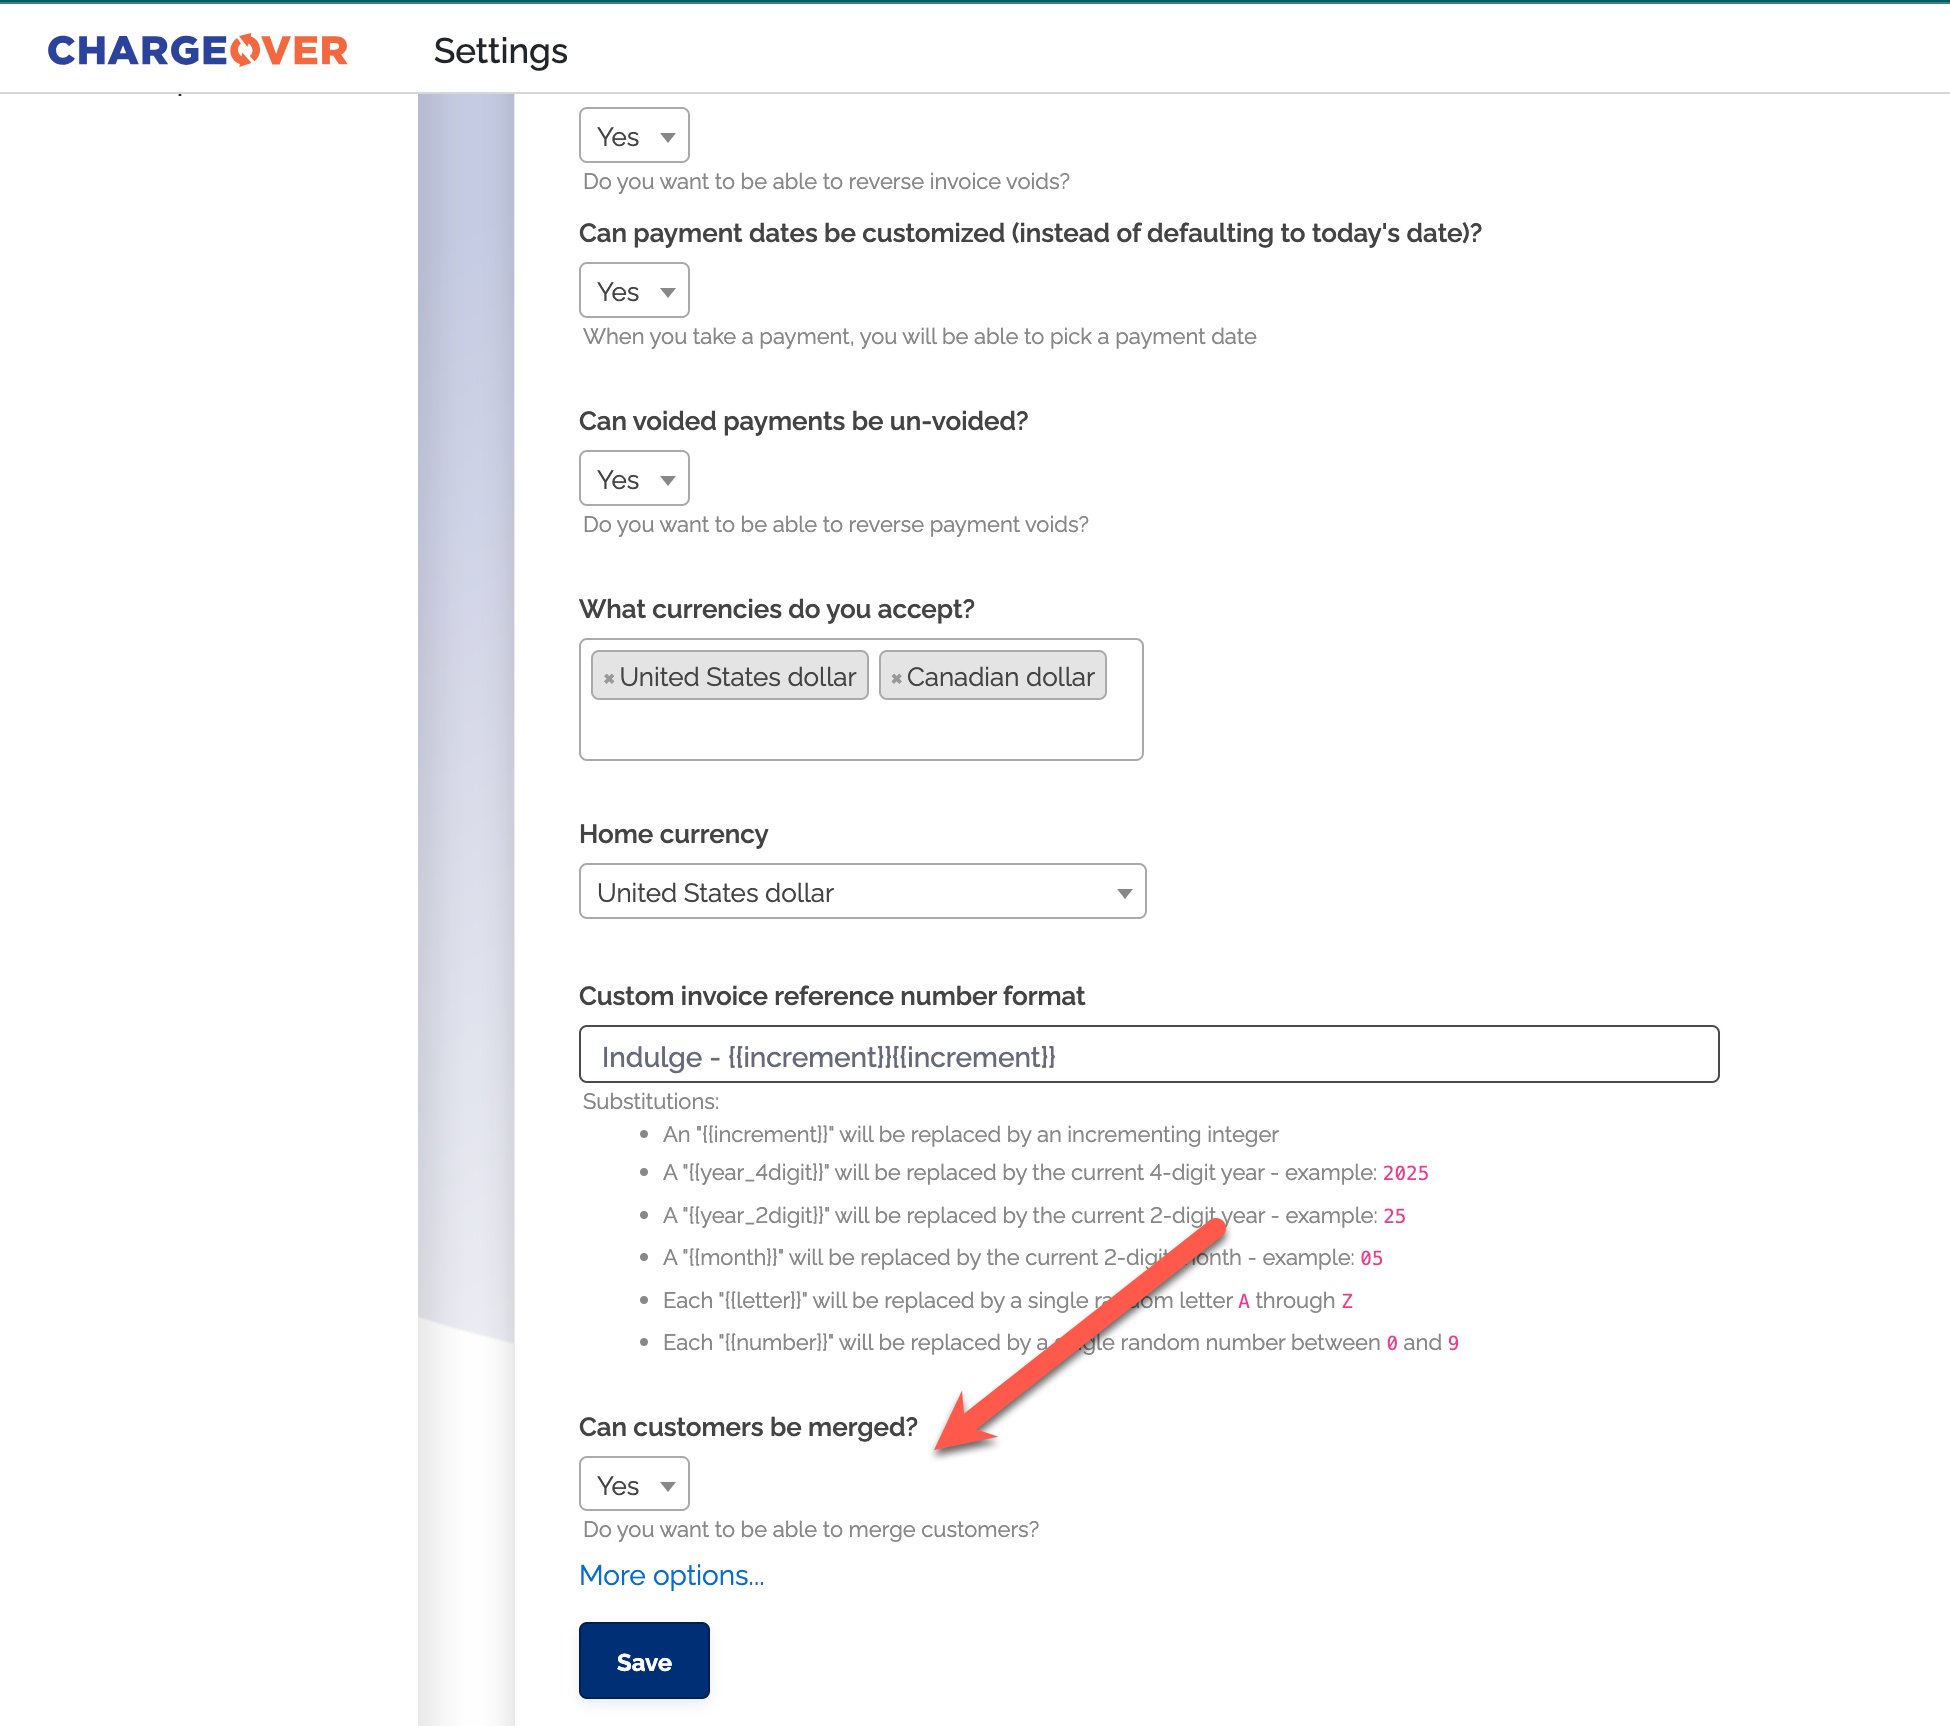
- Go to the customer you want to merge into the other customer
- Select the three vertical dots and click
Merge Customer 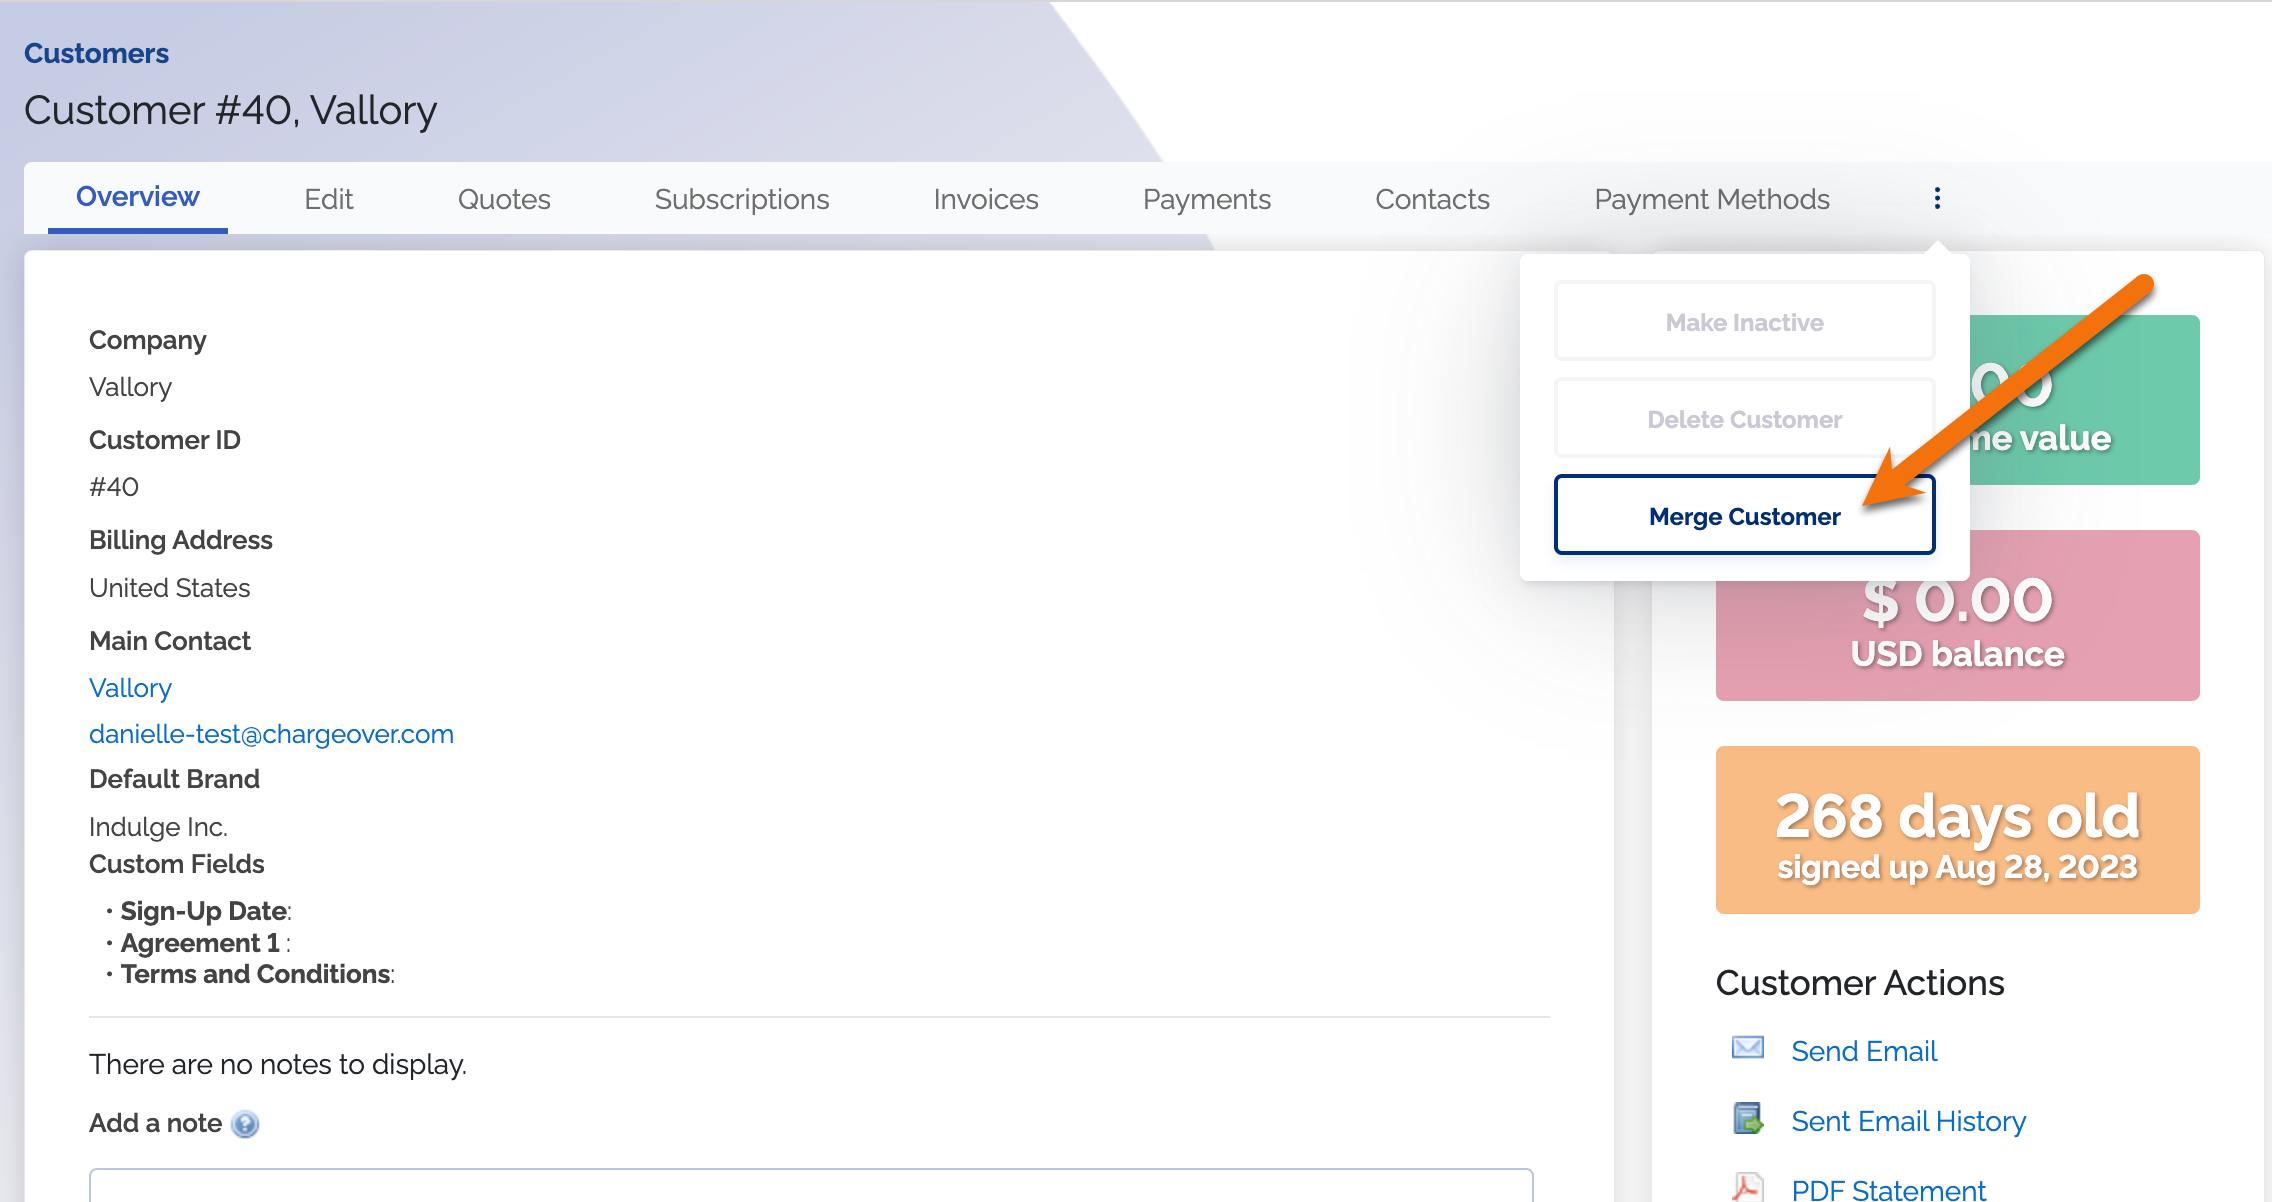
- Select the customer you want to merge them into
- Once you select a customer, you'll be prompted to confirm the details by
typing the exact name of the destination customer
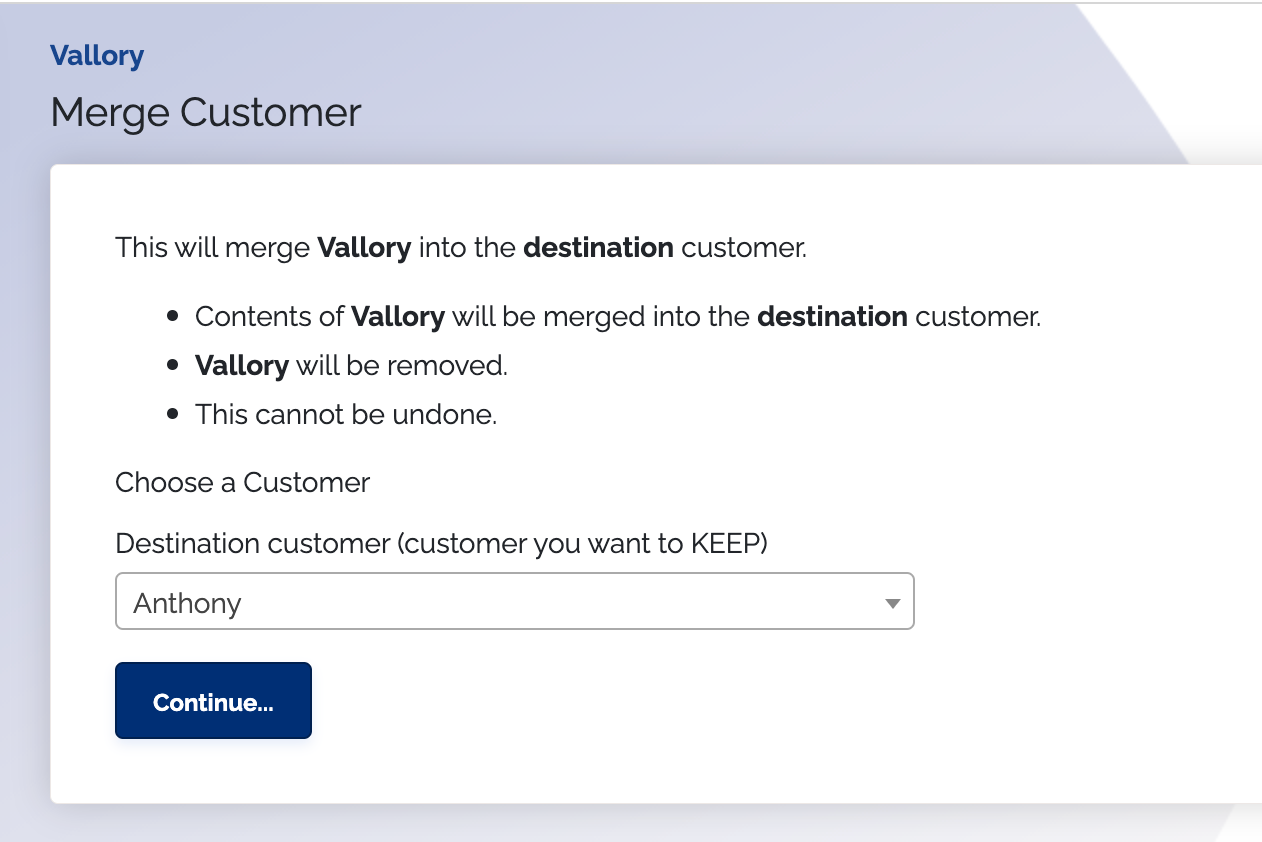
This process cannot be undone.
Once you complete the above step, you'll be redirected to the final merged customer.
Keep in mind
- Historical MRR may be recalculated or changed due to the merge
- How this affects other integrated apps, like QuickBooks or Salesforce, may be dependent on the settings you have in those platforms, so proceed with caution and check those systems after the merge
🤖(Developer)The origin customer is deleted and adeleteweb hook will be fired🤖(Developer)Amergeweb hook will be fired on the destination customer
Inactive customers
You can only mark a customer as inactive in ChargeOver if the customer has no active subscriptions, no open quotes, and no child customers.
If you have any active subscriptions, open quotes, or child customers, then this option will not be available.
Steps
- Find the customer in ChargeOver
- Next to all the tabs, you will see three vertical dots in the top right
If the delete button is faded or un-clickable, check to make sure the customer has no active subscriptions, open quotes, or children.
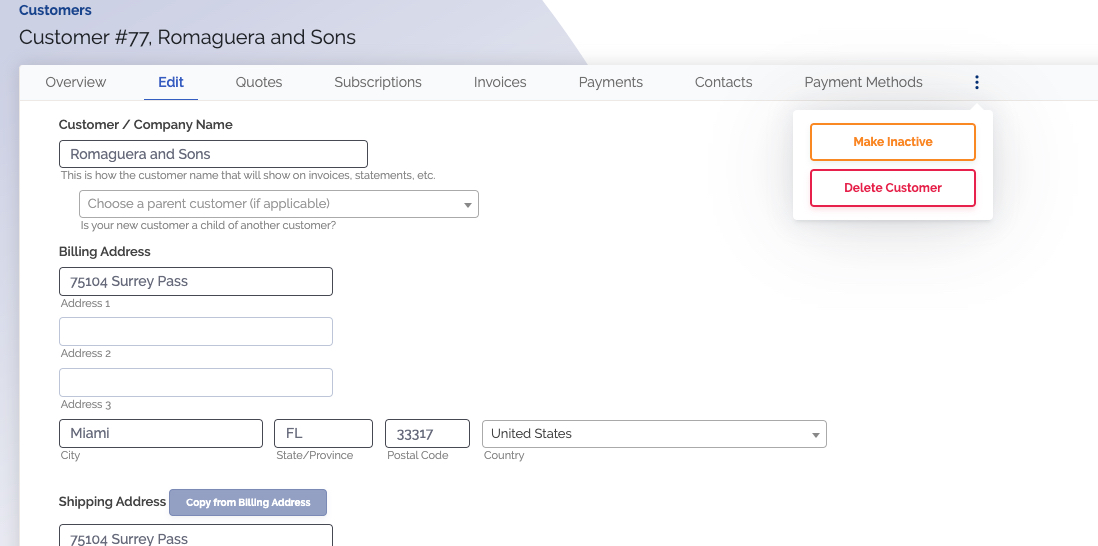
- Select
Mark Inactive
Once you've marked the customer as inactive, you will no longer be able to create new invoices, quotes, or subscriptions until they are made active again.
Existing invoices, subscriptions, quotes, or payments will remain visible and your reporting will reflect those existing records.
Delete a customer
You can only delete a customer in ChargeOver if the customer has no active subscriptions or no open invoices.
If you have any open invoices or any active subscriptions, then the delete option will not be available.
Once you've cleared up any open invoices or active subscriptions, the delete customer option will be available.
Steps
- Find the customer in ChargeOver
- Select the three vertical dots in the top right to get a drop down option
If you see the delete button is faded or un-clickable, check to make sure you have cancelled the subscriptions for the customer and there are no open invoices.

- Select
Delete Customer
Once you've deleted the customer, you will no longer be able to view the customer's profile. Their invoices and payments will remain and your reporting will still reflect when the customer was active.
If you've deleted a customer by accident, you will need to re-create the customer.
Blocked customers
If you mark a customer as blocked, you won't be able to take any payments, or create any new subscriptions, invoices, or quotes for that customer.
If you'd like to use the blocked customers feature, please contact ChargeOver support for assistance.
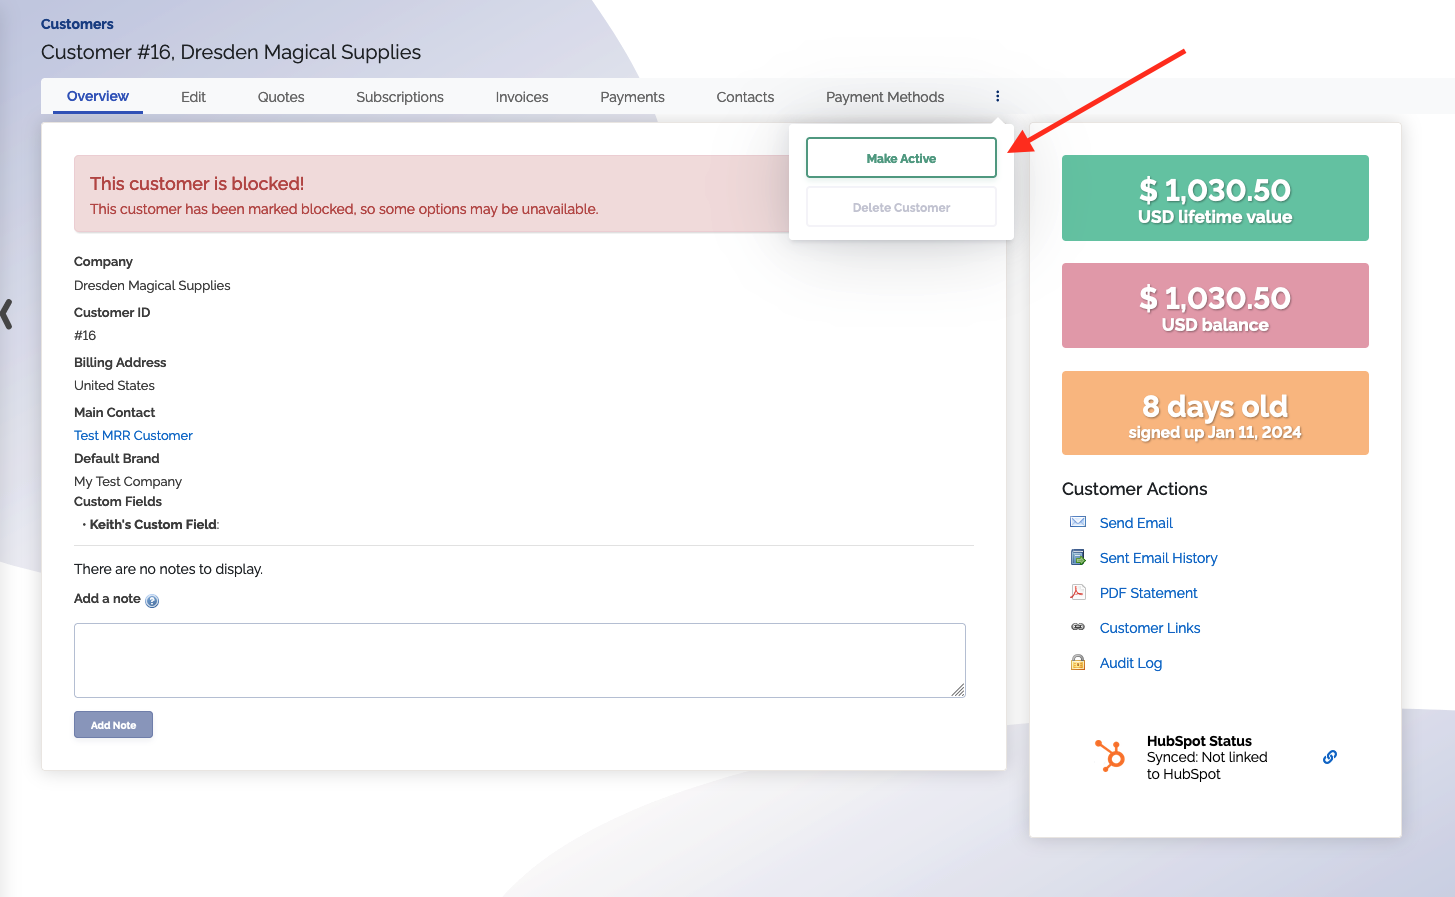
You can make a blocked customer active again by choosing
